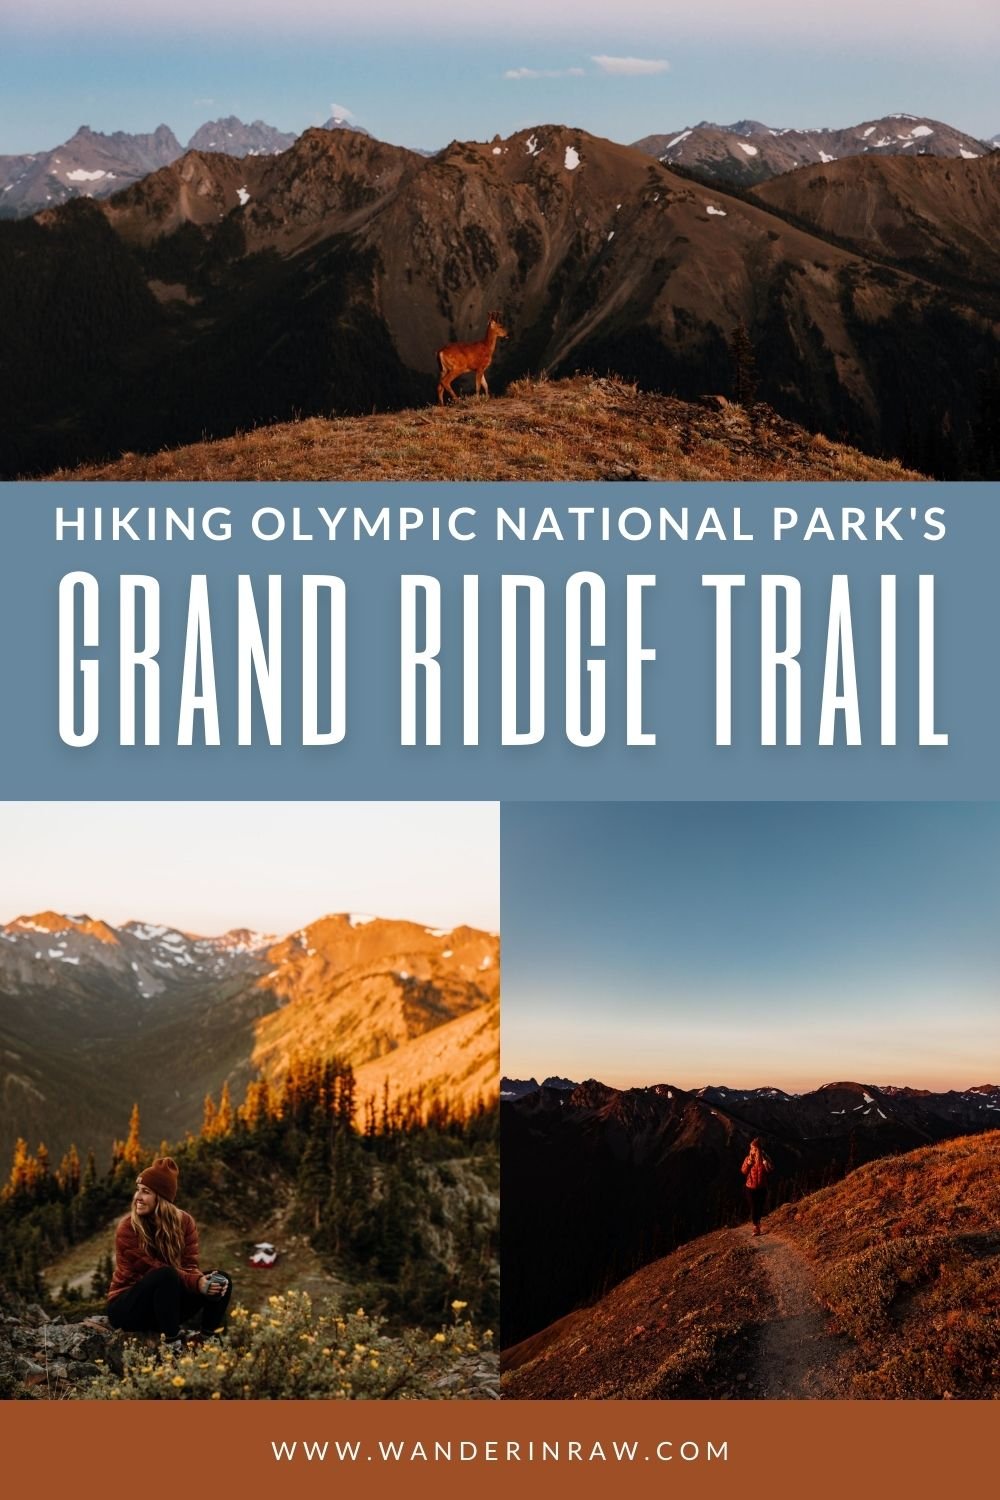
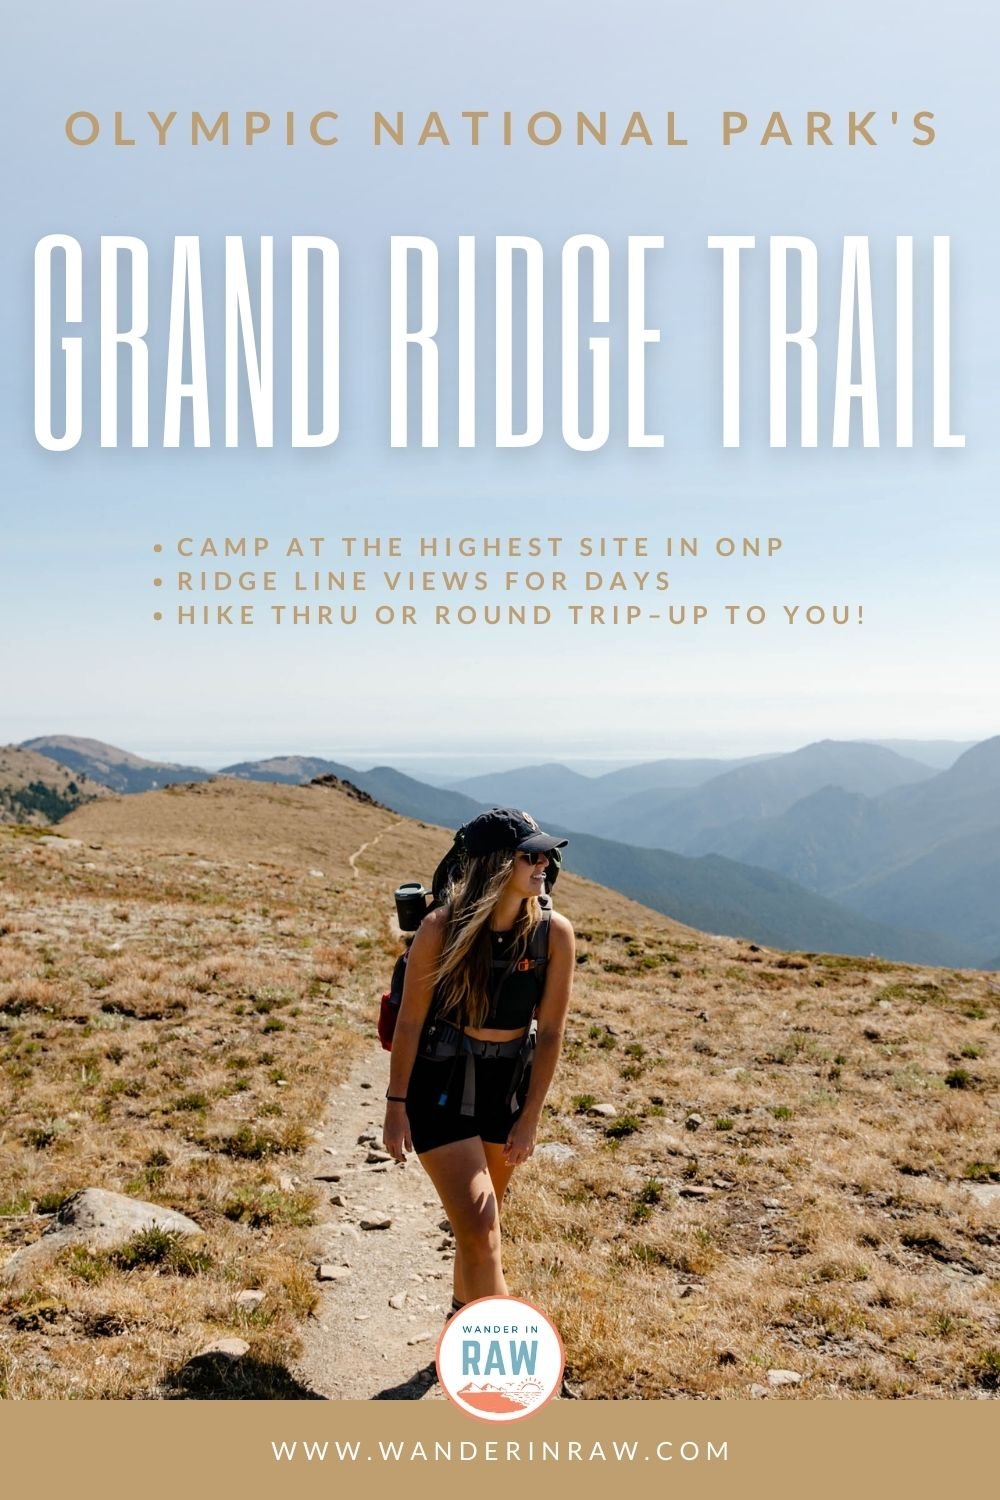
Grand Ridge Trail: Backpacking One of Olympic National Park’s Best Hikes
The 7.6-mile Grand Ridge Trail thru hike is easily one of Olympic National Park’s best hikes (and for good reason). Almost the ENTIRE hike is on a ridge line (which means epic Olympic Range views for days), and if you start from Obstruction Point, it’s almost entirely downhill. Choose to do it in a day or spend the night at the highest campsite in Olympic National Park (5,965’)–it’s an awesome first-time backpacking experience too!
Read on for everything you need to know about hiking Olympic National Park’s Grand Ridge Trail for an epic day or two in the Olympic Mountain Range.
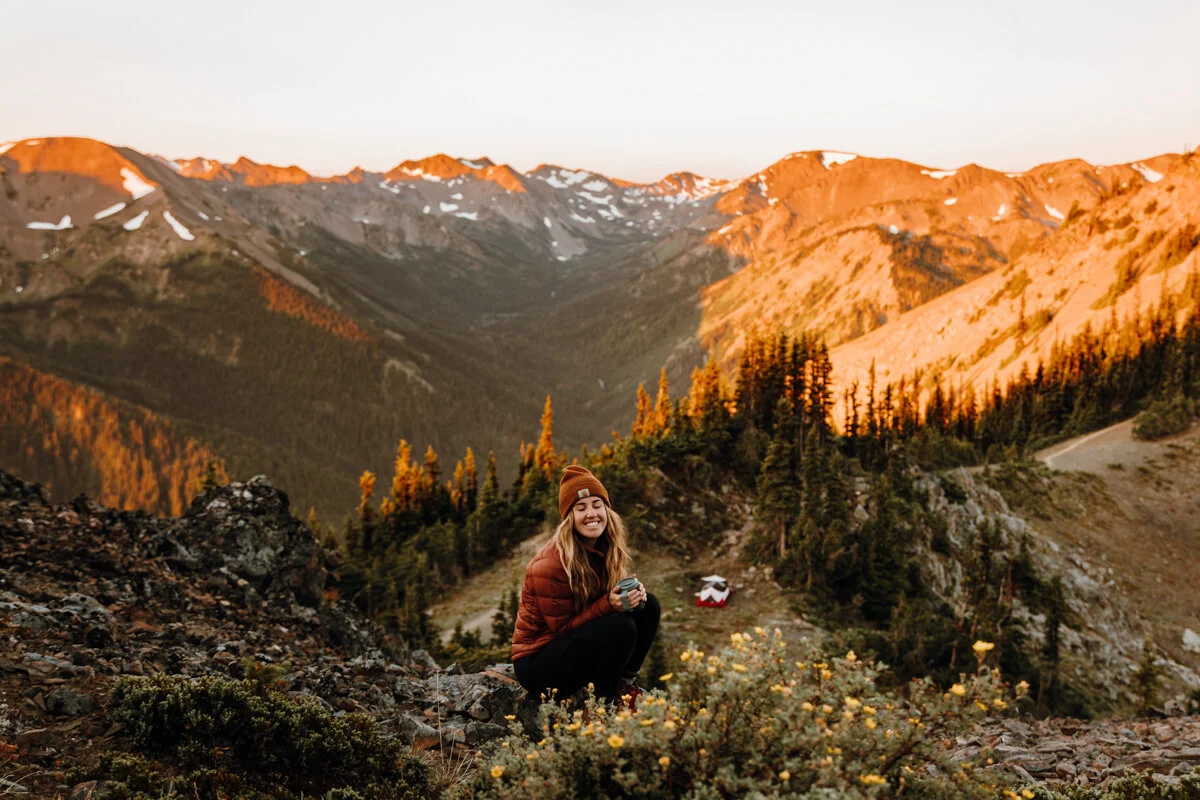
Table of Contents
I love recommending the gear and stays that I'm stoked about and use on the regular. As such, this post contains affiliate links to some of the products I love, and I'll receive commission upon any purchases made through those links at no expense to you.
At a Glance
Information from WTA.
Location: Olympic National Park
Distance: 7.5 miles one-way, 15 miles RT (optional one-way or RT)
Elevation: 3,100 feet gained (RT)
Difficulty: Hard (if you do RT)
Pass: America the Beautiful ($80 annual interagency pass) or Olympic National Park Pass
Permits: Required for overnight stay at Roaring Winds Campground
Best time to go: Mid-July through October
General elevation trend: Mostly downhill if going one-way from Obstruction Point
Native land: Coast Salish
Getting There
To Obstruction Point:
From downtown Port Angeles follow the signs to Hurricane Ridge Rd. You’ll pass a ranger station and be asked to show your pass at the gate. After an 11.5-mile drive along Klahhane Ridge, you’ll reach the parking lot. Obstruction Point Rd. veers down and to the left just as the parking lot begins. It can be super easy to miss, so keep an eye out! Enjoy the 7.5 miles of dirt road and GORGEOUS views of the Olympic Mountain Range.
GO SLOW! The road narrows at points and it can be super slippery if you’re going too fast. It’s well maintained, so 4WD isn’t required, but there are no guard rails so drive carefully, please! Don’t forget to stop and take in the views. It’s easily one of the most gorgeous roads I’ve ever been on (and I road trip A LOT).
To Deer Park Campground:
If you’re driving to Deer Park, you’ll turn off Highway 101 just after Olympic Cellars onto O Brien Rd. The road begins paved and eventually turns into dirt as you enter into the National Park. 17.5 miles from Highway 101, you’ll arrive at your destination! Veer right at the fork at the top for the trailhead. For an extra treat, stay left through the campground to get sweet 360-degree views at the top of Blue Mountain!
This road is also well maintained with pot holes here and there. 4WD recommended but not required.

Planning Your Route: Thru-Hike or Round Trip?
Determining whether you’ll do this hike one-way or round trip is entirely up to you and your physical abilities.
Some questions to ask yourself while deciding:
Can my body do 15 miles and 3,000’+ of elevation gain in one day?
Do I want to spend the night to split up the hike? Are there permits available for the Roaring Winds Campground? (More on permits below.)
If I hike through, can I leave a car at both ends of the hike? (Read more about “key swapping” below.)
Can I carry enough water for an overnighter or round trip hike? (There are no water sources on the entire ridge line, so you’ll need to carry all water with you.)
This was going to be our first backpacking trip of the season, so we decided to take it slow, spend the night, and hike through, leaving a car at each side of the hike (one at Deer Park Campground and one at Obstruction Point).
Getting Your Permit
Permits are required for all overnight stays at Roaring Winds Campground. If you’re day hiking, skip this section!
Why do we need a permit?
Monitoring the number of visitors to a certain area maintains a balanced ecosystem and preserves the beauty for all future visitors. It’s also a safety precaution so park rangers know who’s in the backcountry at any given time in case the unthinkable happens.
Where do I Get a Permit?
The first 50% of permits can be reserved on recreation.gov up to six months in advance. They’re released at 10 a.m. PST on a rolling basis. The other 50% are saved for walk-ups, so if you don’t get your first choice online, you still have one last chance! You’ll need to visit a ranger station within 24 hours of your trip for your chance at a walk-up permit.
Make a Recreaton.gov account.
Search for Olympic National Park Wilderness Permit.
Click “Check Availability".”
Make sure the dropdown menu at the top reads “People” and select how many people will be joining you on the hike. You can reserve for up to 12 people. It costs $6 to reserve and $8/night per backpacker.
Then select your starting area. This hike’s starting area is “Hurricane.”
Look for “Roaring Winds” on the campground list.
Select your desired dates and click “Book Now.”
Once payment has been made, you’ve successfully secured your permits! Woohoo!!
PRO TIP
Set a calendar alert and an alarm for 10 a.m. six months prior to your desired backpacking trip dates for a chance to reserve your ideal time window. This hike is one of the state’s most popular and it can be very difficult to obtain a permit. Don’t hit snooze on that alarm!
DISPLAYING YOUR PERMIT
You must print your permit or pick it up from a ranger station (I’d recommend the Olympic National Park Visitor Center) before heading out on your trip. Keep it accessible in case a park ranger asks for it along the way. Some backpackers choose to put it in a ziplock bag and attach it to their tents to make it easier on the rangers, but as long as you have it on your person, you’re golden.
Scroll to the bottom for a detailed and downloadable packing list!

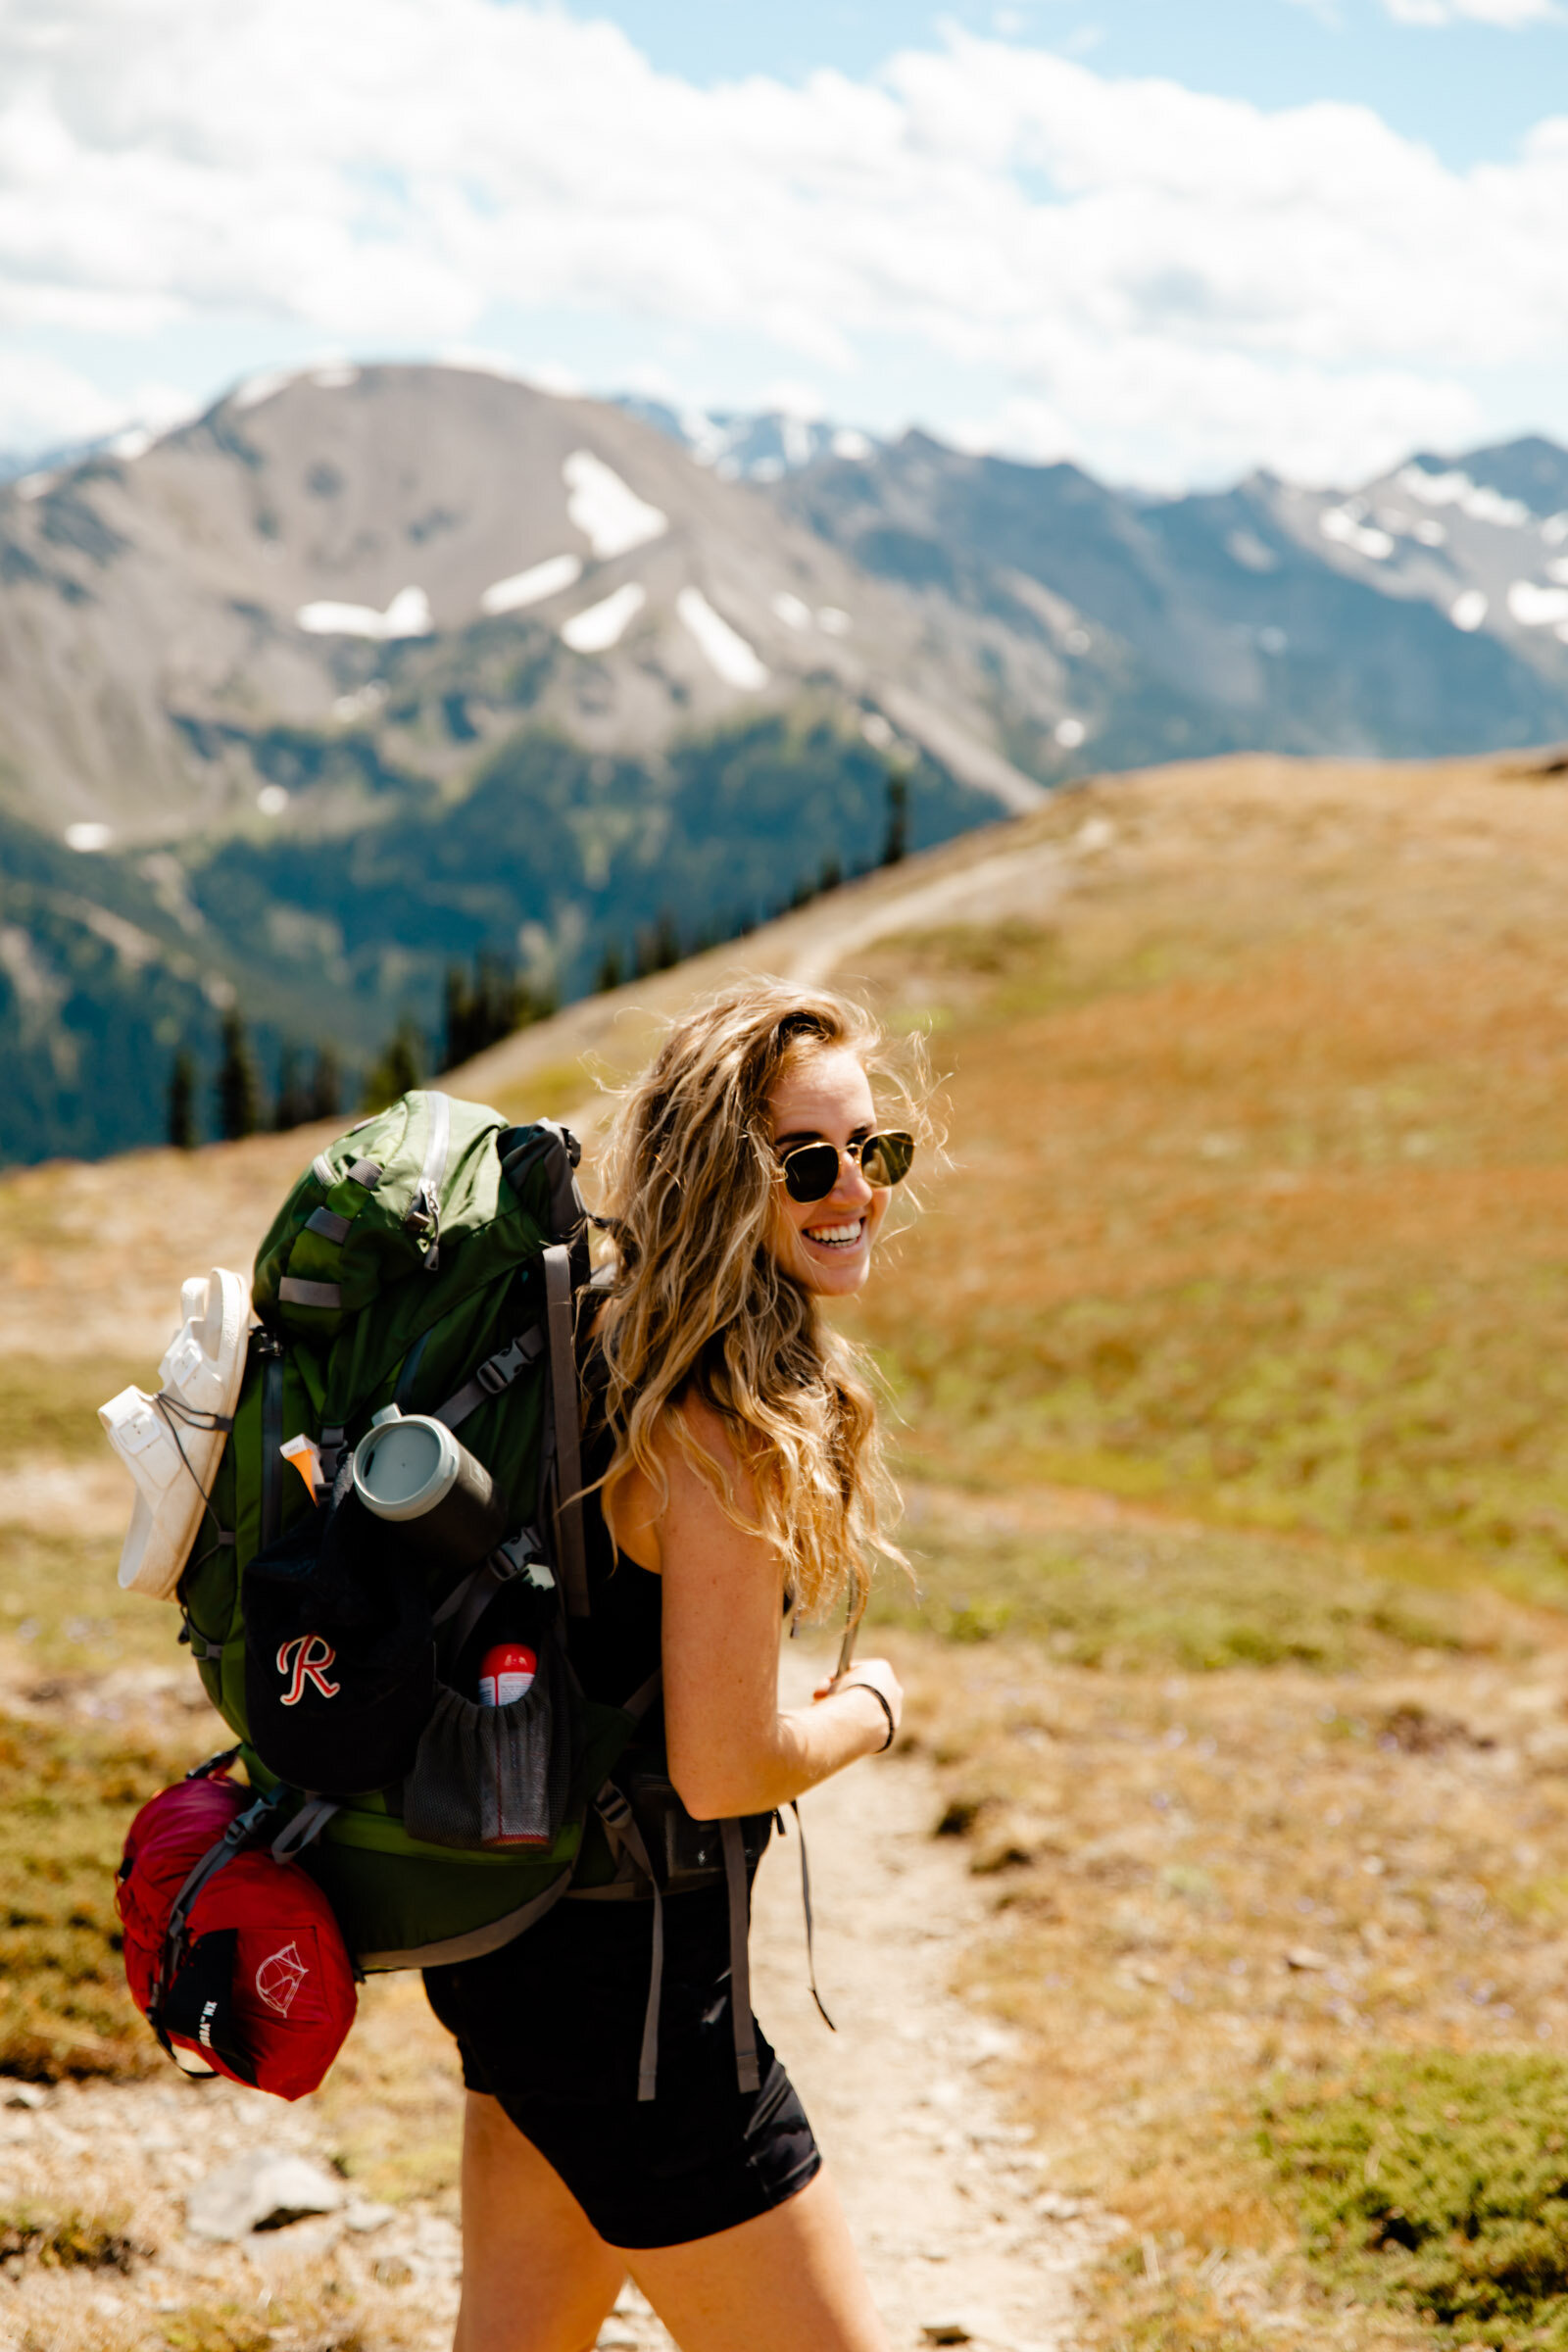
Grand Ridge Trail, Olympic National Park
This was our first backpacking trip of the season, and we wanted to slowly work up our fitness for a few more trips on the itinerary that summer (read about our High Divide Backpacking Trip here!), we decided to go the uphill route, starting at Deer Park and ending at Obstruction Point.
The Grand Ridge Trail is 7.5 miles one way, and our campground is smack in the middle, which means each day was around 3.5 miles, give or take.
Day 1
Parking Our Cars
Because we decided to hike through, we needed two cars. We drove up to Obstruction Point first (our end point) to leave our first car. Then we drove back down to Port Angeles and around to Deer Park in our other car to start the hike. This added an extra 2 hours of driving time, so plan accordingly!
SCHEDULE:
6 a.m.: Depart from Seattle. The first ferry leaves at 6:15 a.m., so plan accordingly. If you’d like an earlier start, consider staying on Bainbridge or even Port Angeles the night before.
9 a.m.: Arrive Obstruction Point. Leave car. Drive second car to Deer Park
11 a.m.: Arrive Deer Park
111:30 a.m.: Start hike to Roaring Winds Campground
The Hike

We left Deer Park surrounded by trees–it was truly beautiful and added a little variety to an otherwise bald hike if you know what I mean! We immediately lost about 300’, knowing we’d have to make it up later. Yeeee!
There were mosquitos this time of year (August), but what I didn’t expect were the swarms of horse flies. They circled me with every step, following me almost the entire time we were in the trees, running into my head, arms, and legs, and buzzing around my ears. I had bug spray on, which could’ve been why they never bit, but man were they annoying!
Consider wearing long sleeves and pants, at least while in the trees. I wish I had!
The landscape began to change after the 0.75-mile mark. The trees thinned–a sure sign of higher elevations–making room for small meadows with purple and white wildflowers. Short spurs veered off to views of the Strait of Juan de Fuca through the trees and Vancouver Island beyond. Freaking epic to say the least!
It was super exciting! Not just because there was hope that the flies would leave us the heck alone once we emerged on top of the ridge, but because the promise of epic, unobstructed views were in our future.
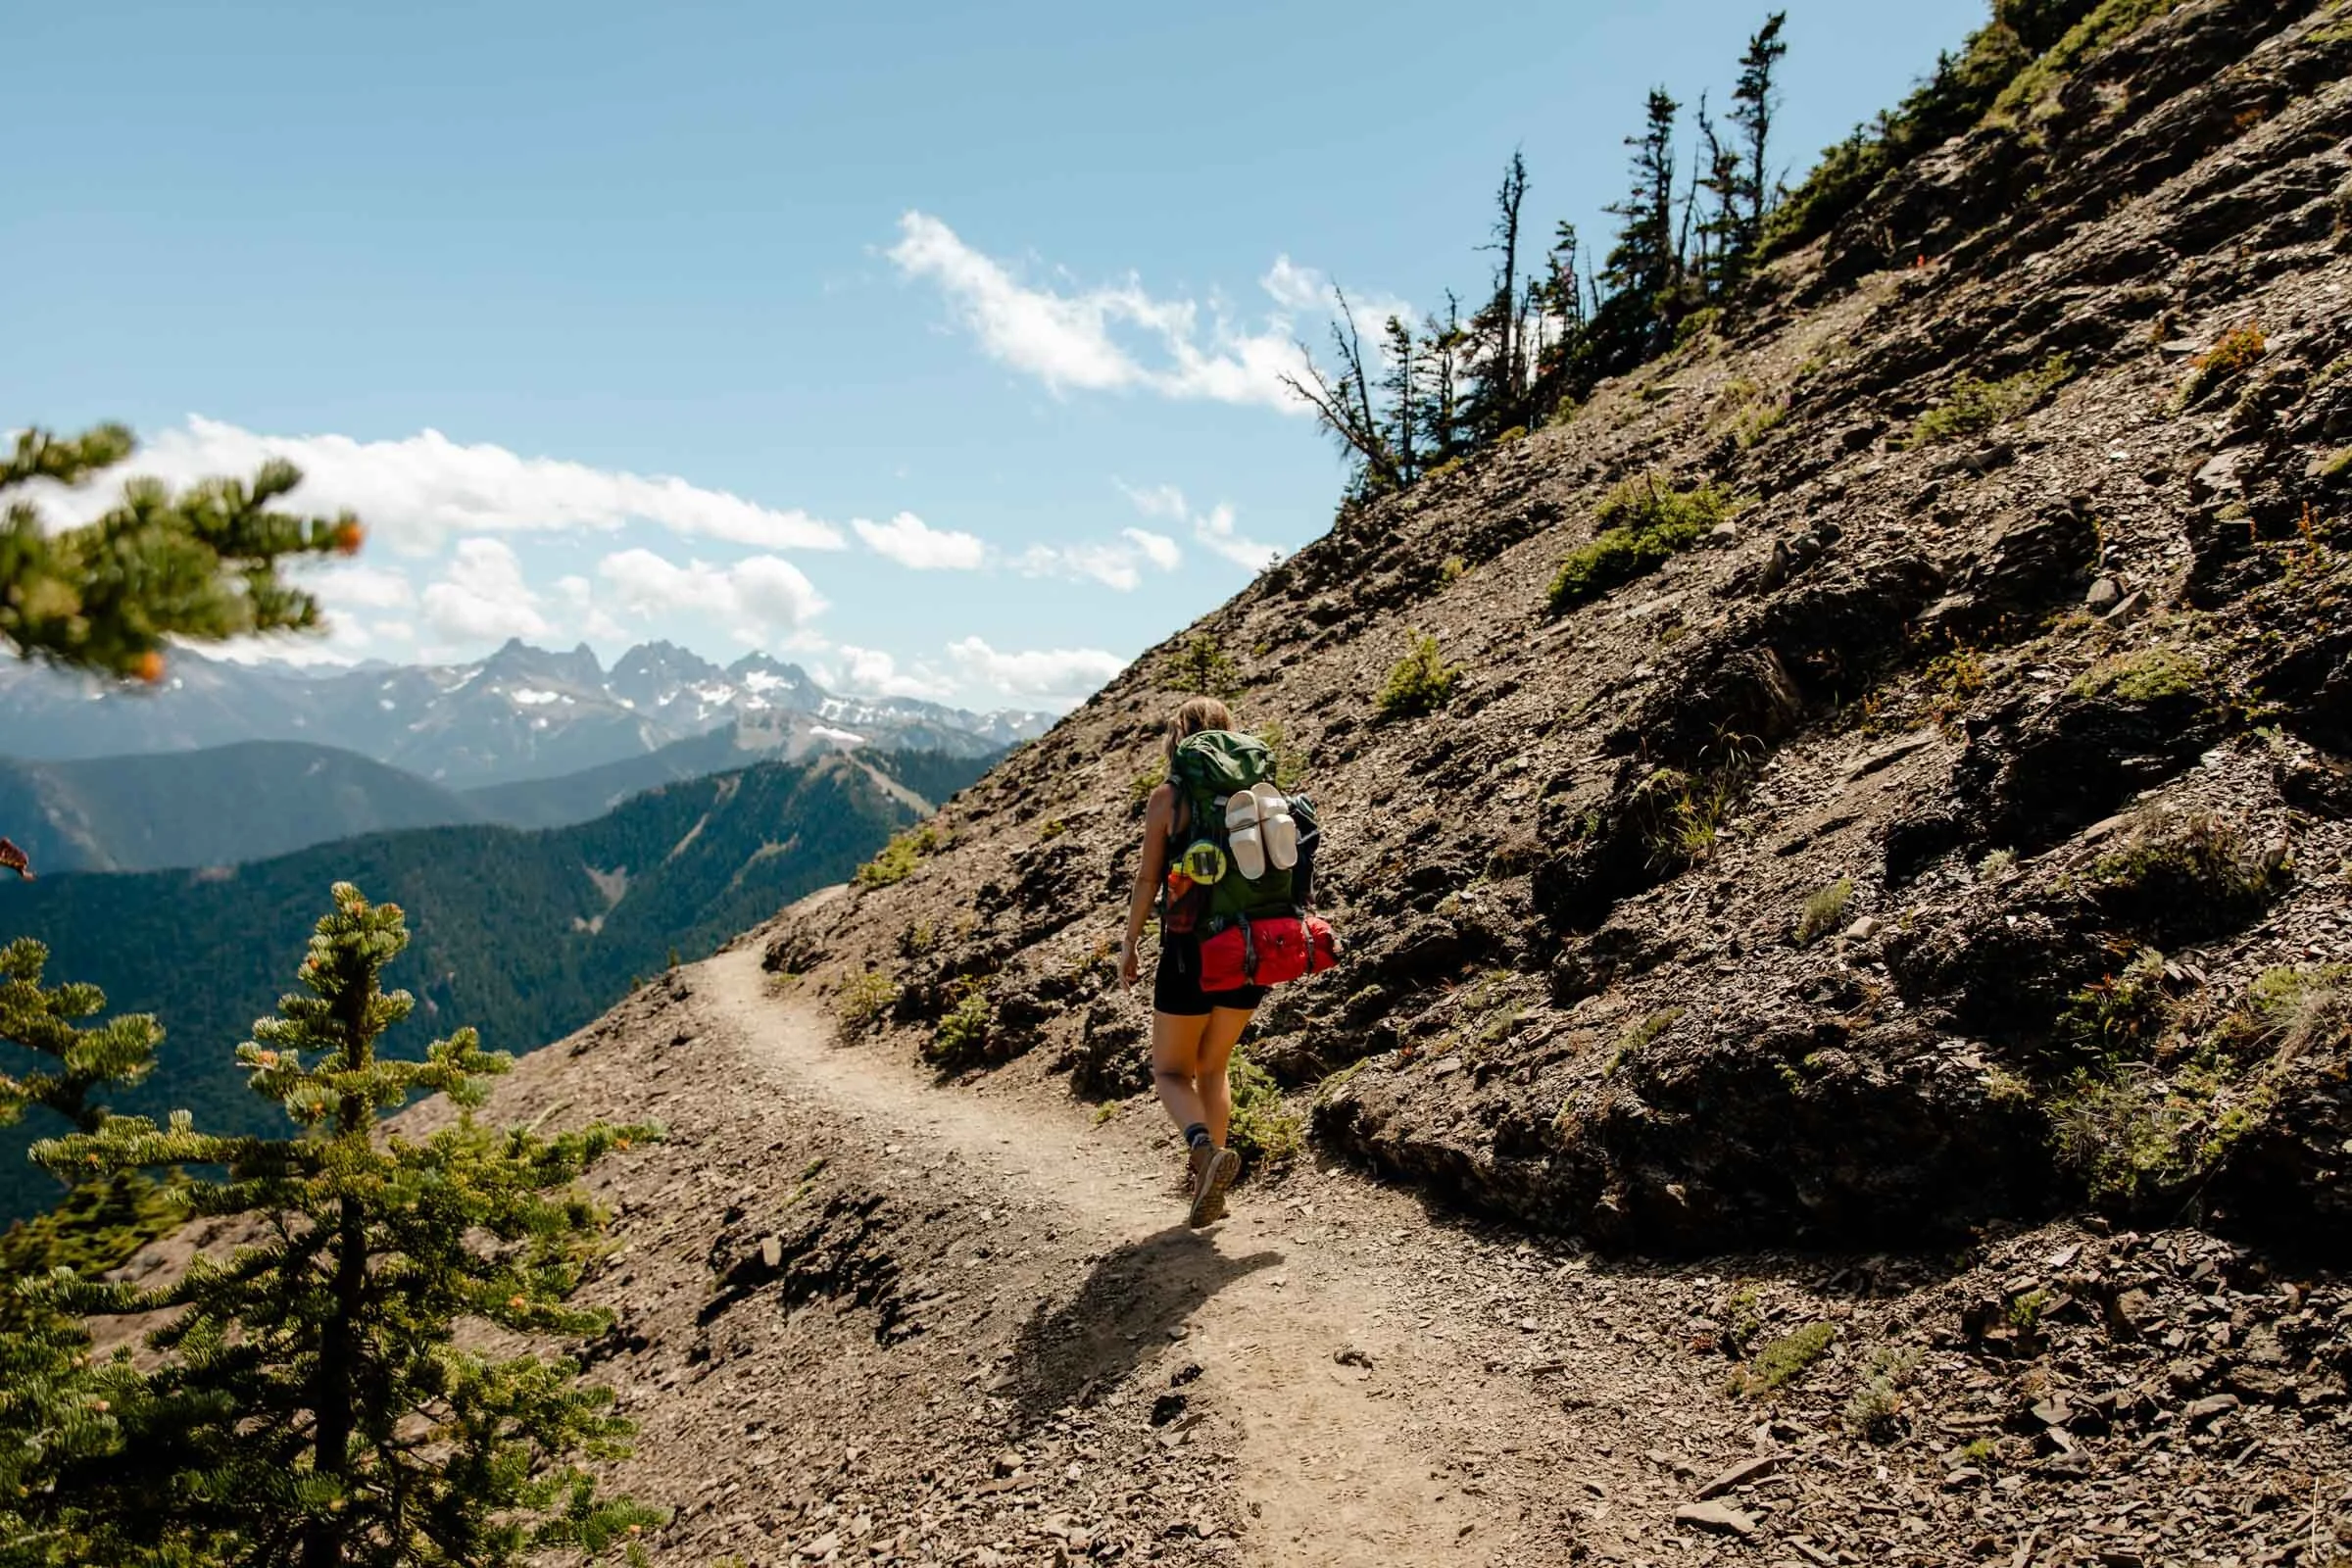
The Grand Ridge
After about a mile, we looked up to see hikers on the ridge above the trees. We made it. The flies, for the most part, fell back with the trees thank GOD!
Take your time here and don’t forget to look behind you! You’ll see the Deer Park Campground (where you came from), Vancouver Island, and the Olympics all at the same time. Pretty freaking incredible.
The rest of the hike guides you just below the ridge line on the side of the mountain with full blown views of the Olympics to the south. There are plenty of peaks along the way with spur trails that allow you to summit if you’re feeling up to it. Keep an eye on your map and get after it!
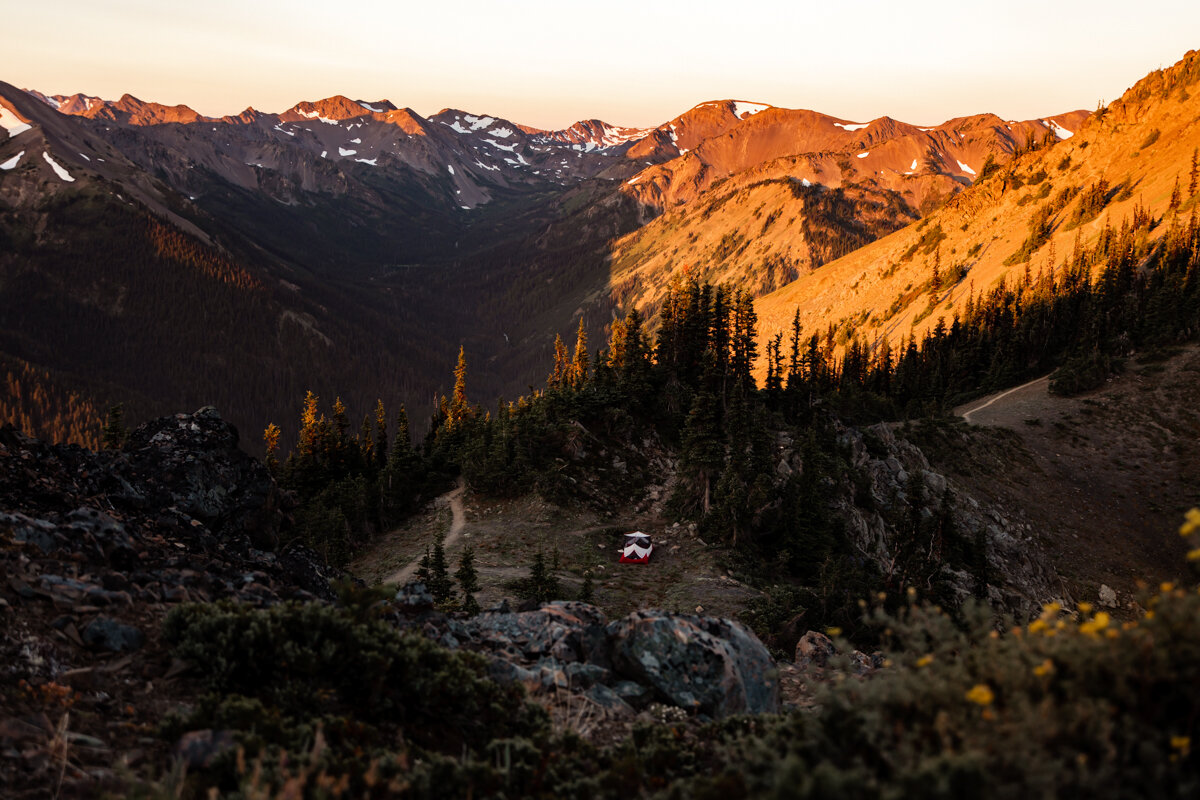
Roaring Winds Campground
After about 4 miles, our cute little Roaring Winds Campground came into view. It’s still on the ridge, but in a little sheltered nook below the tree line about 300’ down, which I’m sure provides some much-needed shelter from those “roaring winds” on a blustery day. Somehow, our 24-hour trip was dead calm and the mosquitos were relentless! Don’t skimp on bug spray!
Pro tip: Get yourself a bug net for your head. No joke. I picked one up after this trip and you can get a 3-pack for $11.99 on Amazon!

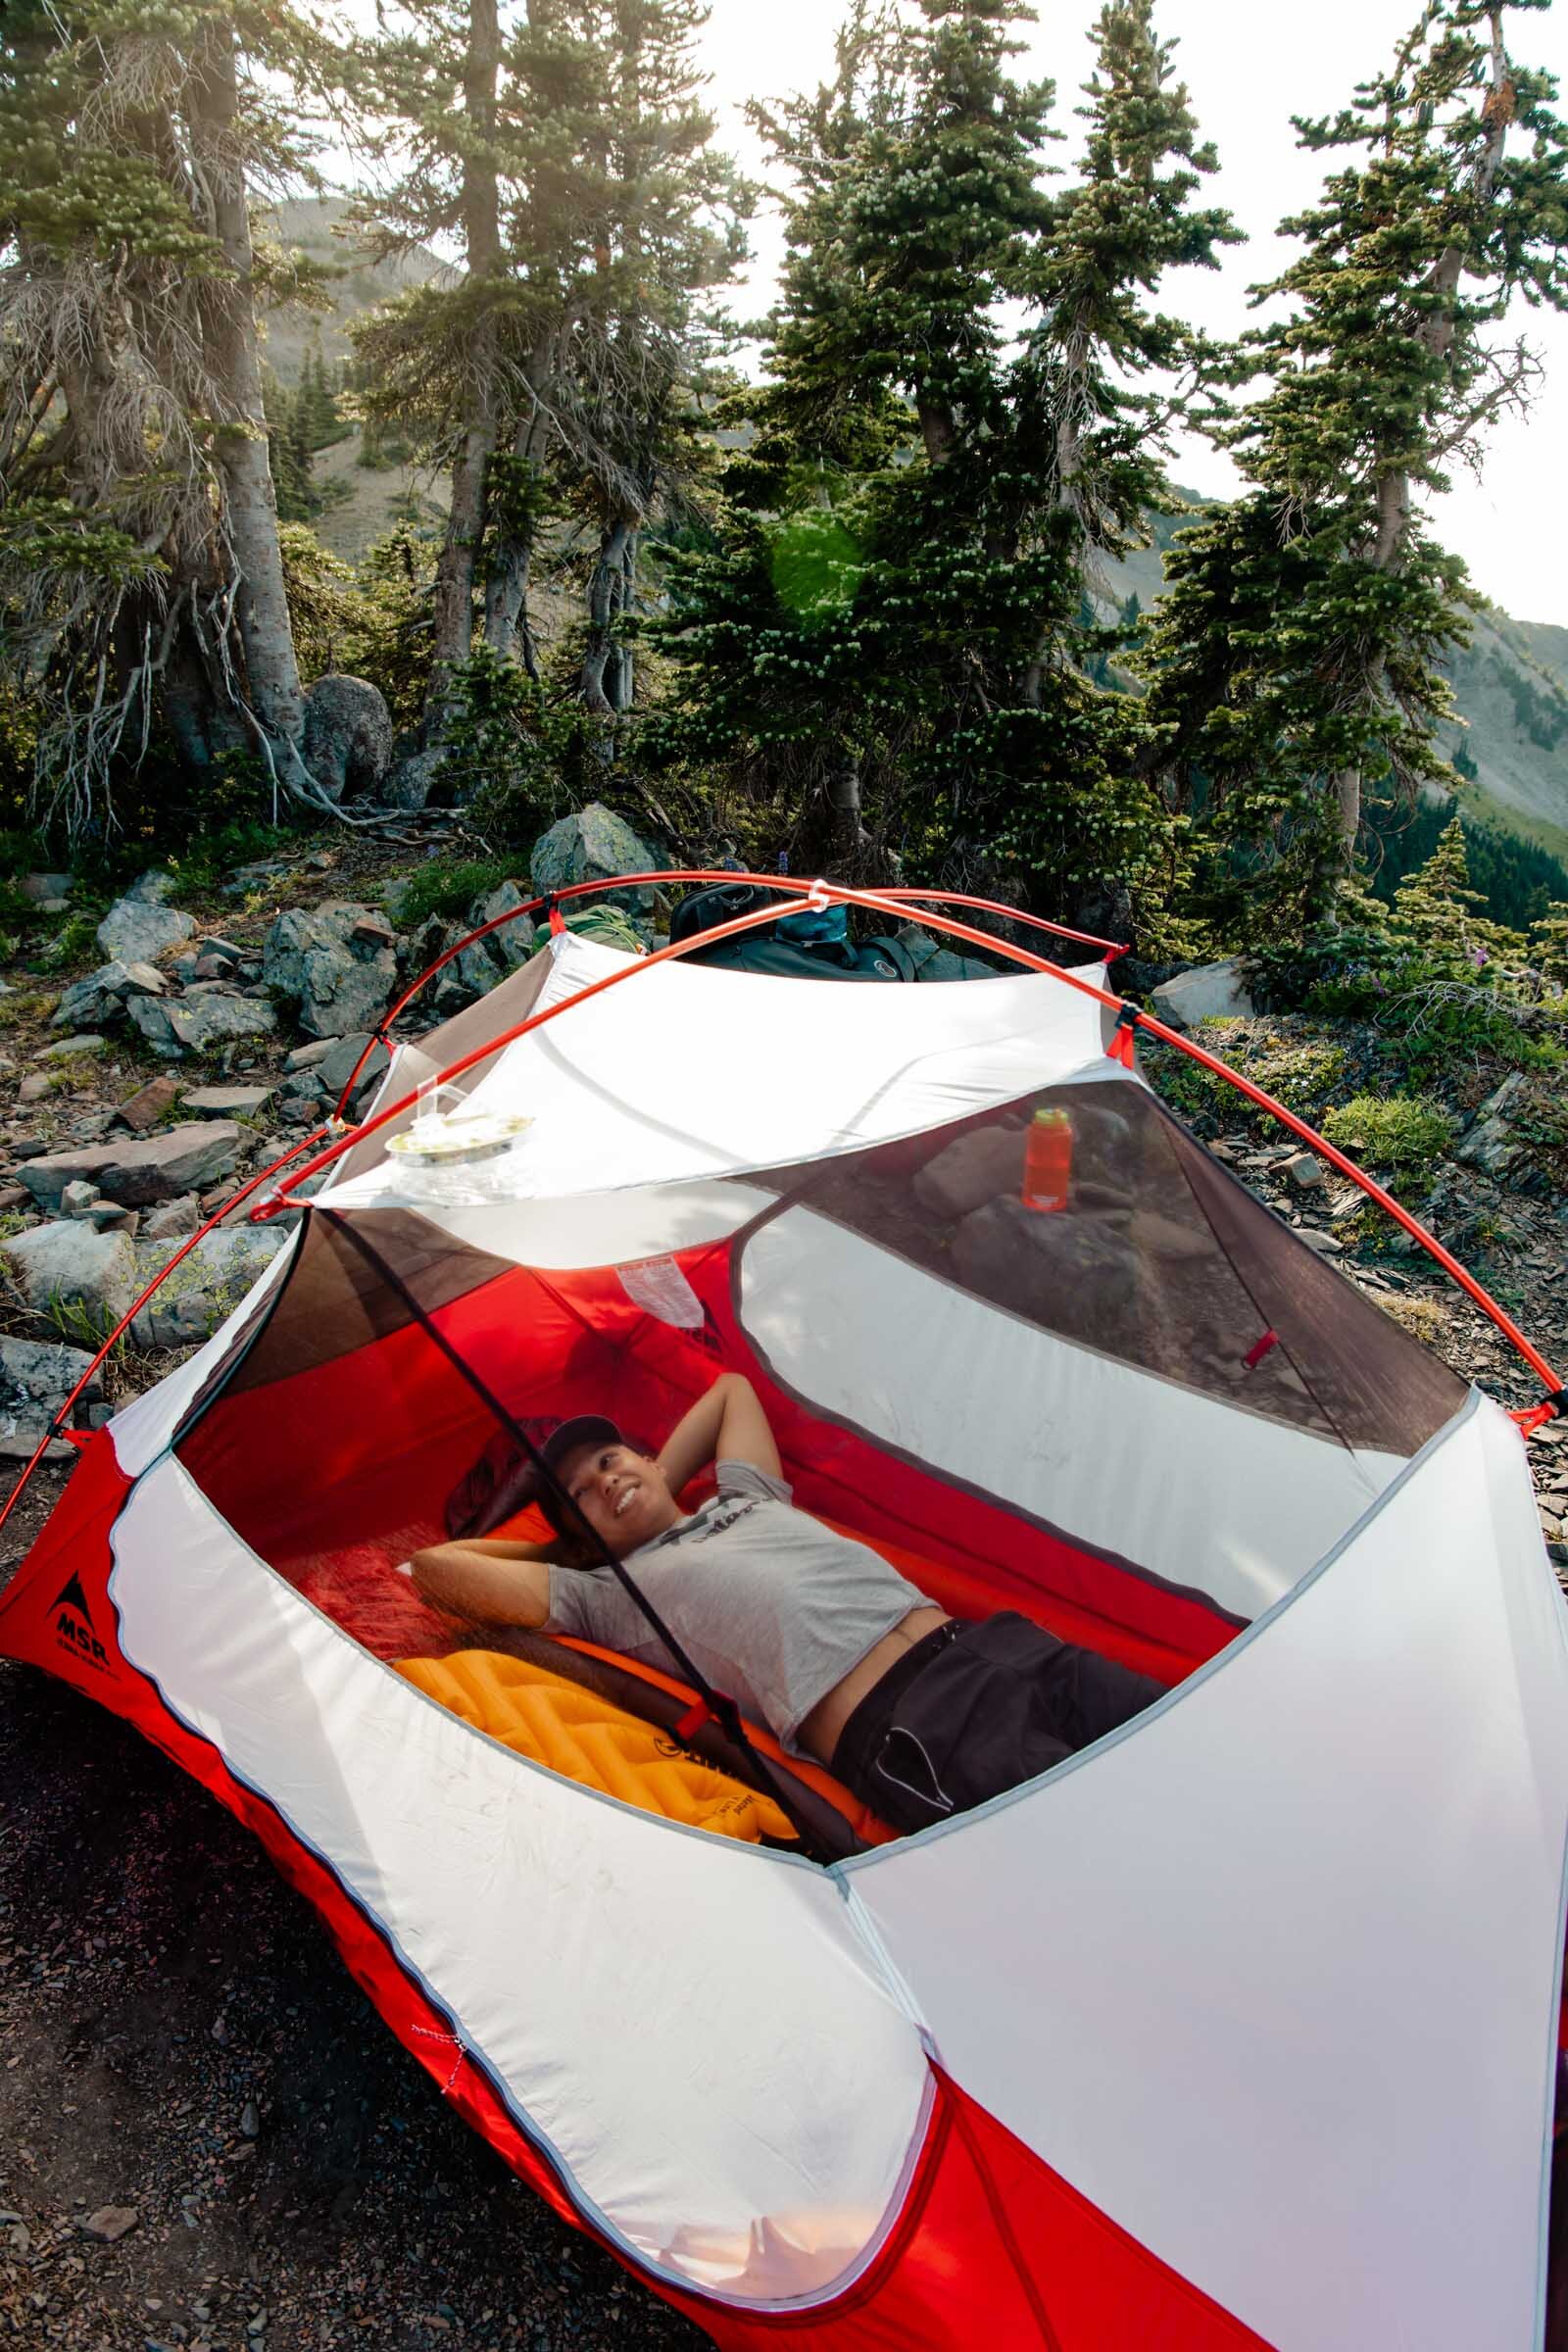

We arrived SO EARLY since it was just about a 4-mile trek up to this point. We set up camp, blew up our sleeping pads, and brought them outside for a little sunbathing, reading, and relaxing. We had almost too much time to kill before evening–it was incredible.
I mean, when was the last time you had absolutely nothing else to do but sit there and enjoy your surroundings without any distractions? I mean really? When you’re up here with no cell service, its just you and the great outdoors. You’ll have plenty of time to think and just “be.” Soak in the serenity. These moments are far and few between in our wild world!

As the day went on, we saw less and less hikers, and it eventually became clear that we were the only humans on the entire ridge that night. I mean, how special is that?!
A curious buck let us be his house guests for the night. He welcomed us into his campsite, checked out our packs to see if we brought him any housewarming gifts (we didn’t–please don’t feed wild animals!), kept watch throughout the night, and greeted us in the a.m. What a guy!


Backcountry horror story time! If you have a queasy stomach, skip this next part!
It was late afternoon by this point and a headache came on in full force. I swear I’ve never had a worse headache in my entire life. We were alone on this ridge, miles away from our car, and I was going through every scenario in my head. Worst case, could I hike out like this? If it gets worse, am I going to have to call a helicopter? (Dramatic I know, but lemme tell ya, I was not okay.) I laid down in the tent, away from the bugs, and tried to sleep. I felt super nauseous. Could it be the tamales we had for lunch? I took some Aleve and tried to wait it out. Pain, pain, nausea, and more pain.

The sun was going down and I wasn’t going to spend my only sunset of the backpacking trip in my tent no matter how bad I felt. I peeled myself off my sleeping pad, hiked up to the ridge, and started gagging into a bush. Our buck buddy was happily eating dinner right next to me while I was hacking up mine–I won’t be eating tamales for a while.
Luckily, that’s exactly what my body needed. I felt better almost immediately, took plenty of blue hour sunset photos (because my head was buried in a bush for the actual setting… *sigh), and passed out in the tent like a freaking rock.

Long story short, DRINK WATER! I was too conscious about my water consumption because I knew we didn’t have any means to refill our reservoirs throughout the entire trip. So I saved my water. Big mistake. Measure out your water ahead of time, and drink exactly what you scheduled into your trip. Don’t savor it. Your body will thank you later.
Day 2
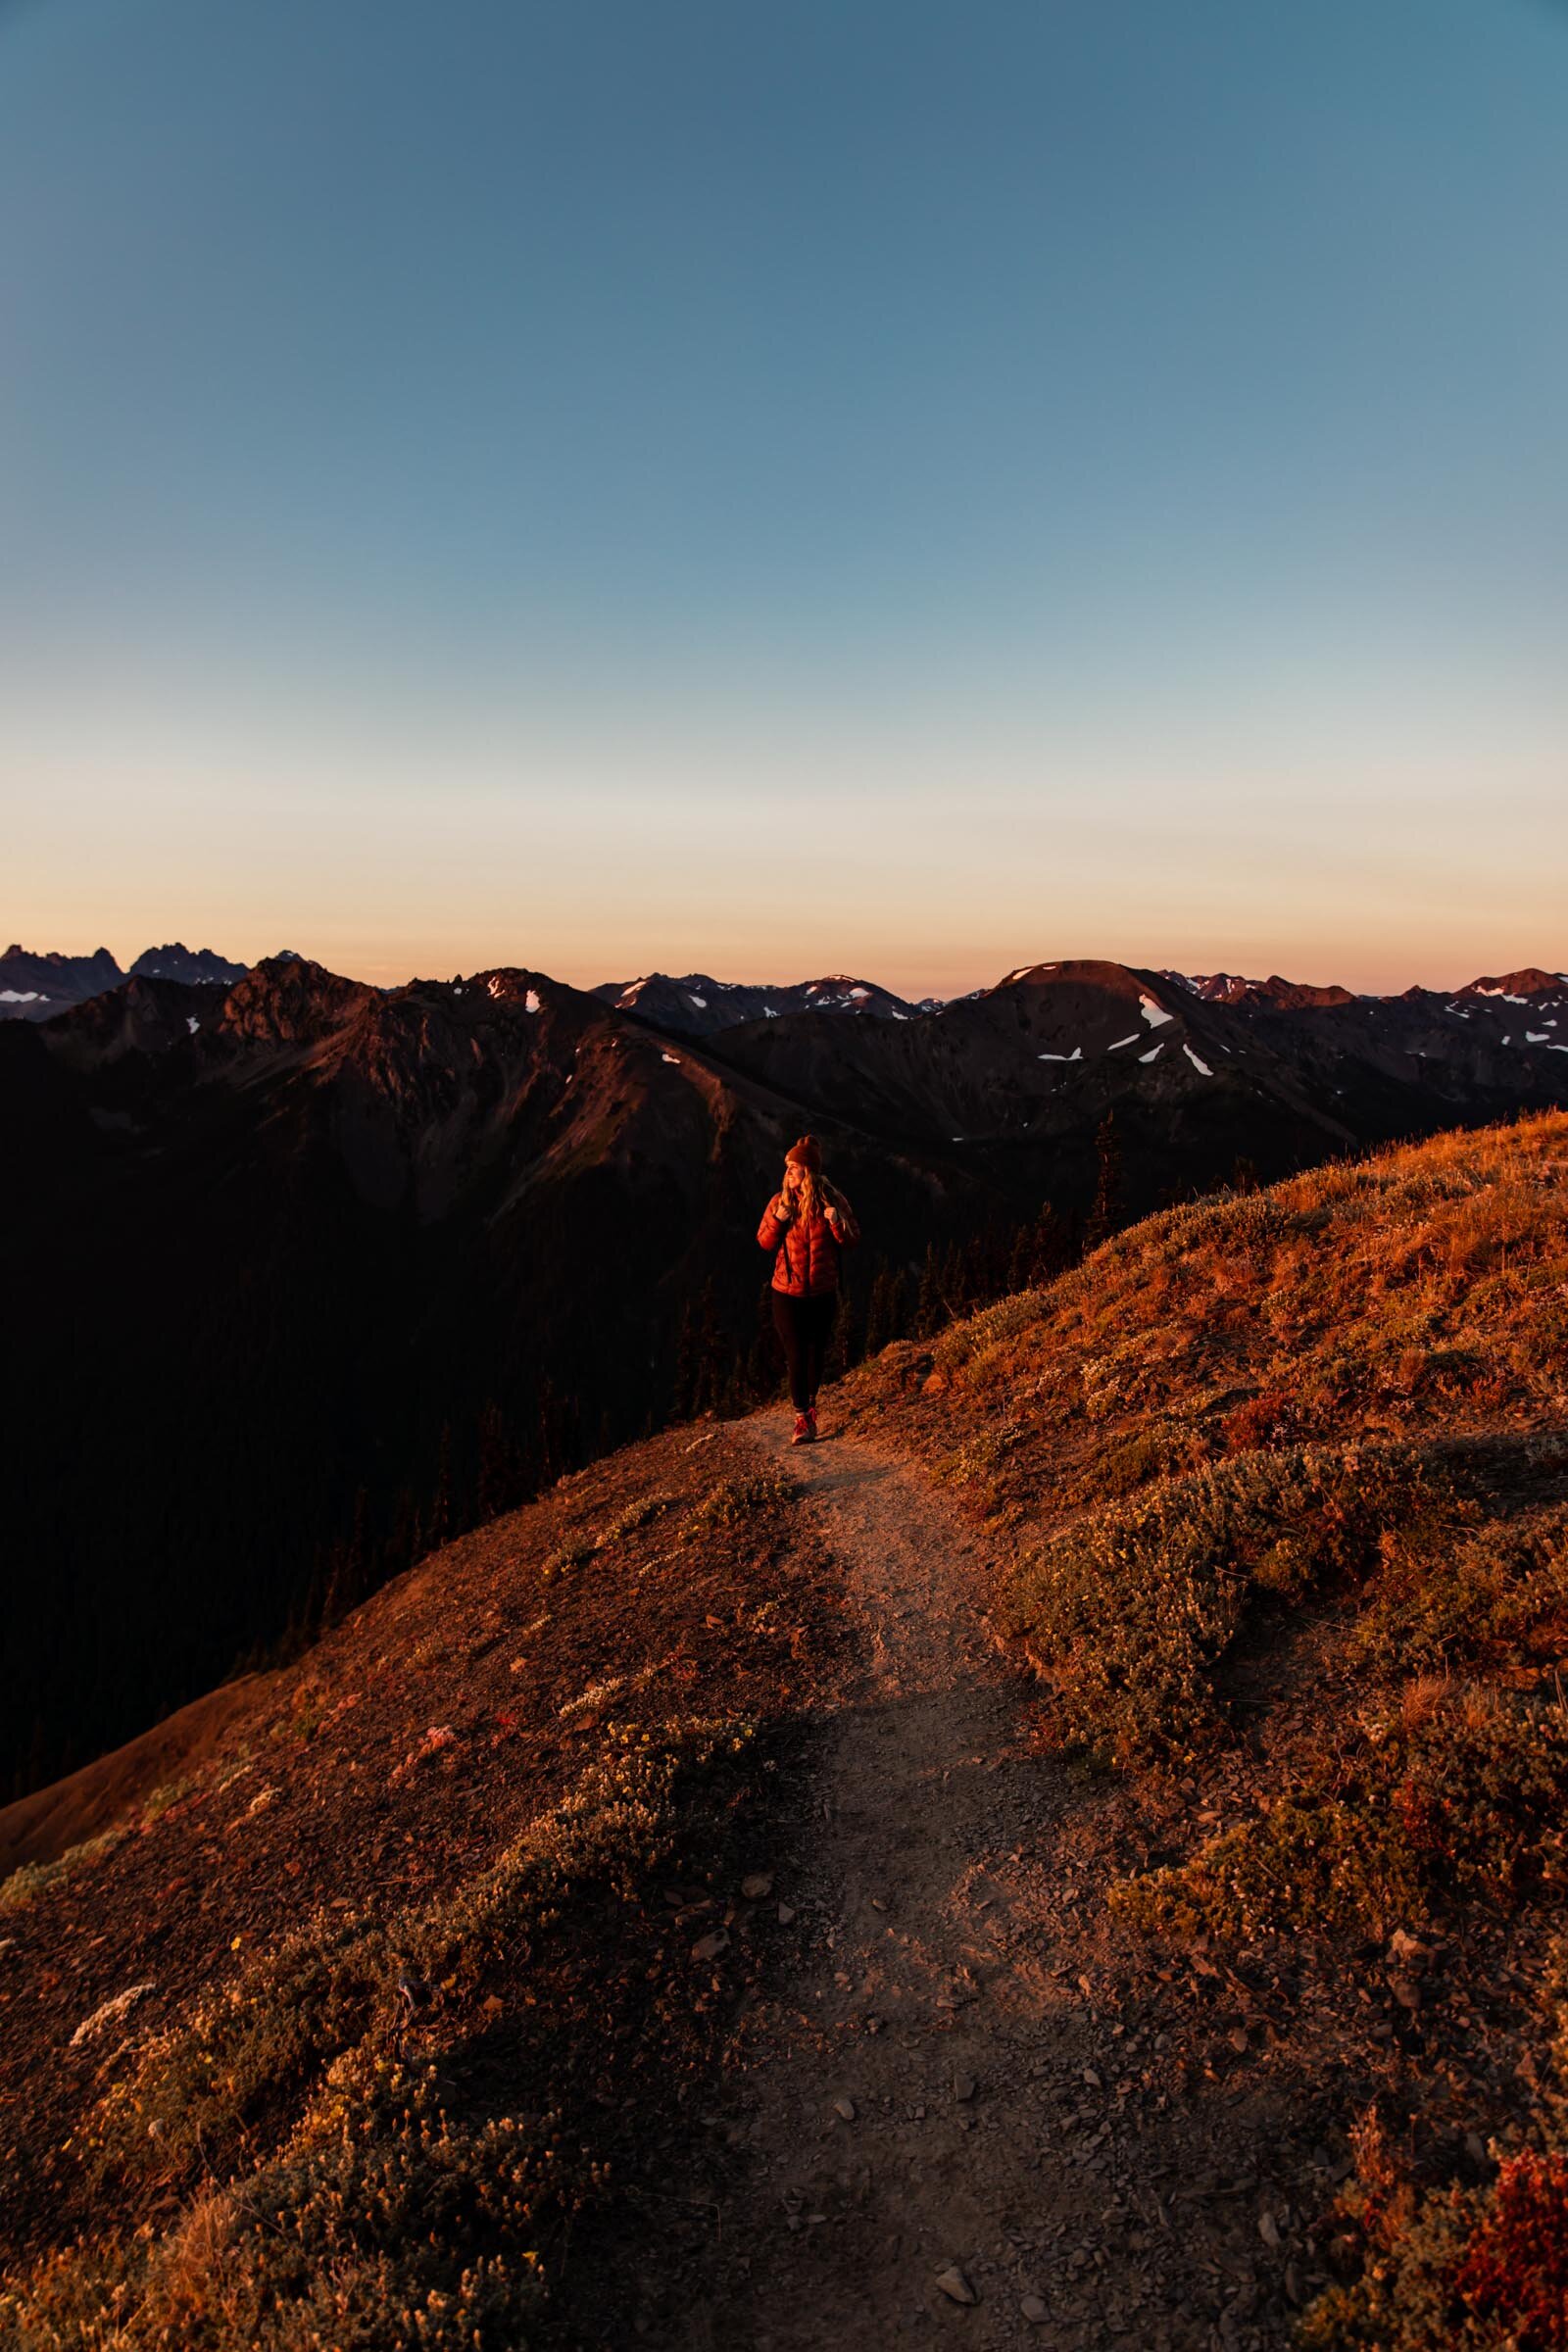
We woke up just before the sun peeked over the mountaintops and the views did NOT disappoint. Seriously. Wake up for sunrise. It’s epic.

After a few photos, we hiked back down to make some camp coffee before the bugs attacked. If you know me you KNOW I’ve gotta start the morning with a cup of joe wherever I am. We packed the Aeropress and had freshly brewed coffee in no time!


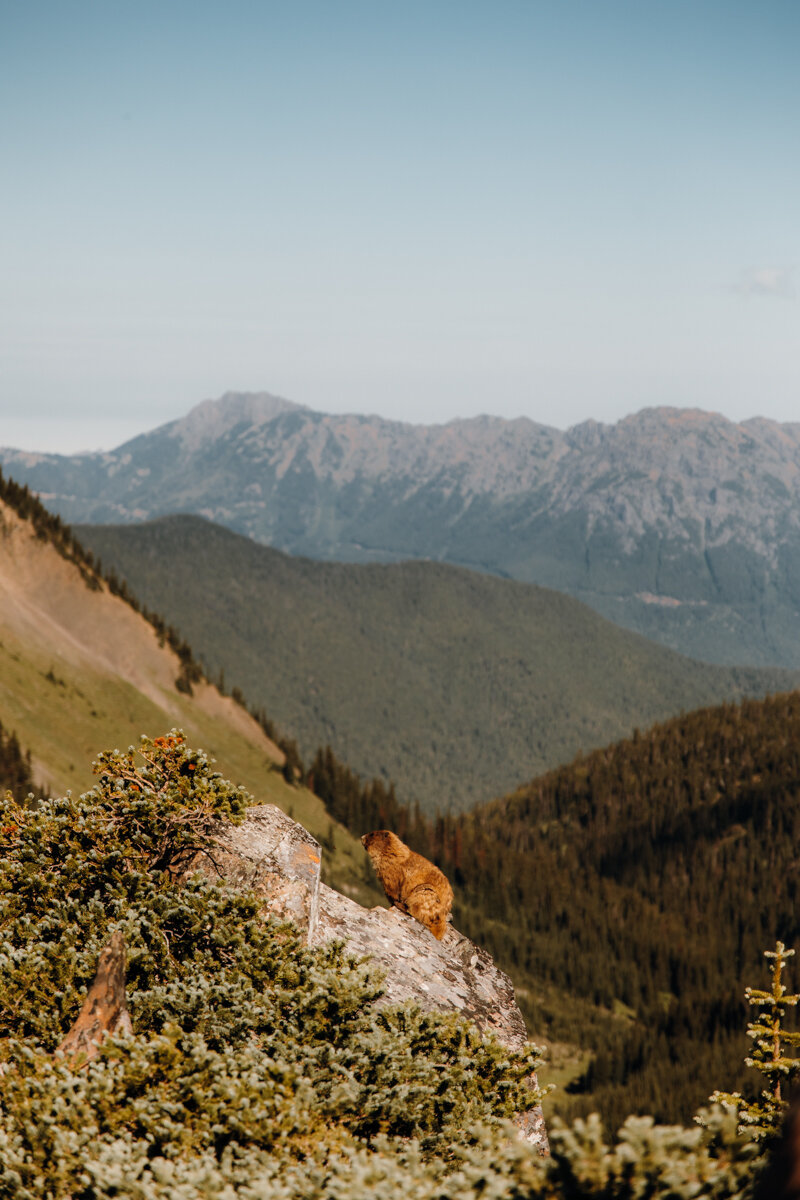
Back at camp, we leisurely brushed our teeth, packed up our tent, said goodbye to our deer friend and the marmot next door, and took off for the last 3.5+ miles to the car.
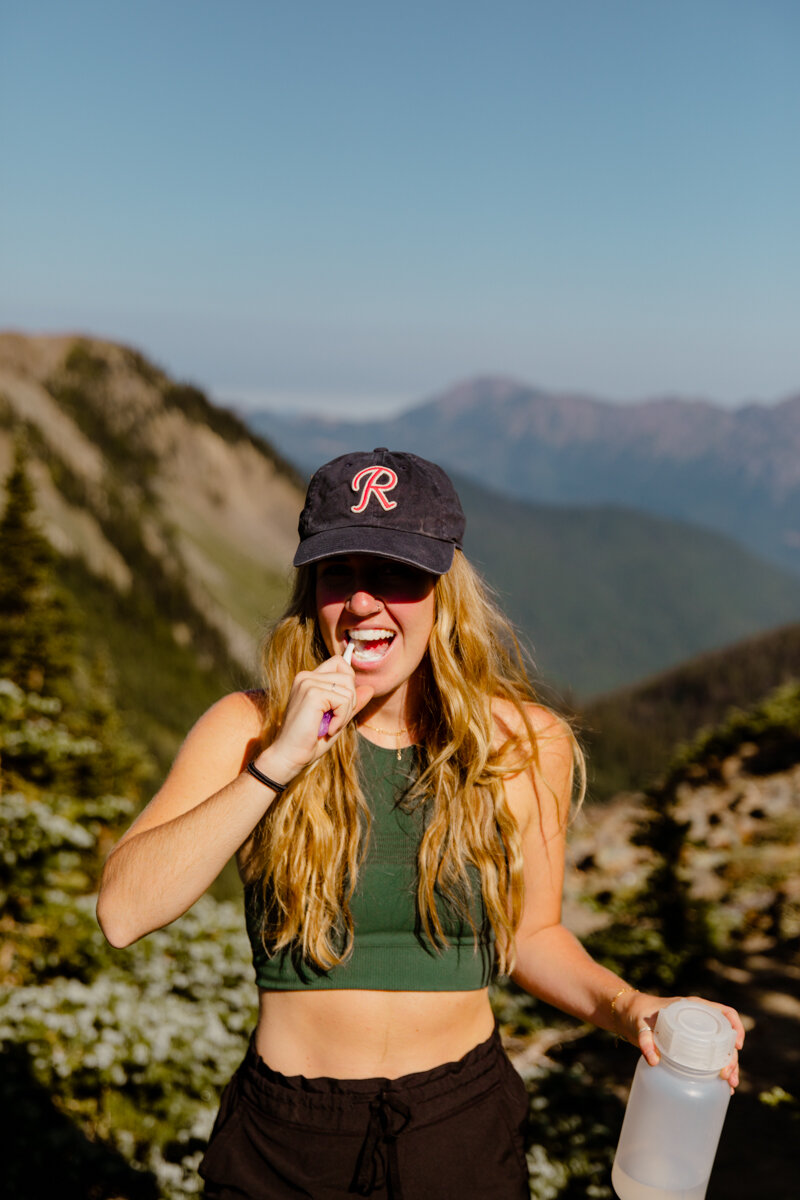
Pro tip: Bring along Bite toothpaste for brushing your teeth! They’re little self-contained pellets, which make them super portable, and you can carry exact amounts. You just pop one in your mouth, chew it up, wet your toothbrush, and brush away! They’re also sustainable! I love them so much, I use them at home now too.

Hiking out of the campground towards Obstruction Point was easily the steepest part of the trail. You gain about 600’ in a little under a mile before you start your downhill stretch to the car. The alpine meadows are stunning!


We ran into plenty of backpackers finishing up the Cameron Basin Loop: a 25.6-mile loop that starts at Deer Park, takes you down along Cameron Creek, across Grand Pass, and finishes at Deer Park after hiking down the ridge line.
Advice from the Trail: Nearly every one of these backpackers said they wouldn’t do the entire loop again, but the hike to Grand Pass is definitely worth it. Go from Obstruction Point, they said. Camp at the top and then turn back around.


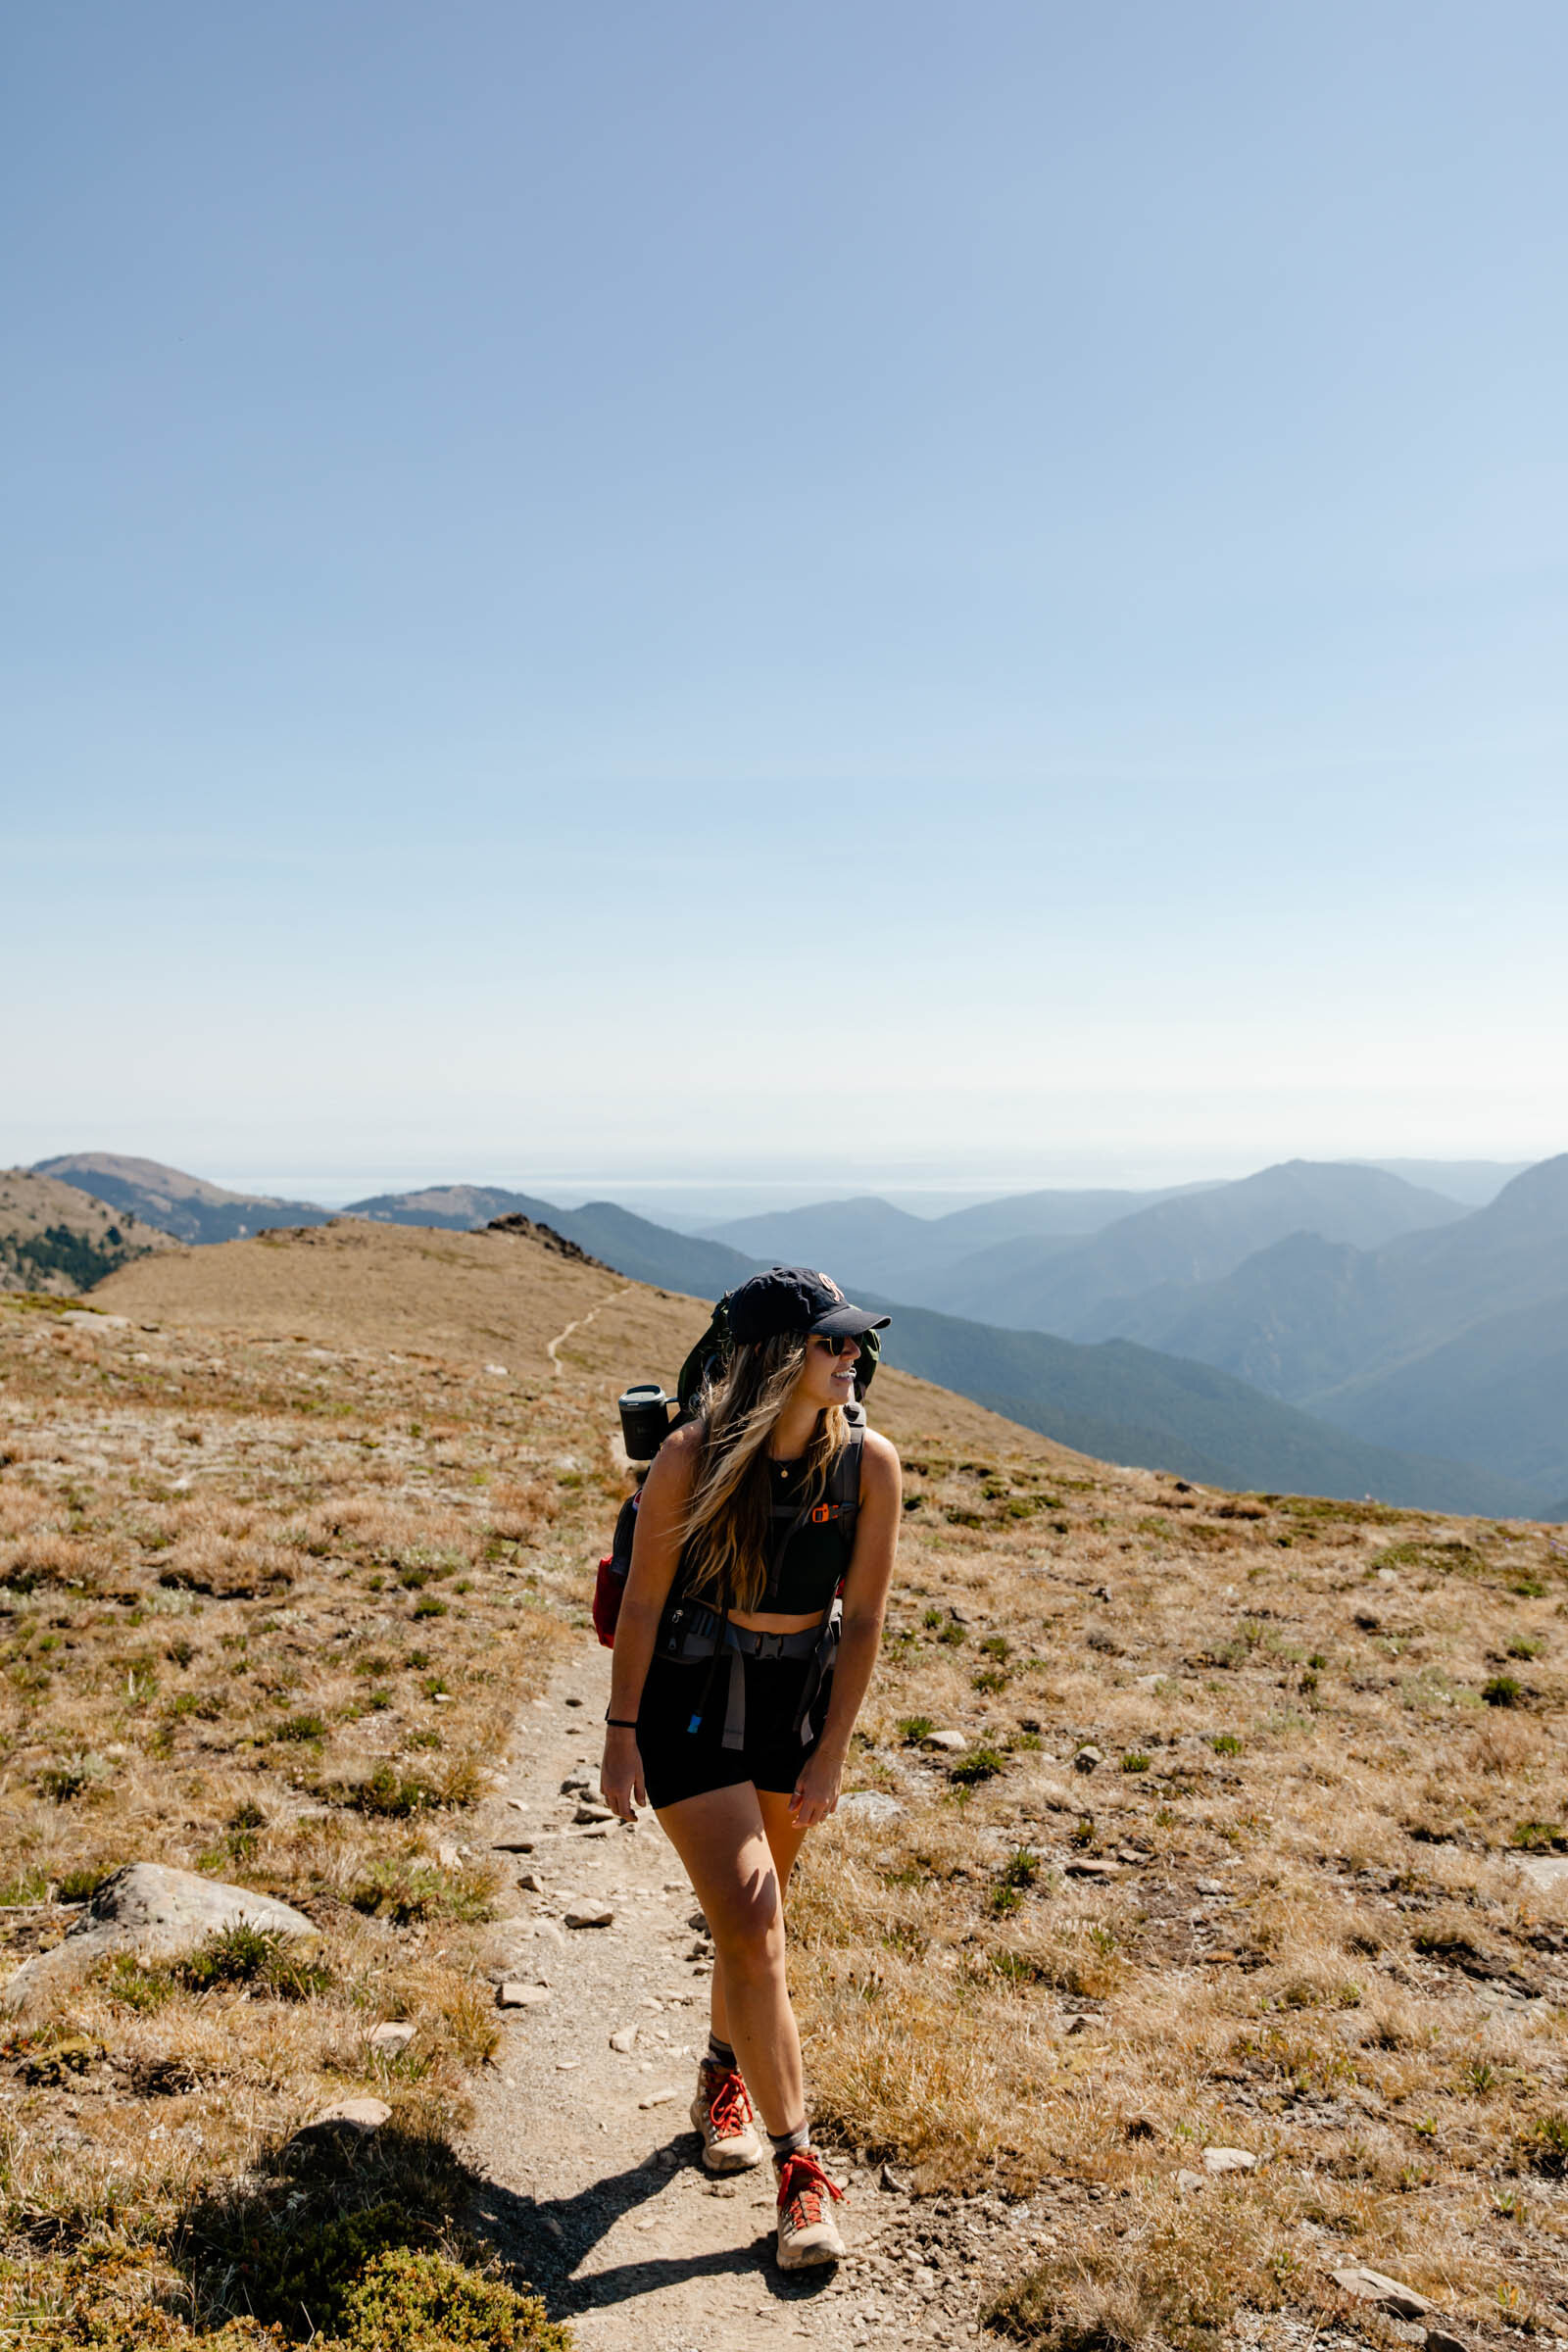

We took our time, stopping to admire the wild flowers, taking lots of photos, snacking on dried mangoes, and just soaking up all the ONP beauty.

It was a perfect first backpack of the season, and one I’d definitely recommend to any first-timers!
Just make sure you have LOTS of water and you actually drink it!!

What to Pack
Sleeping System
Backpack
I used an old REI backpack for this trip but I recently upgraded to the Osprey Aura 50mL and I’m HOOKED. The support is next level, and the back ventilation was clutch during these super hot days. It has two side pockets, a front open pocket where I kept my bear spray, and two zipper pockets on the hood. The only thing I wish this bag has that it doesn’t is side access, but I managed without it just fine.
Sleeping Bag
Mountain Hardware Bishop Pass 15º, 650 down–great for spring/summer backpacking!
Sleeping Pad
I use the Klymit Static V-Lite.
Tent
MSR Hubba Hubba NX Tent for lifeeeee.
Pillow (optional)
I’d rather save the space and weight for something else (like my coffee mug), so I scrunch up my puffer into a makeshift pillow or sleep without one all together.
Gear
This is how I kept my phone charged throughout the trip to capture videos.
Cards (optional)
Journal (optional)
If you’re looking for a way to record your hikes, check out my Dirtbag Diary, available on Amazon :)
Backcountry Kitchen
Water Storage
I brought 3L of water, but I could’ve used 4 to have extra for cooking and coffee. There are no water sources on this hike, which means you’ll have to carry all of your water with you. Plan accordingly.
Food: Remember, all-day hiking means you’ll be burning a heck of a lot more calories than you might be used to. Pack high-protein and high-caloric foods to keep you going.
I love starting the day with Starbucks’ Instant Vanilla Latte and a Kodiak Oatmeal pack (which has 12g of protein each!). Pour water straight into the oatmeal packet and enjoy!
Snacks: Pepperoni sticks are where it’s at. I also bring a hefty bag of peanut M&Ms, some Cliff bars, dried mangoes, and Bolt energy chews. Bolt chews are organic, caffeinated with mate, and have Vitamins B & C.
Dinner: There’s nothing like ending the day with a hot meal. There are freeze dried meals of all types these days (I recommend the lasagna or anything that doesn’t involve a lot of spices).
Dessert: It’s the little things! Bring a little treat to look forward to after a long day. Sometimes I’ll save my M&Ms to have after dinner for a little dose of chocolate. The candy coating keeps them from melting!
MSR Pocket Rocket Mini Stove Set (that includes a pot)
Lighter
Waterproof Matches
These are required. You might not see a bear, but it keeps other animals like deer and marmot away from your food as well. Keep your food locked up both for your safety and the animal’s health!
You can pick up one for free from a ranger station or the Olympic National Park Visitor Center, but I ended up purchasing the BearVault after the COVID bear canister shortage.
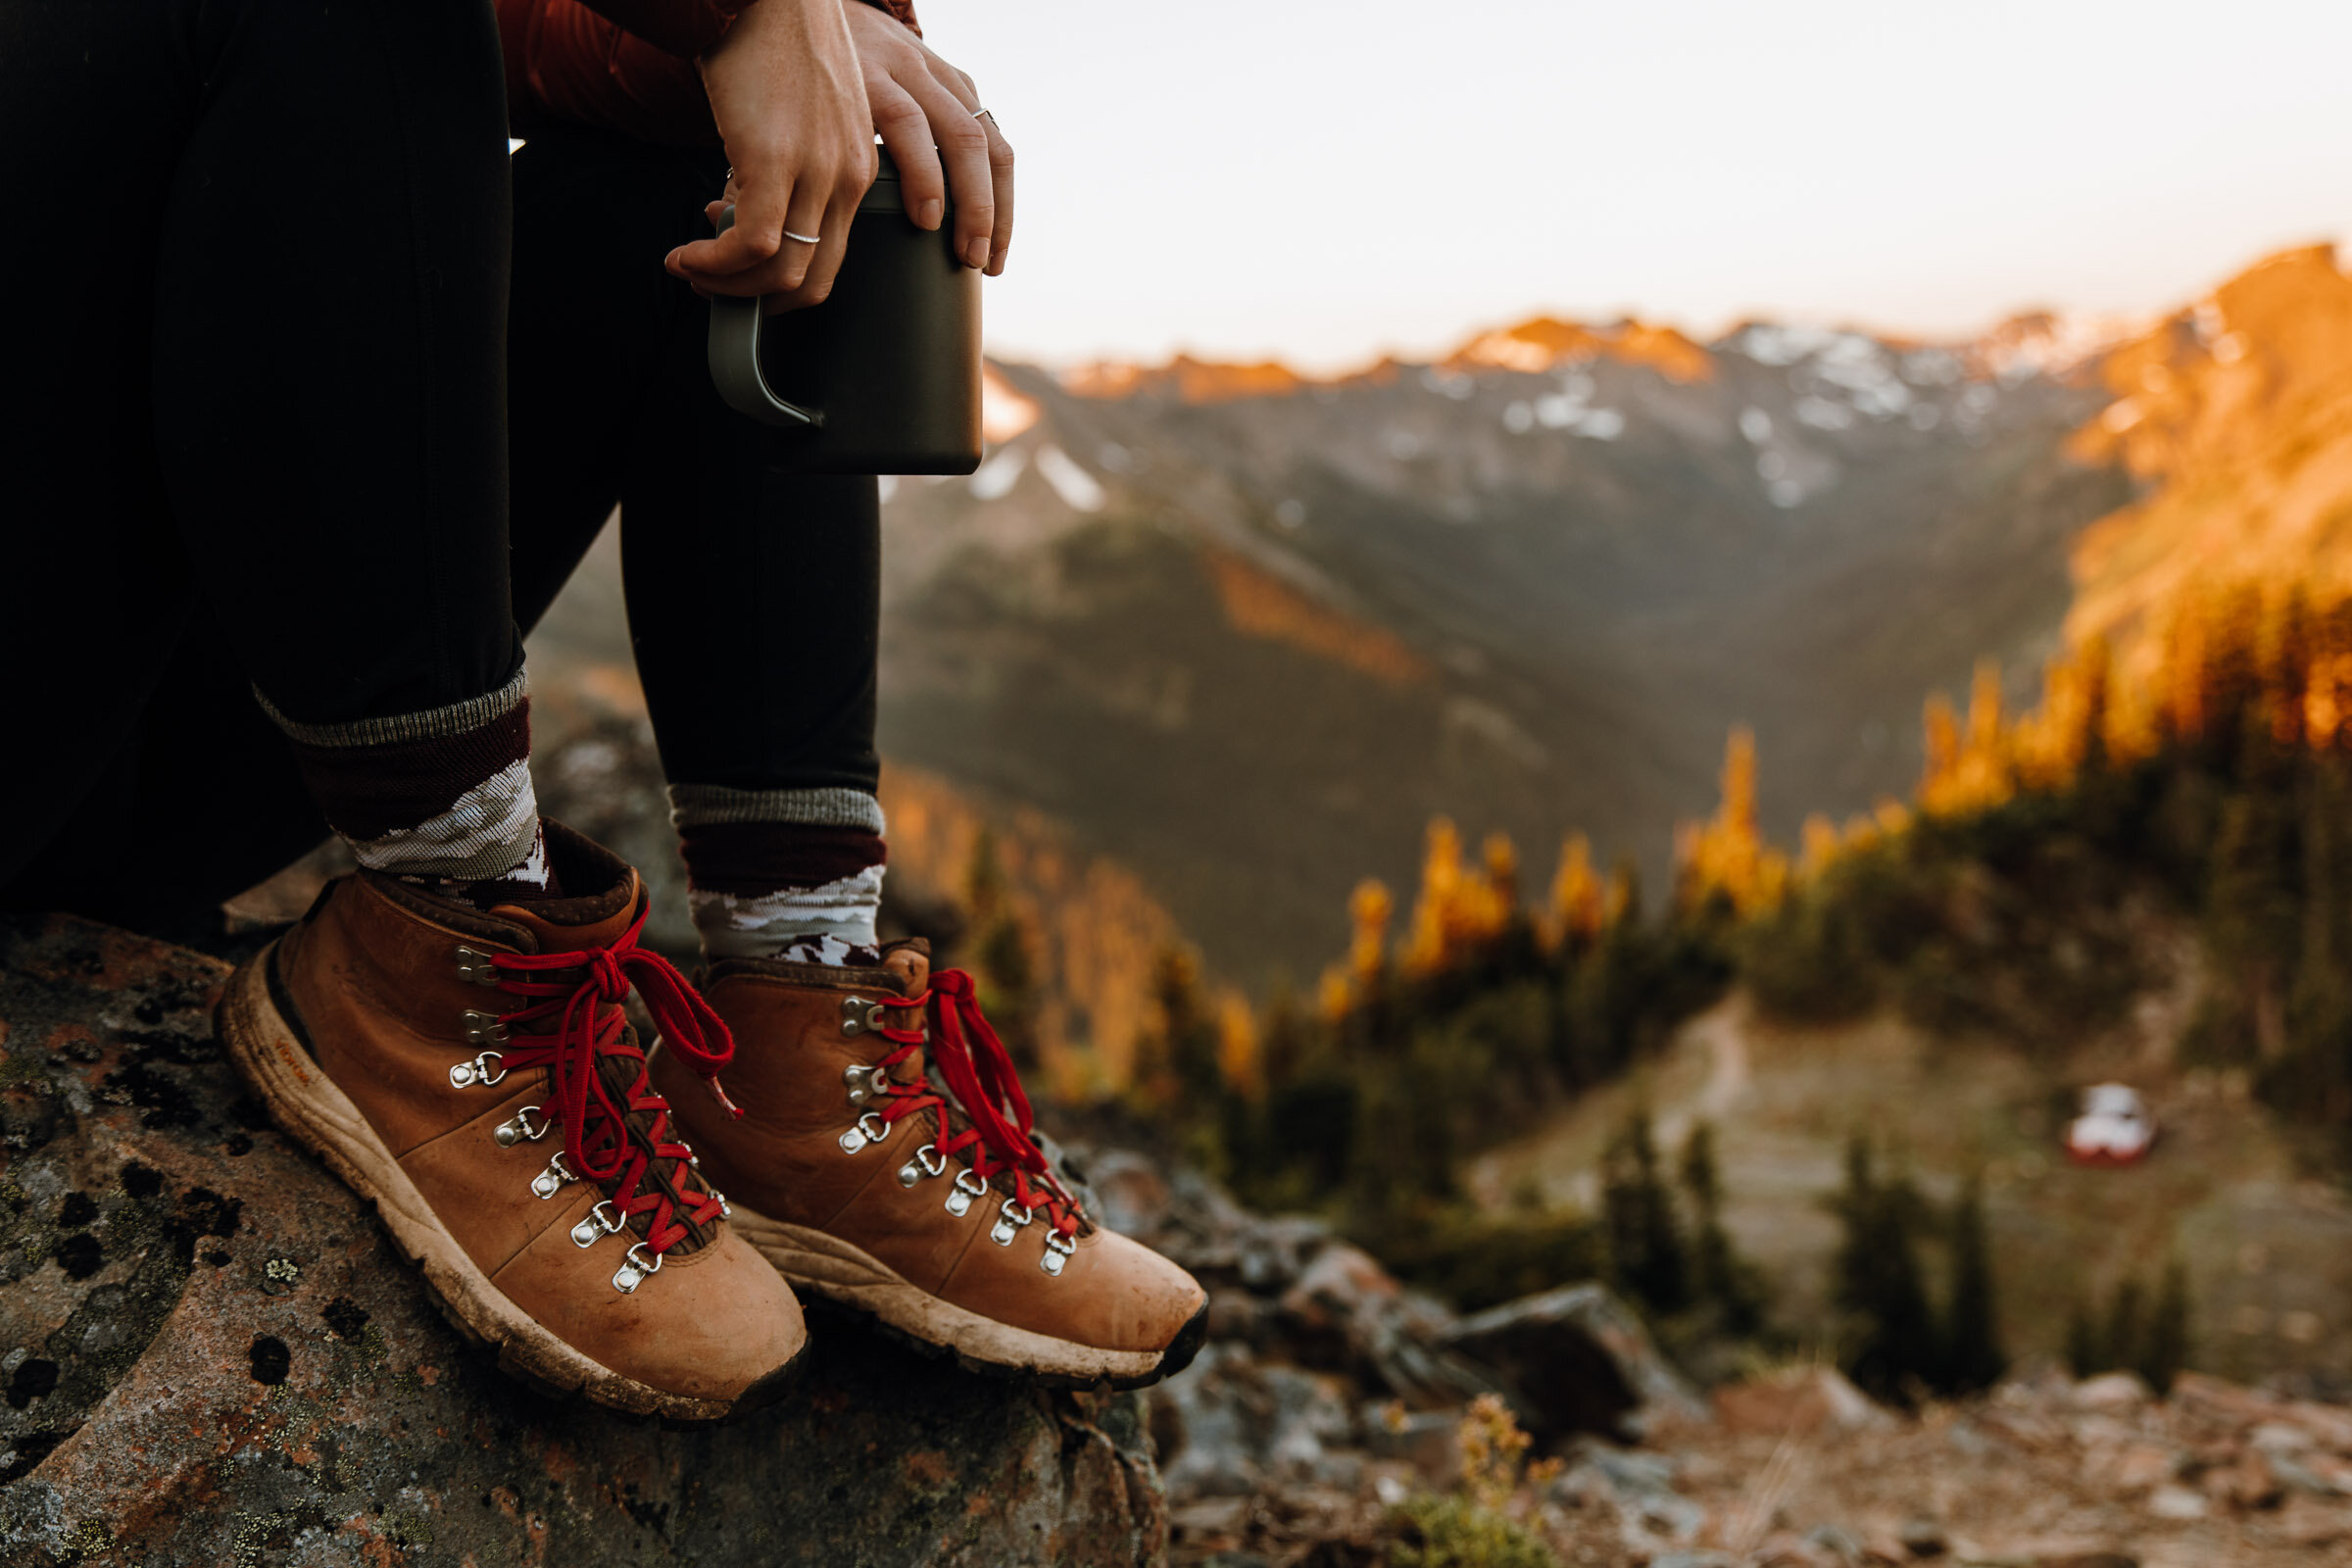
Mug: For coffee, tea, or a meal. You can always drink out of your pot to save a couple of ounces, but a lightweight, insulated mug to keep my coffee hot is worth the weight to me.
Clothing
Head
Baseball Cap
The sun is no joke out there! Because it’s mostly ridge line and above the tree line, there’s little shade in most places. Come prepared!
Beanie
It can get chilly at night and most of your heat escapes through your head. Pack a beanie to trap it.
Bug net. If you’re hiking earlier in the summer, definitely bring one of these along if you want to spend any time outside of your tent! The bugs are fierce.
Chapstick with SPF
Body
T-Shirt or Tank – Here’s the Amazon tank I wore the whole time!
Quick-Dry Sports Bra
Waterproof Windbreaker
I brought my Cotopaxi and used it mainly for mosquitos.
Insulating Layer (like a puffer)
It ended up being too hot to wear my REI puffer, so I used it as a pillow instead. Good to be prepared just in case!
Bike Shorts
I prefer biker shorts to eliminate thigh chafing like these ones from Amazon.
Leggings with Pockets
I went during August when it was pretty hot, so I brought my Naked Feeling leggings from Amazon in case I needed an extra layer for either warmth or mosquito protection.
Hiking Pants (For at night and mosquitos)
Feet
Smartwool Socks
Yep, you bet I was rocking From the Ground Up Socks’ Olympic National Park socks the whole time.
Hiking shoes or boots
I LOVE my Danner Mountain 600s. I wear these on every.single.adventure, and they did me proud on this hike too!
Sandals
Once you’ve finished hiking for the day, you’ll want some open-toe sandals for around camp. I use these rubber knock-off Birkenstocks from Amazon–I can wear socks with them, and they’re super comfortable too!
Health + Hygiene
Toothbrush + Toothpaste
We packed enough zero-waste Bite toothpaste tablets for each day–they’re dry, small, portable, and precise, which make them great for backpacking!
Menstrual Cup if it’s that time of the month
Toilet Paper or Wet Wipes
Stall Mates are compostable multi-use wet wipes. Use them for a hippie shower or to wipe your booty. But just because they’re compostable doesn’t mean you should bury them! Pack them out with you if you’re digging a poop hole, or leave them in the privies at designated High Divide campgrounds.
Other Items
Duct Tape
Paracord
Bug Spray
We brought Sawyer’s bug spray lotion for the trip. I usually spray bug spray into my hands and rub it onto my body anyway, so having a lotion made it super quick and easy! It just makes sense. Make sure to rinse your hands before snacking though… it doesn’t taste good and it’s so not good for you.
Sunscreen
Kinfield’s SPF 35 mineral sunscreen called Daily Dew is lightweight, water resistant, and can be used as a daily moisturizer too! It's reef safe and its bottle is made from consumer-recycled plastic.
Whistle
Permits
ID