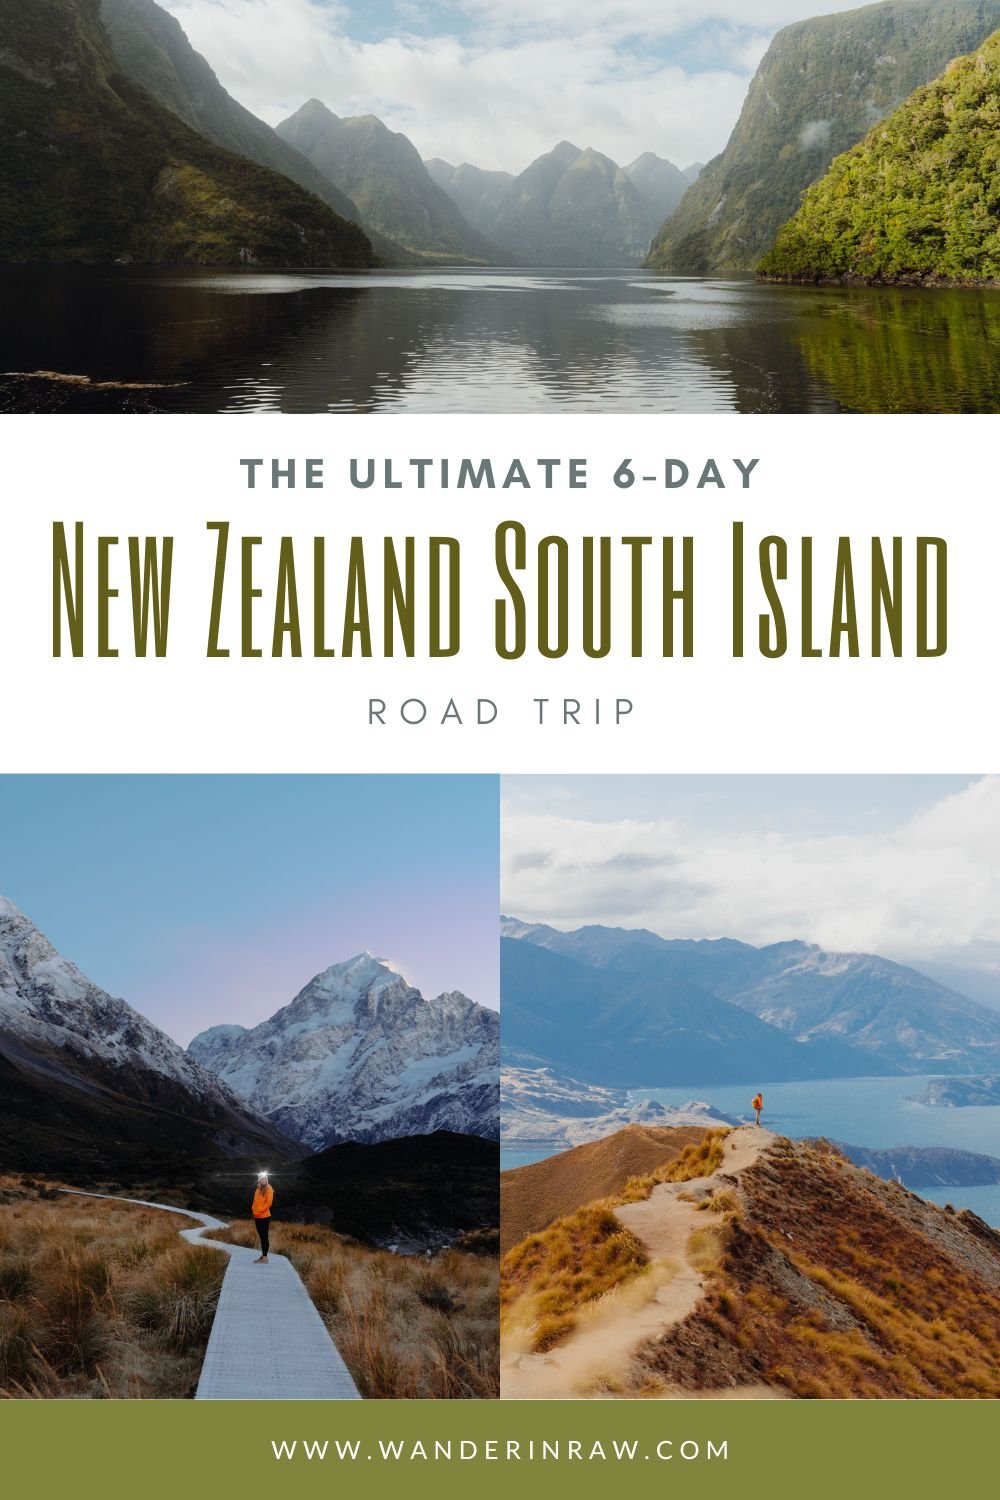
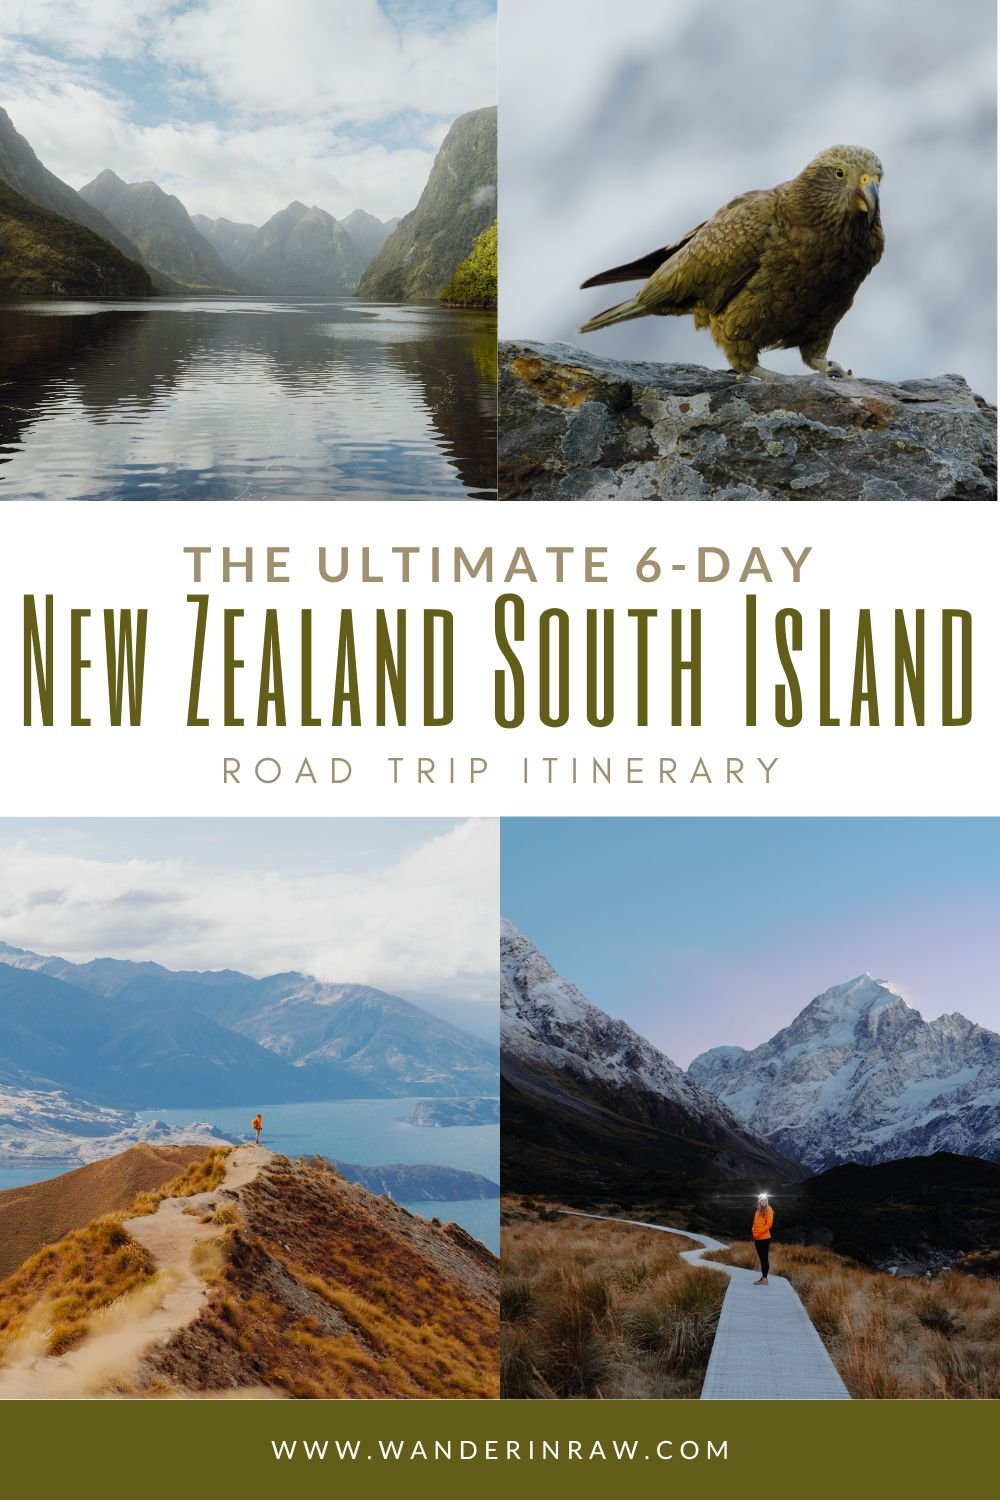
The Ultimate 6-Day New Zealand South Island Itinerary
New Zealand’s South Island is an adventurer’s paradise. I’m talking rugged mountains, pristine rivers, coastal wonders, incredible wildlife, and everything in between. If you’re on the verge of booking a New Zealand adventure, let this be your sign to DO IT. This New Zealand South Island itinerary is the combination of what I did, but in the order I wished I did it, after spending 2.5 months adventuring around this epic country. Let’s lace up our boots and hit the trail, shall we?

Hey, friends! This post may contain affiliate links to some of the things I love, and I'll receive a commission upon any purchases made through those links at no expense to you.
Table of Contents
At a Glance:
Arrive: Queenstown airport
Depart: Christchurch or Queenstown airport
Towns you’ll experience: Queenstown, Glenorchy, Te Anau, Wanaka, Mount Cook Village
National Parks you’ll experience: Fiordland National Park, Mount Aspiring National Park, Mount Cook National Park
Best time to go: November through April
Official languages: Māori, English, sign language
Who is this itinerary for?
If you’re someone who enjoys the outdoors and wants to see a solid sampling of some of the South Island’s most epic landscapes in a short amount of time (6 days), sometimes with a hike or boat involved, then this South Island road trip itinerary is for you! The longest hike in this itinerary is 10 miles.

Remember, You’re on Maori land!
The first known human to set foot on New Zealand was a man named Kupe who sailed across the Pacific using currents and stars to guide his way nearly 2000 years ago, according to Māori oral history. Then came the colonizers. Captain Cook arrived in 1789, shooting Māori people on the spot. In 1840, the British tricked the Māori people into signing the treaty of Waitangi. The principles were unclear and many Māori chiefs signed being uncertain, others refused, and many didn’t have the chance to sign. Once signed by a few, the British claimed the agreement applied even to the chiefs who didn’t sign it. By signing, Māori cede the sovereignty of New Zealand to Britain; Māori give the Crown an exclusive right to buy lands they wish to sell, and, in return, are guaranteed full rights of ownership of their lands, forests, fisheries and other possessions; and Māori are given the rights and privileges of British subjects.

The New Zealand Wars broke out between 1845 and 1872 over land disputes and eventually a misunderstanding that Māori were joining forces and refusing to acknowledge the Crown. 18,000 British army troops supported by artillery, cavalry and local militia, battled about 4,000 Māori warriors. Talk about an unfair advantage. The Māori held their ground for a while, but no one could win a battle that type of power imbalance. 1,800 Māori lives and 800 European lives were lost.
Protests began in the 1960’s in an effort to regain the land and culture europeans stripped from them. In 1975 Dame Whina Cooper led Māori from all over the country on a walk from Te Hāpua to the nation’s capital, Wellington, which is the entirety of the North Island, over ongoing land alienation.

The Waitangi Tribunal was established in 1975, designed to address perceived breaches of the Treaty of Waitangi, which provided a forum for the expression of Māori protest and anger over the impact of Euruopean colonization. It greatly helped return to some assets to tribes.
The Māori people have fought long and hard for influence in government, the right to their stolen land, and the resources to keep their culture alive. There’s still a long way to go, and the community still suffers from the affects of oppression.

FAQ
-
This itinerary requires a minimum of 6 days.
-
It depends on what type of trip you’d like to have! I’ve visited in both summer and winter and both offered something a little different, but if you’re not a die-hard snowboarder or skiier and want the most bang for your buck, I’d recommend visiting between November and March (New Zealand Summer–southern hemisphere things) to have all the trails accessible and free of snow!
-
Great questions, I’m glad you asked! I’ll cover them all below.


Map: South Island, New Zealand
Know Before You Go
Entry requirements:
USA citizens need to fill out an NZeTA application a few days prior to leaving. This allows you to spend up to 90 days in New Zealand, and the airport staff will need to enter the NZeTA number and expiration date into their system at check-in.
Learn from my mistakes and do NOT do this last minute. My partner’s was approved in a matter of minutes, but mine took 3 days. They say it can take longer too. Save yourself an anxiety attack and do it ahead of time. Go through the app for a better user experience (and a potentially faster approval period).
They also require you to have a return flight. They didn’t ask us for proof, but it could happen.
Wall outlets:
New Zealand uses a Type 1 plug (same as Australia and other Pacific Islands). Snag one before you go!

Currency/Credit Cards
The currency is the New Zealand Dollar, but most established places accept credit cards, also referred to as EFTPOS. There are surcharges for credit card transactions. Pro tip: Insert your chip into the machine to yield a smaller surcharge than tapping it. Don’t ask me why!

SIM Cards
If you’re heading to New Zealand (or honestly, anywhere in the world), GigSky is hands-down my favorite eSIM for staying connected on the go. From misty mountain passes to tiny fishing villages, it's helped me stay connected in some of the most unexpected places. No SIM swaps, no unexpected travel charges, no stress, just a quick download on their app and boom, I was online and ordering my airport Uber in seconds. Plus, they’ve got a free 100MB trial to get you started! It’s super easy, reliable, and perfect for adventurers who want to share their journey in real time.
Pro tip: Set up a WhatsApp account with your current phone number before leaving so you can still text friends and relatives and login to your online accounts when you need to be texted a two-factor authentication code.

Film Photographer?
Bring all your film with you, especially if you’re a Portra lover like me! Film is very expensive in New Zealand and pretty hard to find. Ultramax is pretty common, but Portra is nearly impossible to find. Wānaka Camera Shop does have Portra 400 available only because they partner with a US company to get it, but man, is it expensive! Avoid the headache and hole in your pocket and bring your own (but don’t forget to hand-check it!).

Car Rentals
You’ll need some sort of your own transportation to make the most of your trip. Trust me. Having that flexibility (especially if you’re into photography and want to catch a few sunrises or sunsets), a car or van is key. And many of the most beautiful views and stops aren’t a destination, but rather just roadside bangers.
We booked with Discount Car Rentals Queenstown a month ahead of time and found that was a good time to find deals! EZ Rentals, and Go Rentals are two other great New Zealand car rental companies. You can search for the best deals on TripAdvisor here! Prices skyrocketed anywhere once we were a month out from our trip, so I’d recommend reserving as soon as possible.

Van Rentals
Van-lifeing it is a BIG thing in New Zealand and is easily the best way to see as much of this beautiful country as possible. New Zealand is extremely camper friendly, and even has a bunch of advertised free camping sites as long as your vehicle is self-contained, which is a certification used to show that a campervan can contain water waste for up to three days. They just want to make sure you’re not hurting the environment is all!


There are plenty of van companies to choose from, but demand is very high and prices can be ridiculous. Definitely be sure to book your vehicle as early as possible!
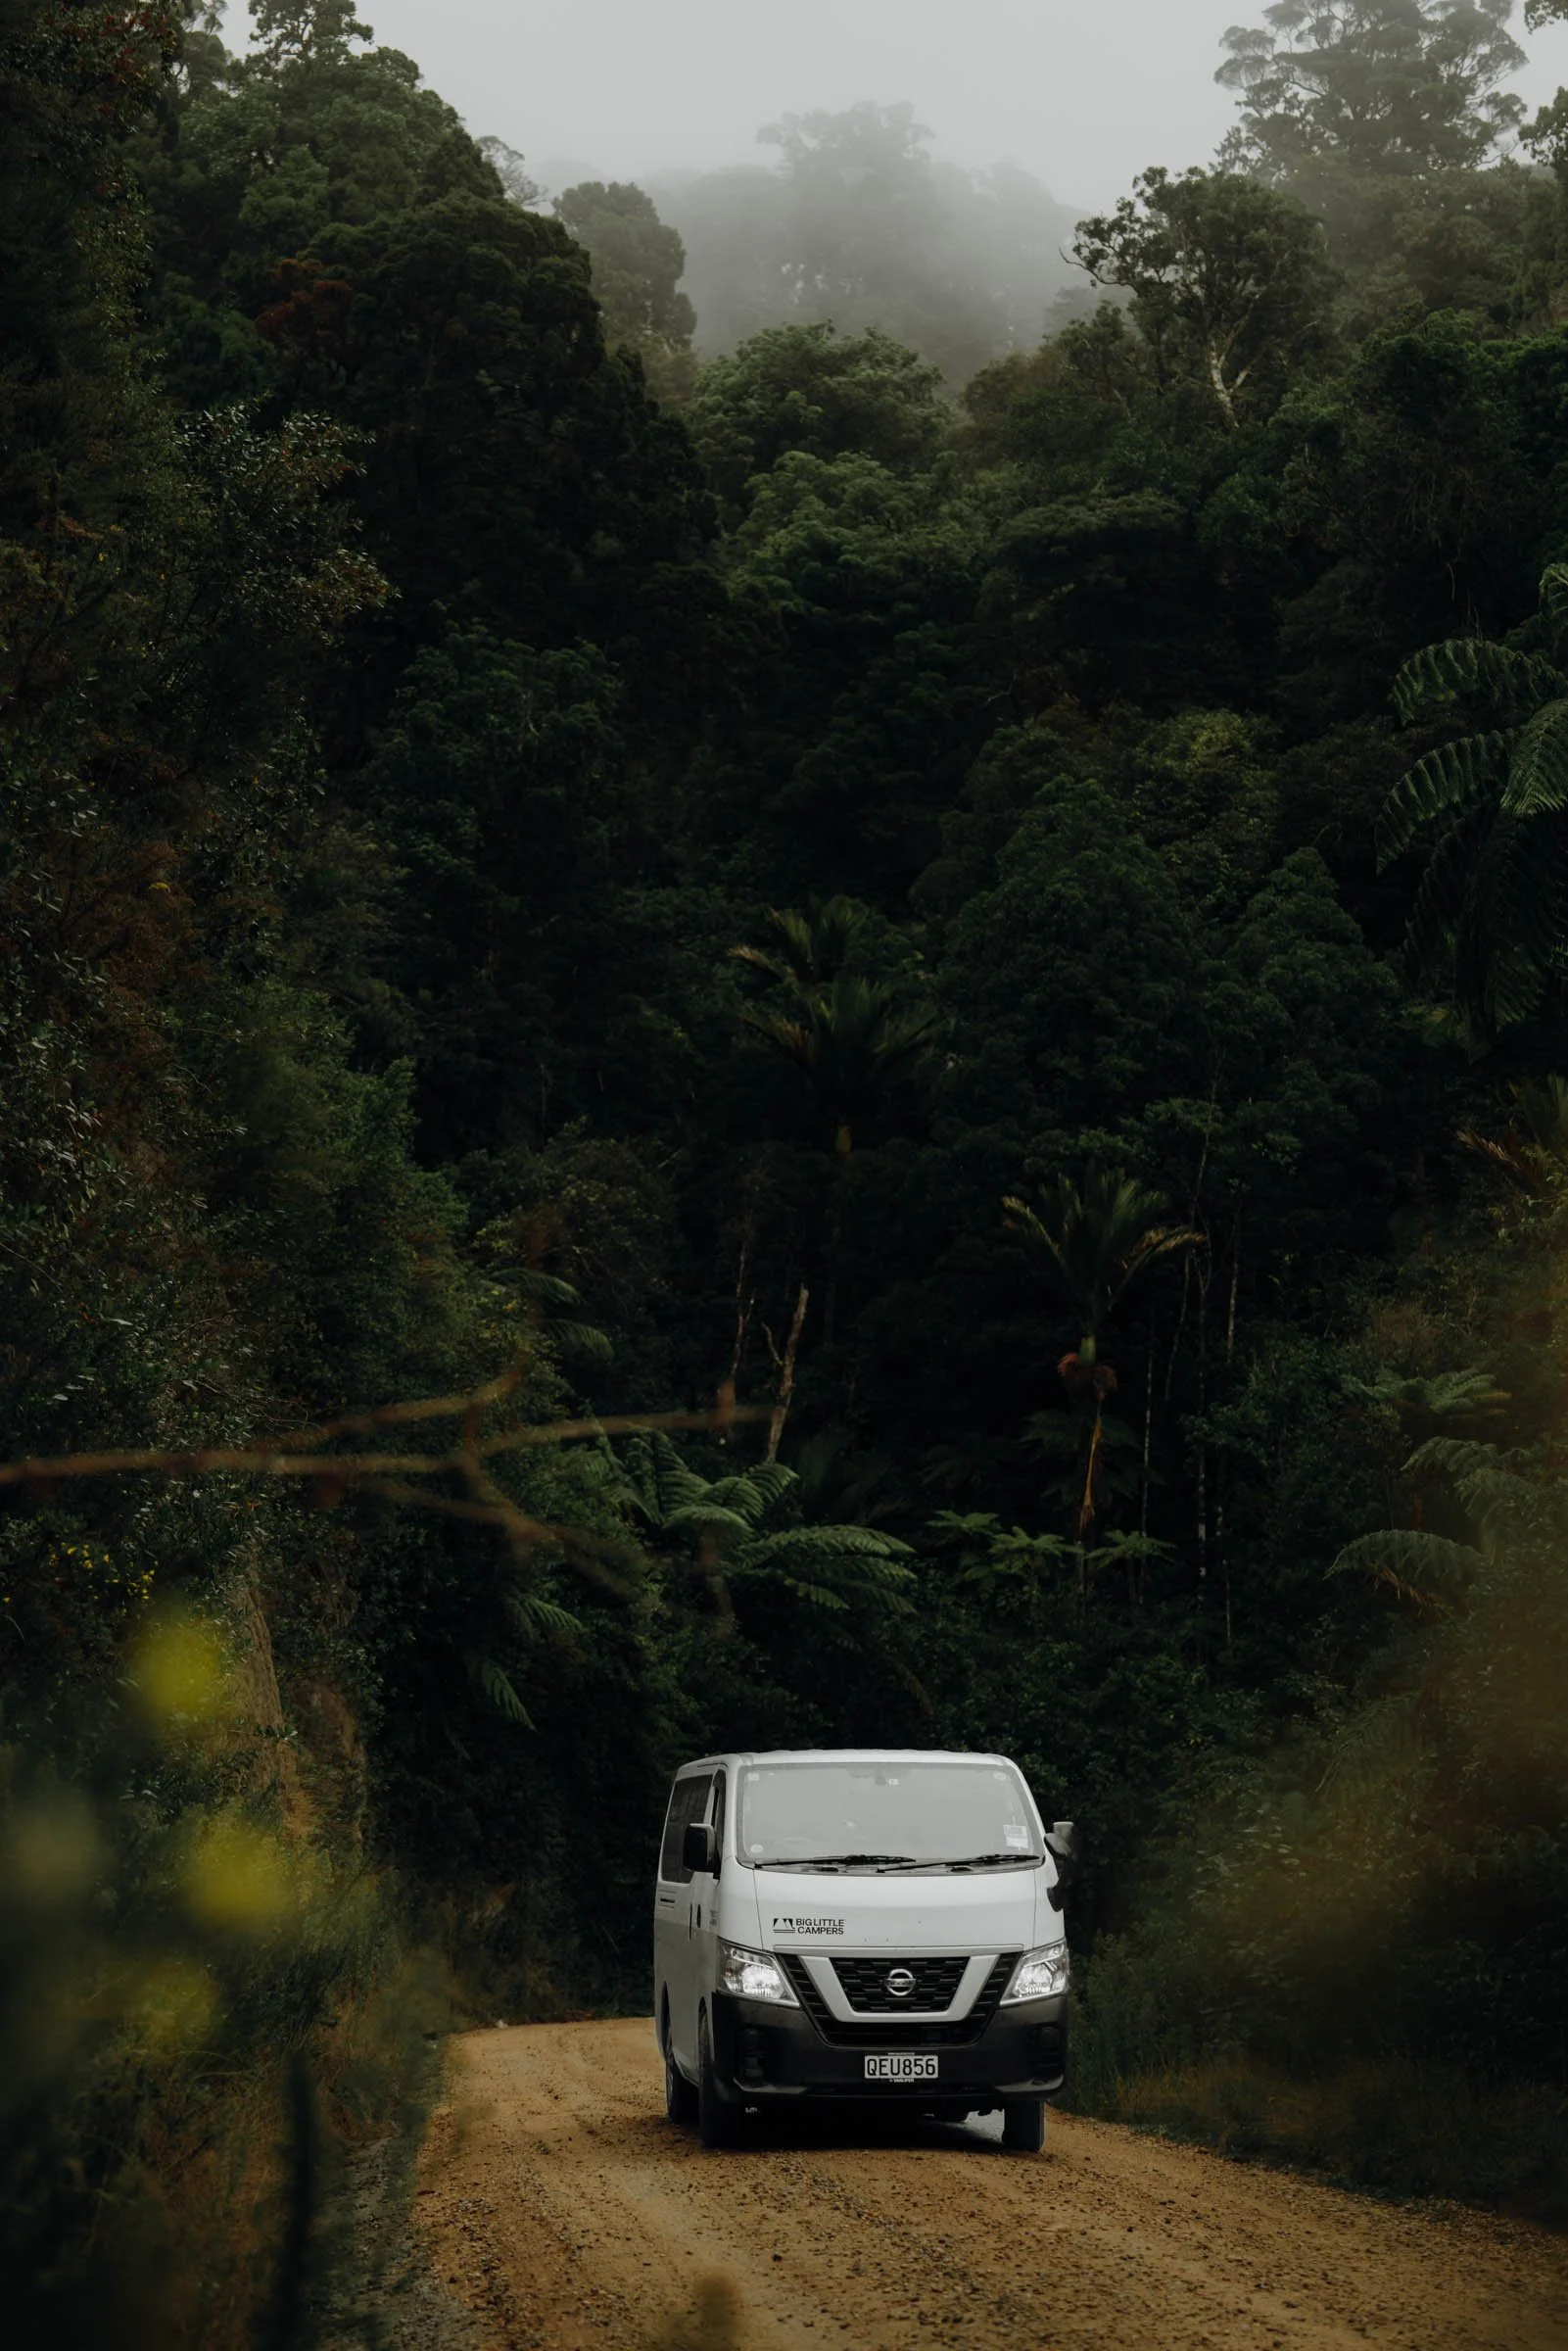
I went with Big Little Campers, but here are a few more I saw throughout my New Zealand adventure:

Helpful apps to find free and paid camping:

What to Pack for New Zealand: Summer-Fall
Raincoat. I wore my REI XeroDry raincoat.
Puffy or warm mid-layer. I love my Stio puffy! While it’s warm in the sun, the shade feels about 10 degrees colder. I wore my puffy almost every day at some point!
Beanie or a warm hat. Especially if you’re hiking in the dark.
Baseball cap. The sun is no joke. Protect yourself. Which brings me to my next item.
Leggings. Glyders are my favorite!
Base layer long-sleeve shirt: I wore The North Face Summit Series Pro on the chillier days!
Jeans
Hiking sports bras/tops: My Girlfriend Collective white sports bra is my favorite thing to hike in!
Everyday tanks/tees for in towns.
Everyday long-sleeves for in towns.
Quality socks. Your boots are sometimes only as good as your socks. I’d recommend merino wool hiking socks.
Quality hiking boots or shoes. Preferably ones you’ve broken in already. Do your soles a favor and bring along good boots! I wore my Danners, per usual.
Blundstones. I found myself wearing these on chillier/rainy days when I didn’t want to wear my hiking boots.
Slip-on shoes. On warmer days (when I wasn’t hiking) I loved freeing the toes with my Birkenstocks.
Water bladder. I love the easy of drinking through a hose so I don’t have to stop on the trail to pull out a water botle. I love my Osprey!
Camera. I brought along my Sony a7r III, Sony 24-70 GM II lens, and my Tamron 70-300mm lens, as well asmy Canon 38m II point-and-shoot film camera and my Canon AE-1 film camera with a 24mm lens.
Headlamp. If you’re doing any sunrise or sunset sends, this’ll come in handy! I bring along my Black Diamond Spot 400.
Sunscreen. Self explanatory. I love my Kinfield!
Lightweight microfiber towel. If you’re van-lifeing it or staying at hostels, or even just going to be spending some time by the water, it’s nice to have a lightweight, packable, quick-drying towel. I love my Nomadix Ultralight towel!
Travel Backpack. I like to pack carry-on only, so I always have a backpacking backpack on my back, and my camera backpack on my front, which is what I use as a day pack on the trail! I had my Shimoda X30 camera backpack that fit everything nicely.


6-Day New Zealand South Island Itinerary
Day 1: Arrive Queenstown + Explore Town
Overnight: Queenstown
Kia Ora! Welcome to Queenstown! This adorable little lakeside mountain town is definitely one you’ll want to spend some time in. It’s a whole vibe and a half with plenty of fantastic shopping, a swim-worthy beach, and enough good food to keep your bellies full and your stoke high. If you underestimated the weather and could use a few more layers, maybe lost a hiking shoe, or ripped your backpack, Queenstown’s got ya covered.
My favorite Queenstown restaurants and shops:
For outdoor-wear:
For gifts:
Frank’s Corner: Beautiful handmade in New Zealand gifts or treat yourself items. Mugs, maps, wool clothing, yarn, jewelry, etc. I bought myself a cute little jade bracelet!
The Gift Center: Handcrafted Maori gifts, art, and jewelry.
Restaurants: There are so many delicious options, here are just a few that I tried and loved!
Fergberger (and the Ferg Bakery and bar while you’re at it!): It’s a popular burger spot, and for good reason. This also means the line gets pretty dang long. I’d recommend going for lunch or in off hours to avoid the crowd.
Margo’s: Mexican food with a twist. I had their fish taco and al pastor bao bun. It was delicious!
Sal’s NY Style Pizza: Delicious thin-crust pizza by the slice. Grab a tasty slice and head to the grassy waterfront park out front for a picnic!
Monster Chicken: Straight FIRE Korean friend chicken. Some of the best I’ve had. It’s down in the bottom of the mall in the food court, and man is it worth it.

Ben Lomond Track
Feeling up for a hike?
There’s a beautiful and relatively challenging hike just behind town: the Ben Lomond Track. I’d recommend taking the gondola up to save 2+ miles and 1000+’ of elevation gain. It then becomes a 6.3-mile round-trip hike up to Ben Lomond Peak with about 3,313’ of gain. If you start from Queenstown, it’s about 9.3 miles round-trip and 4,700’ of gain. Sheesh!!! Why make it harder on yourself?
It’s a thigh-burner for sure, but the views are incredible! We were feeling lazy, and had a big day ahead of us, so decided to call it quits at the Saddle, and were super content with our decision. The views were top.

If you’re feeling like something a little less challenging but with an epic reward, check out Lake Alta. It’s an awesome way to stretch those legs after your long journey to New Zealand!
Best Time to Go for Photos:
Sunset if you’re shooting digital! It’ll set the mountains on the opposite side of the lake aglow on a clear day. Or, if you’d rather have the trail lit in your photos (or if you shoot mostly film), I’d consider going for sunrise instead.
Where to Stay in Queenstown:
Where we stayed: The Alps Two-Bedroom + The Pinewood Lodge
Budget: Pinewood Lodge
Mid-range: Central Private Hotel
Luxury: Kamana Lakehouse

Day 2: Milford Sound + Lake Marian.
Overnight: Te Anau
Milford isn’t called the 8th Wonder of the World for no reason!! Driving into Fiordland National Park is a dream in and of itself rain or shine (pray for rain), but don’t miss the opportunity to get on the water for an up-close experience with this beaut. You’ll have the chance to see the rare Fiordland Crested Penguins, dolphins, endless waterfalls, venture out into the Tasman Sea a bit, and even shave 10 years off your life with a splash from Stirling Falls.

Fun fact: did you know Milford isn’t actually a sound? It’s technically a fiord, but the locals didn’t have the word for it then (since it’s a Scandinavian term), and called it a sound instead. Rather than changing all the maps, the marketing, and everything else that comes with a name change, they decided to stick with the name “Milford Sound.”

A sunny day on the water is always a good day, but trust me when I say try to book your Milford experience on the rainiest day of the week if possible. I know, opposite from your instincts right? Get this: you know those cliffs that protrude straight out of Milford? Well, when it rains, thousands of little temporary waterfalls cascade over those same cliffs. Straight magic.
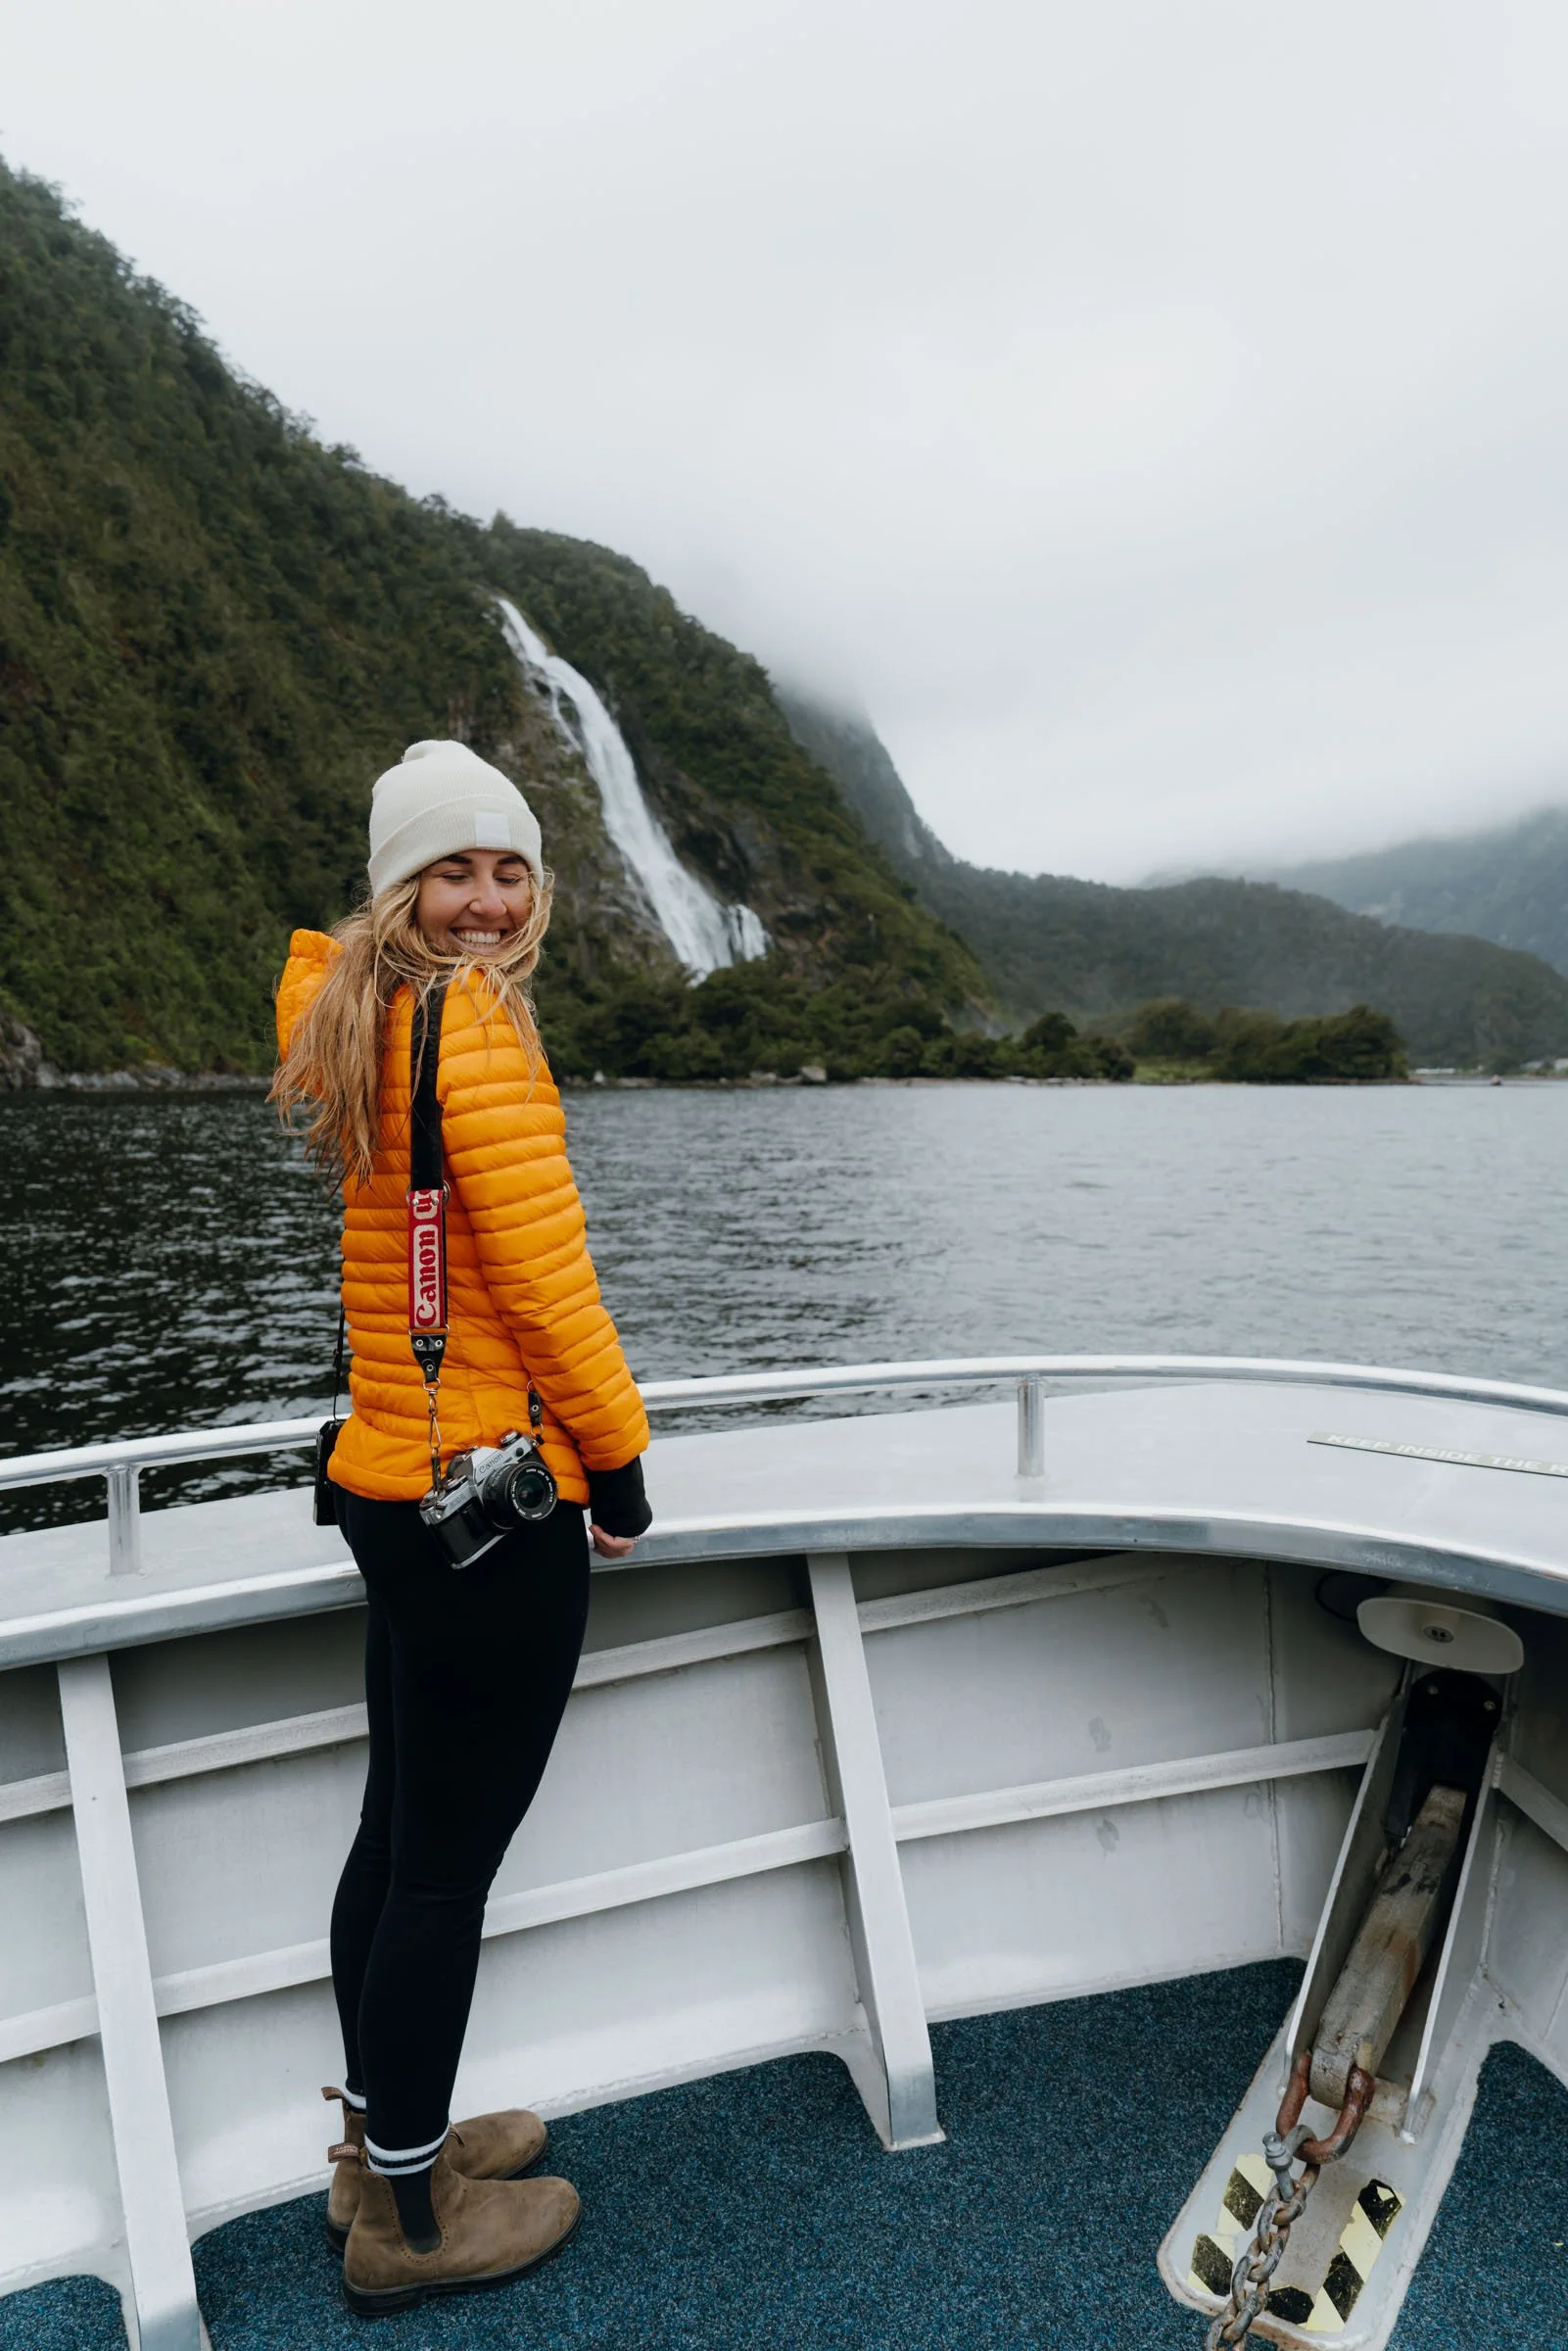
There are a few different companies you can go through and they’re all just slightly different. I’d recommend a smaller boat for a more intimate experience with the Sound and the opportunity to get much closer to the walls and falls. Most have coffee, tea, and snacks and refreshments for purchase. Some even have an included lunch.

We booked this experience with Mitre Peak Cruises and loved it! It does require you to have your own car to meet at Milford Sound’s dock. You’ll also need to pay a parking fee and walk 10-15 minutes to the meeting point. Make sure you calculate this into your travel time, especially since it takes 3.5-4 hours to drive from Queenstown.

Milford Sound cruises:
From Milford Sound:
Milford Sound 2-Hr Small Boat Scenic Cruise | ~$90 USD/pp
Drive your own car and park at Milford Sound’s Visitor Center ($10 NZD/hr) and walk the 10-15 minutes to the docks.
Enjoy a 2-hour cruise down Milford Sound, out to the Tasman Sea and back, stopping at waterfalls, admiring New Zealand Fur Seals, looking for whales and dolphins, and taking in the rainforest, accompanied by a naturalist’s commentary.
Boutique Small Boat Cruise | ~$90 USD/pp
Drive your own car and park at Milford Sound’s Visitor Center ($10 NZD/hr) and walk the 10-15 minutes to the docks.
Enjoy a 2-hour cruise down Milford Sound, out to the Tasman Sea and back, stopping at waterfalls, admiring New Zealand Fur Seals, looking for whales and dolphins, and taking in the rainforest, accompanied by a naturalist’s commentary.
Cruise and Kayak Milford Sound | ~$180 USD/pp
Get up close and personal with an above, on, and below Milford Sound adventure.
Start with a cruise experiencing Milford Sound by boat before then heading to Milford’s Underwater Observatory to see the magic happening below the surface. Learn about the history, geology and wildlife of Milford Sound and visit New Zealand's only floating underwater observatory to view rare black coral.
Finally, paddle out into the fiord in your very own kayak for up to 90 minutes for an intimate experience with the 8th Wonder of the World!

From Queenstown:
Milford Sound Coach + Cruise Full Day Trip: ~$150 USD/pp
Get picked up in Queenstown or Te Anau and enjoy a few stops to take in the epic sights along the beautiful highway to Milford Sound (takes about 5-6 hours with stops).
Cruise along the sound and enjoy all the epic scenery and wildlife from a two-story catamaran with 3 viewing decks and a glass roof.
Milford Sound Cruise + Coach Day Trip | ~$150 USD/pp
Get picked up in Queenstown and enjoy a scenic bus ride on a luxury coach with a glass roof to Milford Sound. You’ll stop at a cafe and a few photo spots along the way.
Enjoy a 2-hour cruise on a beautiful vessel with large windows and spacious decks for optimal views.
Milford Sound Full Day Trip by Plane and Boat | ~$400 USD/pp
This trip looked so cool! But it’s a bit pricey so we opted out. Let me know if you do it!
Hop on a small plane in Queenstown and enjoy Mt. Aspiring National Park and Milford Sound from above before embarking on your 2-hour cruise.
You’ll return to Queenstown by air as well.

From Te Anau:
Milford Sound + Coach Day Trip | ~$130 USD/pp
Hop on a coach for the scenic drive to Milford Sound and enjoy a few scenic photo stops along the way.
Embark on a 2-hour cruise to experience all Milford Sound has to offer!
Milford Sound Coach Tour + Cruise | ~$115 USD/pp
Hop on a coach for your scenic drive to Milford Sound with photo stops and walks along the way.
Embark on a 2-hour cruise to experience all Milford Sound has to offer! Lunch is included.

Best Time to Go for Photos:
I’d recommend taking the earliest boat. Catch sunrise from the docks, and hop on your cruise during that gorgeous morning light! Clear or not, you’ll also get the entire afternoon to check out more adventures in the area!

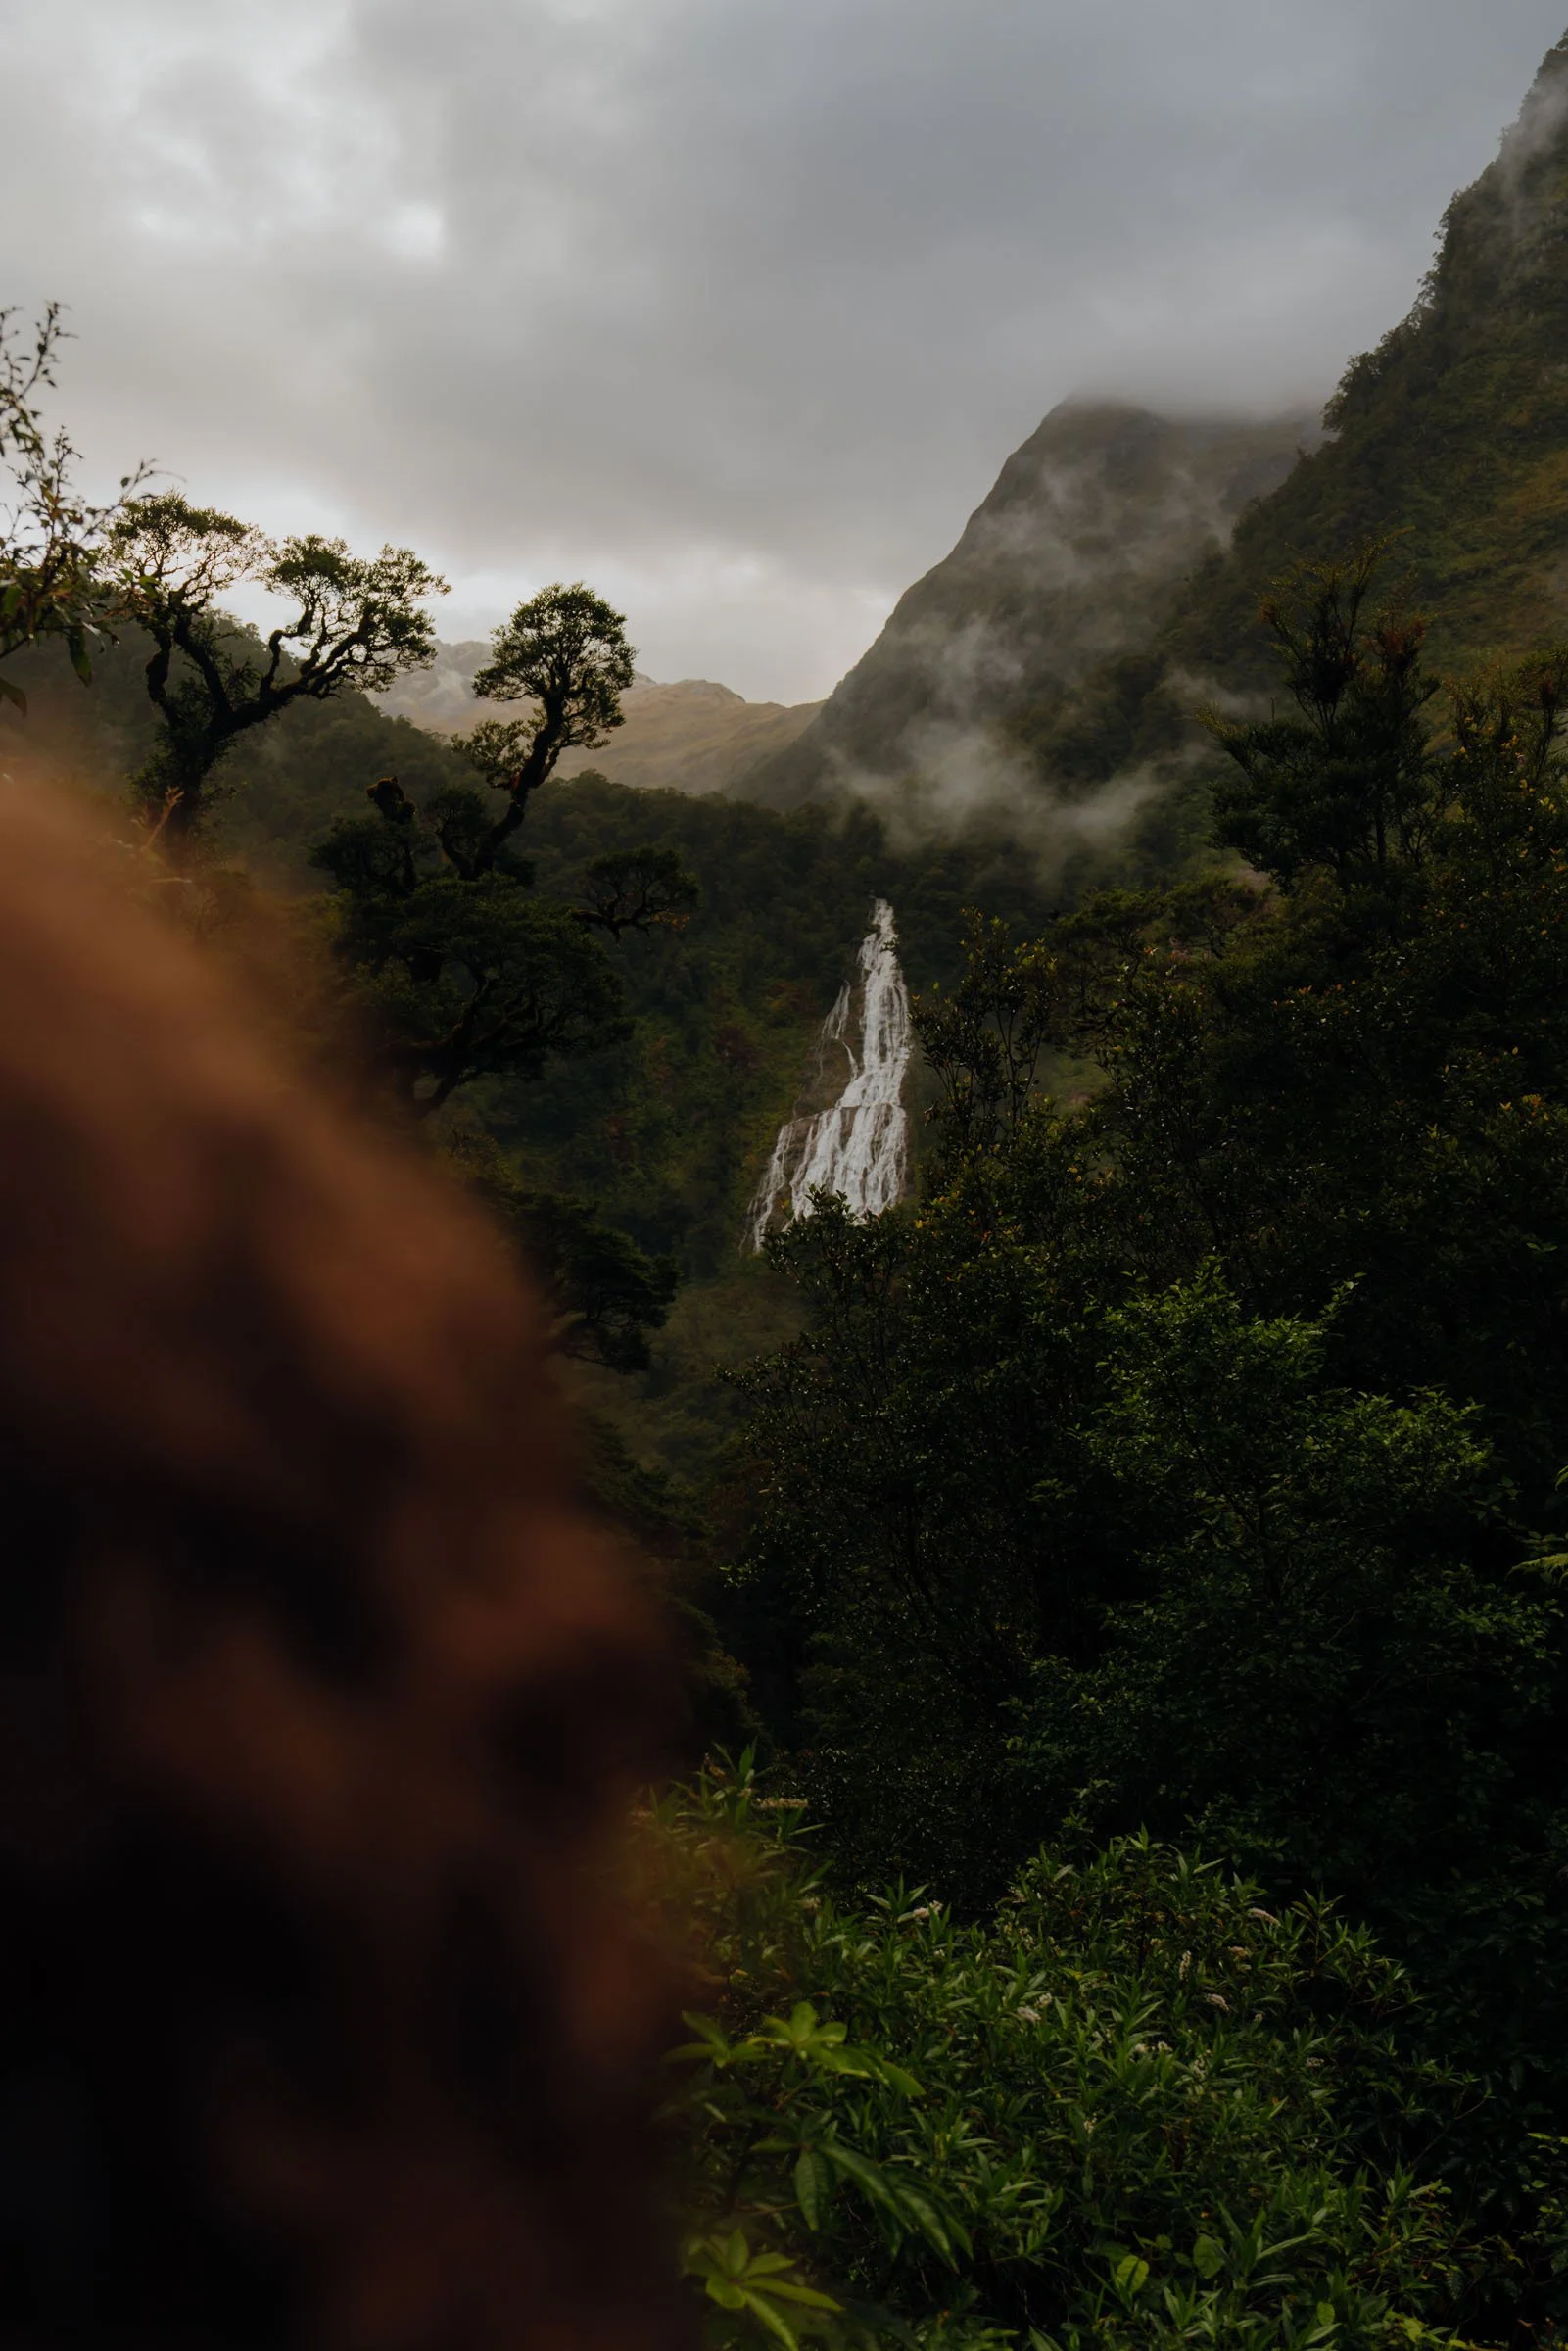
Lake Marian
That same afternoon, we decided to check out Lake Marian and got incredibly lucky with the conditions.
The trail is 3.8 miles round-trip and about 1,312’ of gain. I’ve found that most of New Zealand’s South Island hikes tend to be pretty steep and require careful footing. This was no exception.

It starts pretty flat along the river, turns to boardwalk for a second (such a pretty spot), and gets steep pretty quickly after that. You’ll find yourself walking over rocks and mud, tree stumps and roots, but don’t forget to look up! This temperate rainforest is BEAUTIFUL.


It flattens out again near the top, you’ll walk past a toilet, and then BAM. There she is. Lake Marian in all her glory. A waterfall greets you across the way and to the left? Sheeesh. What are you waiting for. Strip down and dive in! The water is fineeee.

Best Time to Go for Photos:
Sunrise if you can swing it. But midday photos here are beautiful too! Since we only had one day to both Milford and Marian, we opted for an afternoon hike and still found the conditions to be absolutely gorgeous. We went in March and the sun dipped behind the mountain at about 5 p.m.


We stayed in Te Anau to shorten the drive, and caught a gorgeous sunset on the way back home!
Where to Stay in Te Anau:
Where we stayed:
Budget: Bob and Maxine’s Backpackers
Mid-range: Asure Explorer Motel Te Anau
Luxury: Fiordland Lodge
OR stay right on Milford sound at the Milford Sound Lodge!

Day 3: Doubtful Sound + Drive to Wanaka
Overnight: Wānaka
All I needed to hear was “fiord,” “super remote,” and “more wild than Milford” and I was DOWN. Doubtful Sound requires a bit of a trek to see but it felt so special having the opportunity to experience this epic part of Fiordland National Park.


To get there, you’ll need to make your way to Manapouri where you’ll then board a catamaran to ferry you across Lake Manapouri. On the other side, you’ll hop on a coach for a 45-minute ride over Wilmot Pass through rainforest with informational commentary, making a stop or two along the way for photos.
Only then will you hop on board your last catamaran for a 3-hour cruise of Doubtful Sound. Think Milford, but more massive. And more green. We saw those same little adorable New Zealand Fur Seals, a few magical waterfalls, and even got lucky with a pod of dolphins!


I would’ve LOVED to do the overnight cruise, but it just wasn’t in the cards. If you have the opportunity, I hope you take it! Let me know how it goes!
If you go the day-cruise route (and drove yourself) you’ll be back in Manapouri at 2:30 p.m. Now for your 3-hour drive to Wānaka! If you arrive before sunset, consider checking out the legendary Wānaka Tree. Mind you, it’s just a tree, but it’s kinda pretty!

Best time to go for Photos:
Because this is kind of an all-day thing, you don’t really have much leeway with timing. The first ferry leaves the dock at 7:30 a.m., and because we went in March, we got a gorgeous sunrise from the boat, and even a rainbow! Real NZ recently added a second ferry at 10:30 a.m. to accommodate additional passengers since the tour is becoming more and more popular, but this also means you’ll receive a shorter cruise to make up for time.
Where to Stay in Te Anau:
Budget: Bob and Maxine’s Backpackers
Mid-range: Asure Explorer Motel Te Anau
Luxury: Fiordland Lodge
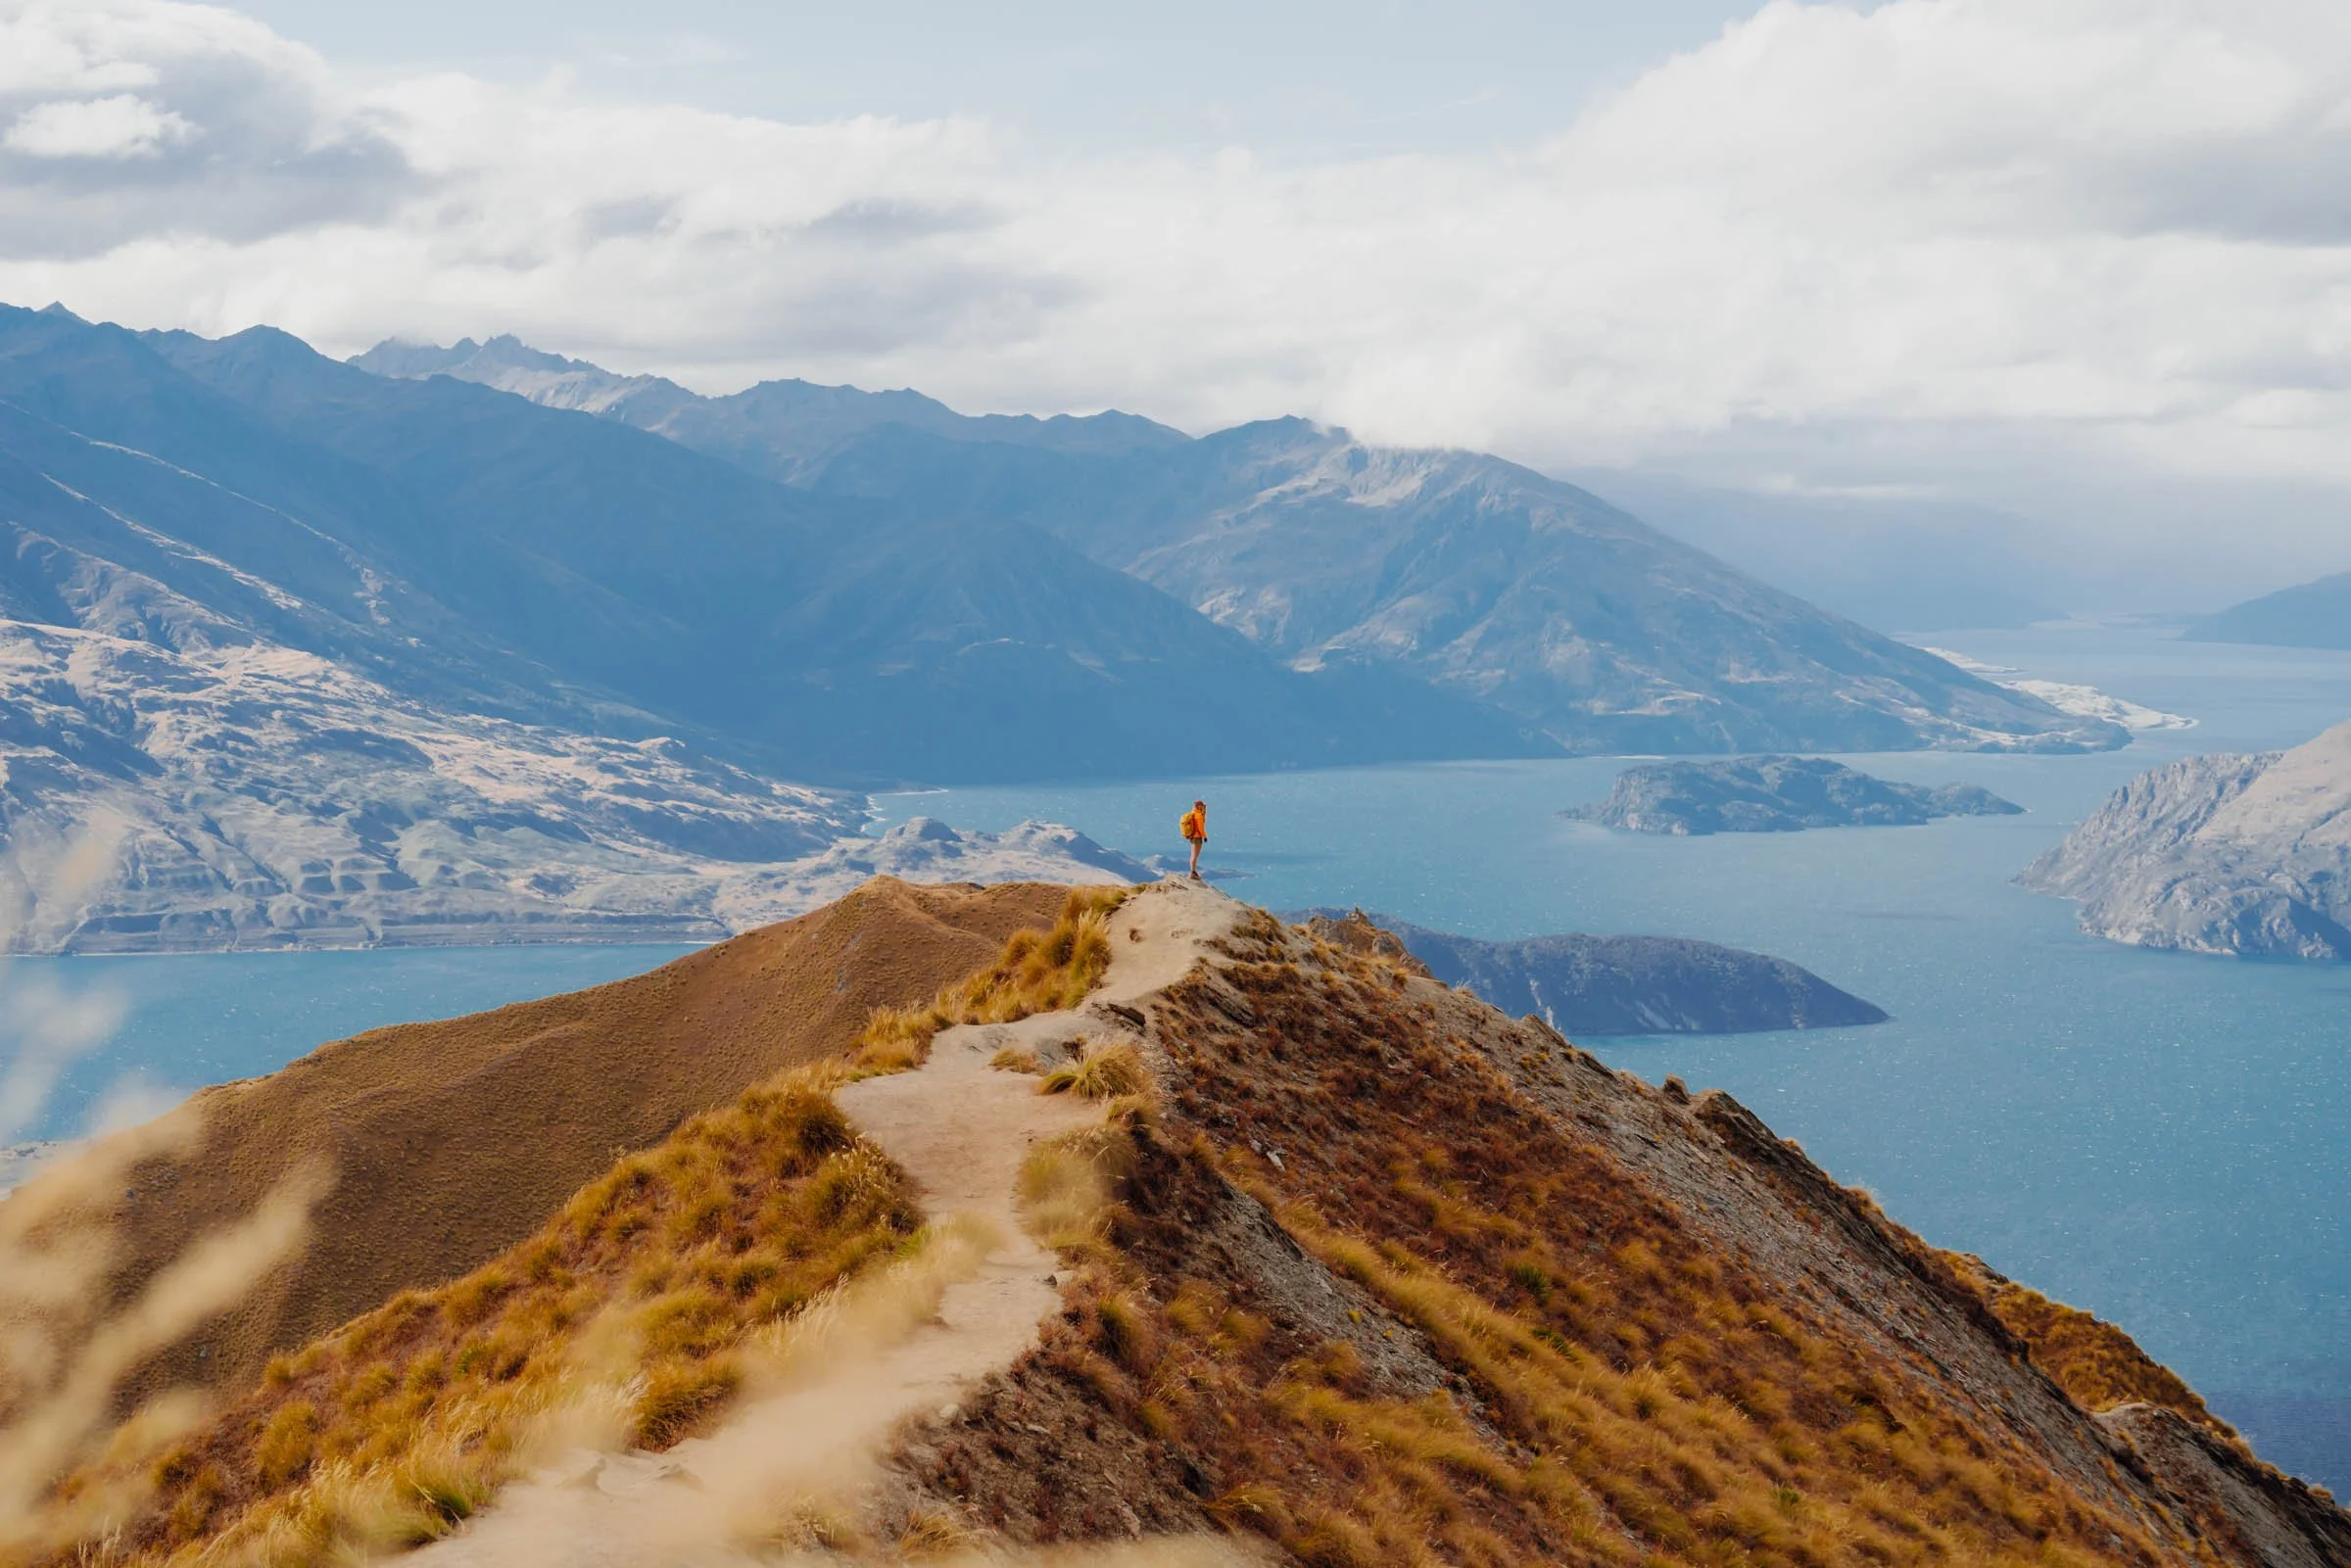
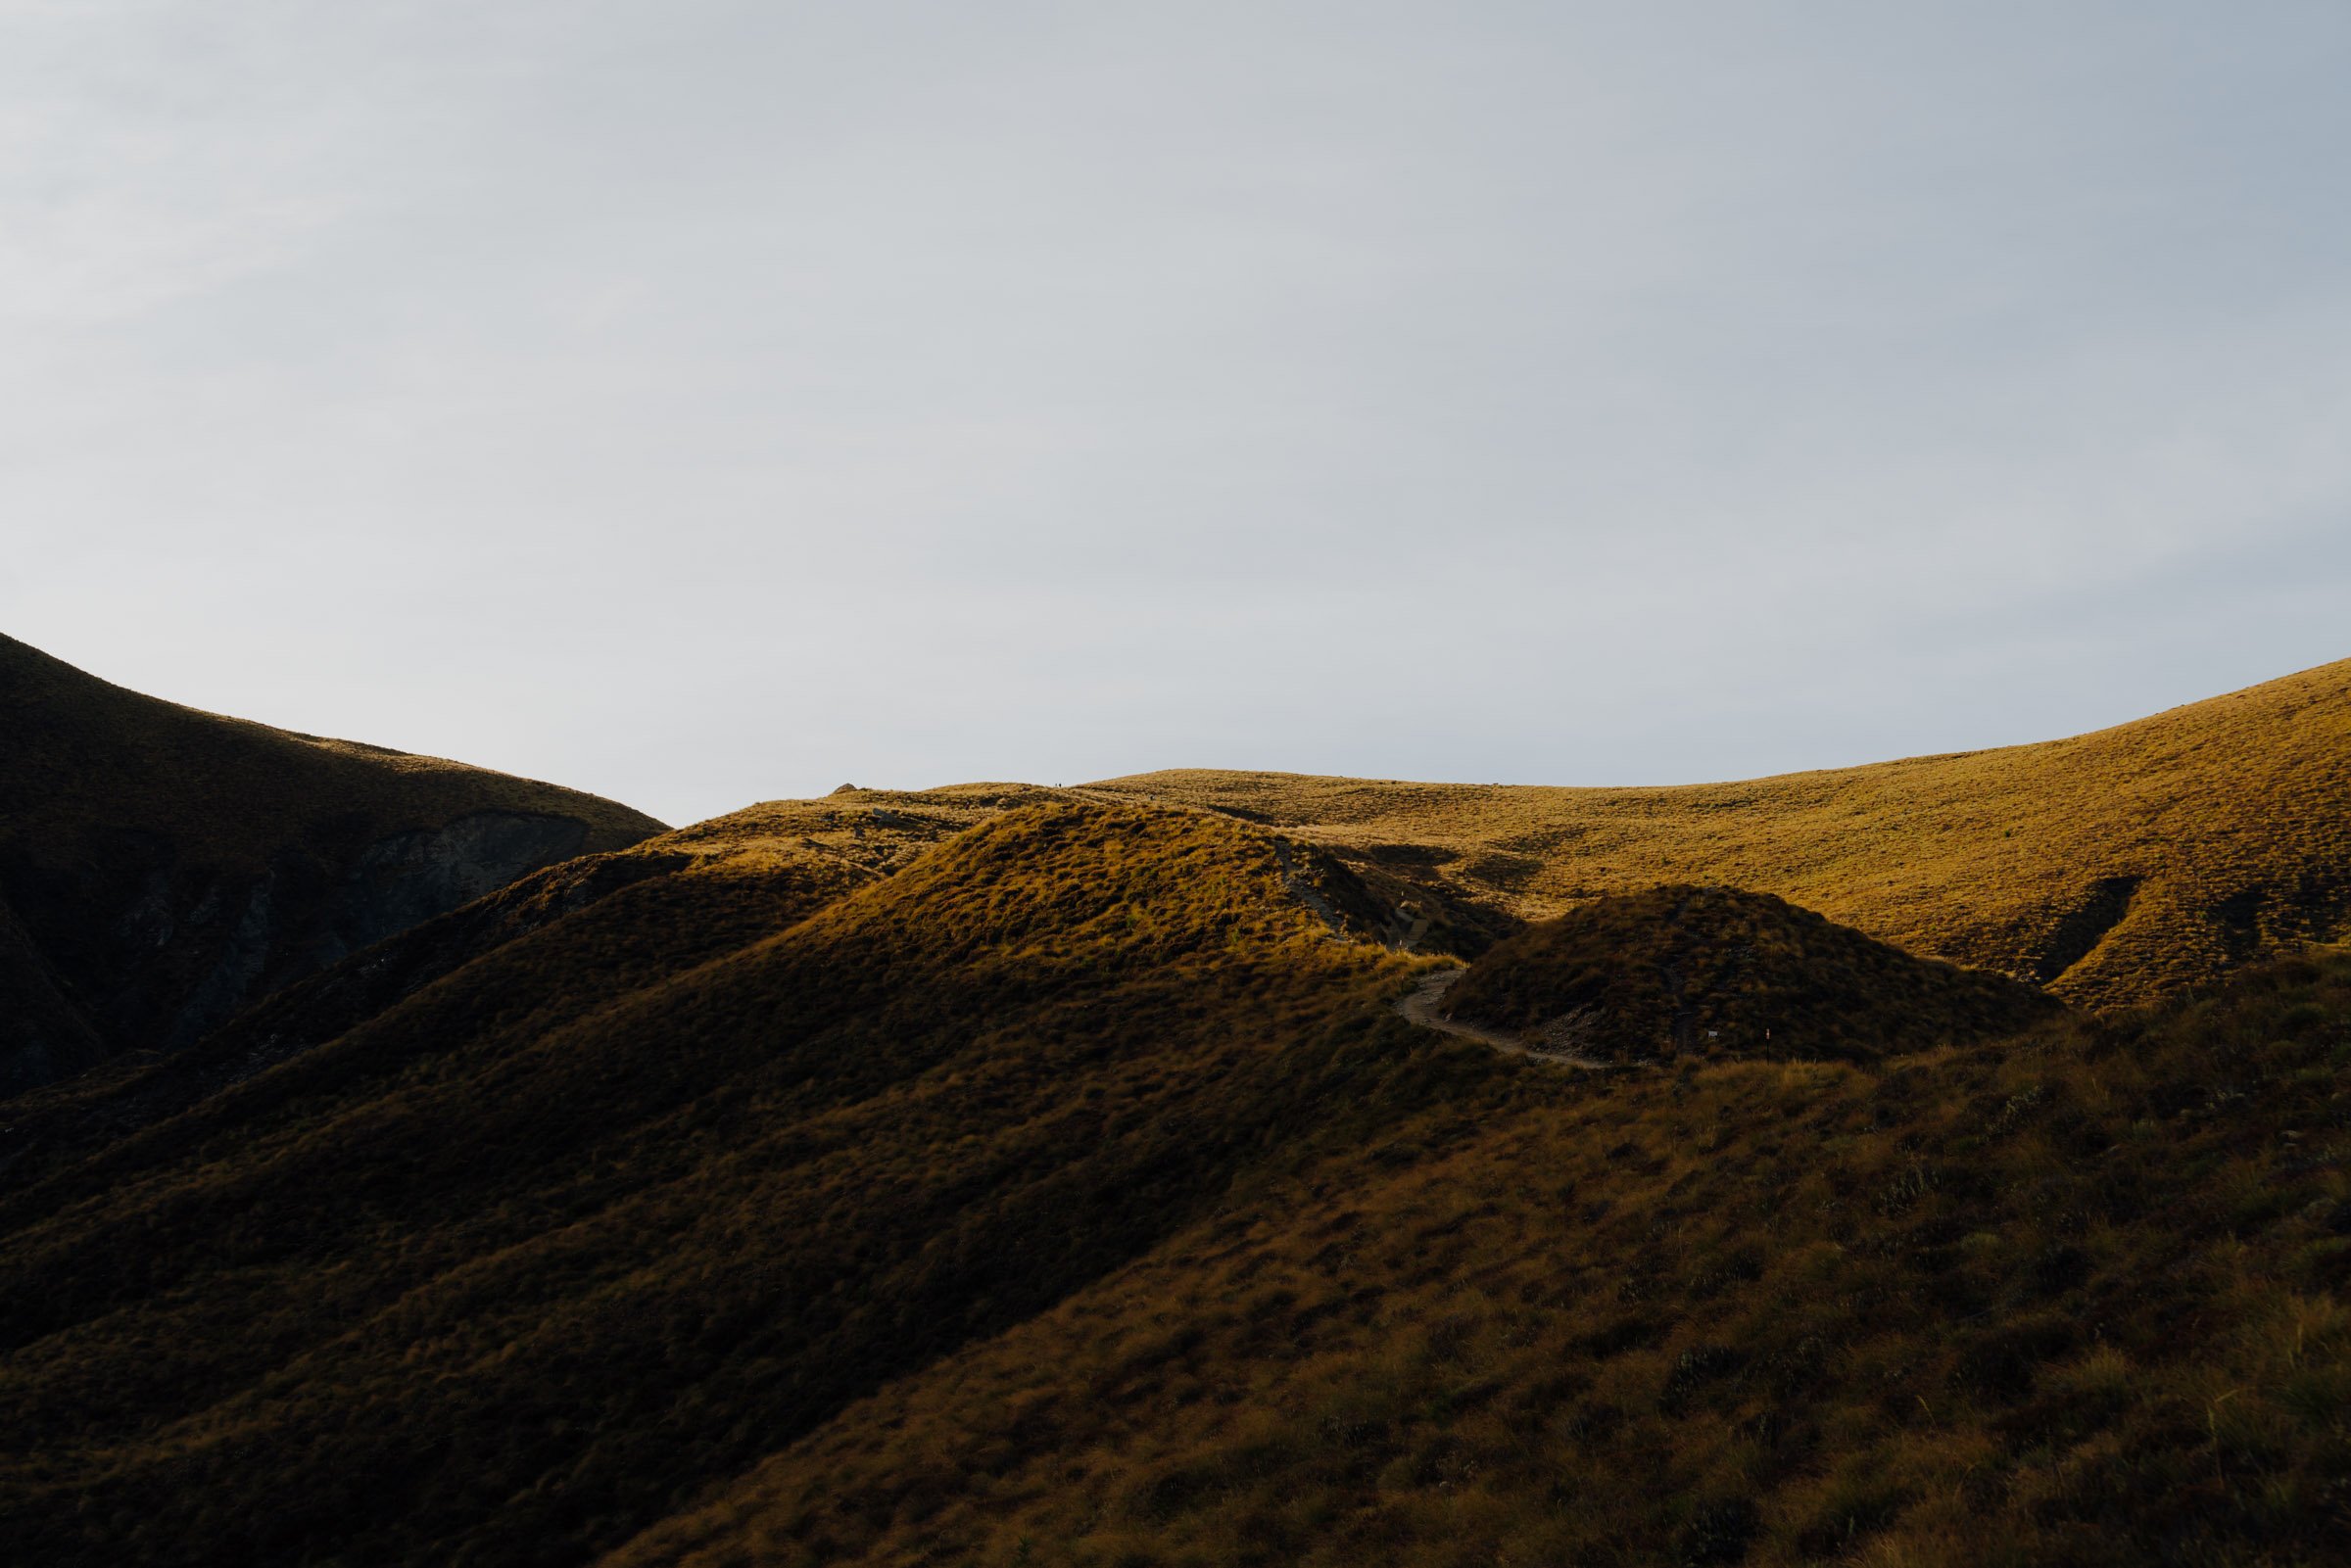
Day 4: Wanaka + Roy’s Peak
Overnight: Wānaka
Wanaka is such a cute little lakeside escape with more of a laid-back vibe than its Queenstown neighbor. Plenty of good shops and restaurants to check out, and we sure did indulge in some fire eats after our hike! Which brings me to my favorite thing to do in town: Roy’s Peak.
Roy’s Peak is 10-miles round-trip with 4,300’ of elevation gain. It’s just eight minutes from the town center and the parking lot fills up fast. We arrived at 11 a.m. on a weekday and there wasn’t a single spot available in the free lot, but jutting up against the fence is a plot of land that charges $5/car for parking–cash only. This is one of the few times it’s good to have cash on hand!


Yeahhh, with 4,300’ of gain in about 5 miles, it’s steep, but just take your time and go slow. The trail is in excellent condition–it almost looks like a 4x4 track in some spots–it’s dirt with a few rocks, some grass, and is super wide. Such a nice surprise from some of the other hikes South Island has to offer!

Drink lots of water and take tons of snack breaks. Every inch of this hike offers an epic view of Lake Wānaka down below, so enjoy it!
If you don’t feel like making it all the way to the tippy top, I honestly don’t think you really need to. There’s a beautiful viewpoint at mile 4 that I personally think is the best photo spot.

Best Time to Go for Photos:
Roy’s Peak pops off at both sunset and sunrise, so choose your poison! It does get windy out there, so check the weather and bring layers.
Where to Stay in Wānaka:
Where we stayed:
Budget: Altamont Lodge
Mid-range: Cardrona Hotel

Day 5: Hooker Valley + Tasman Glacier Overlook
Overnight: Lake Ohau/Lake Tekapu/Twizel
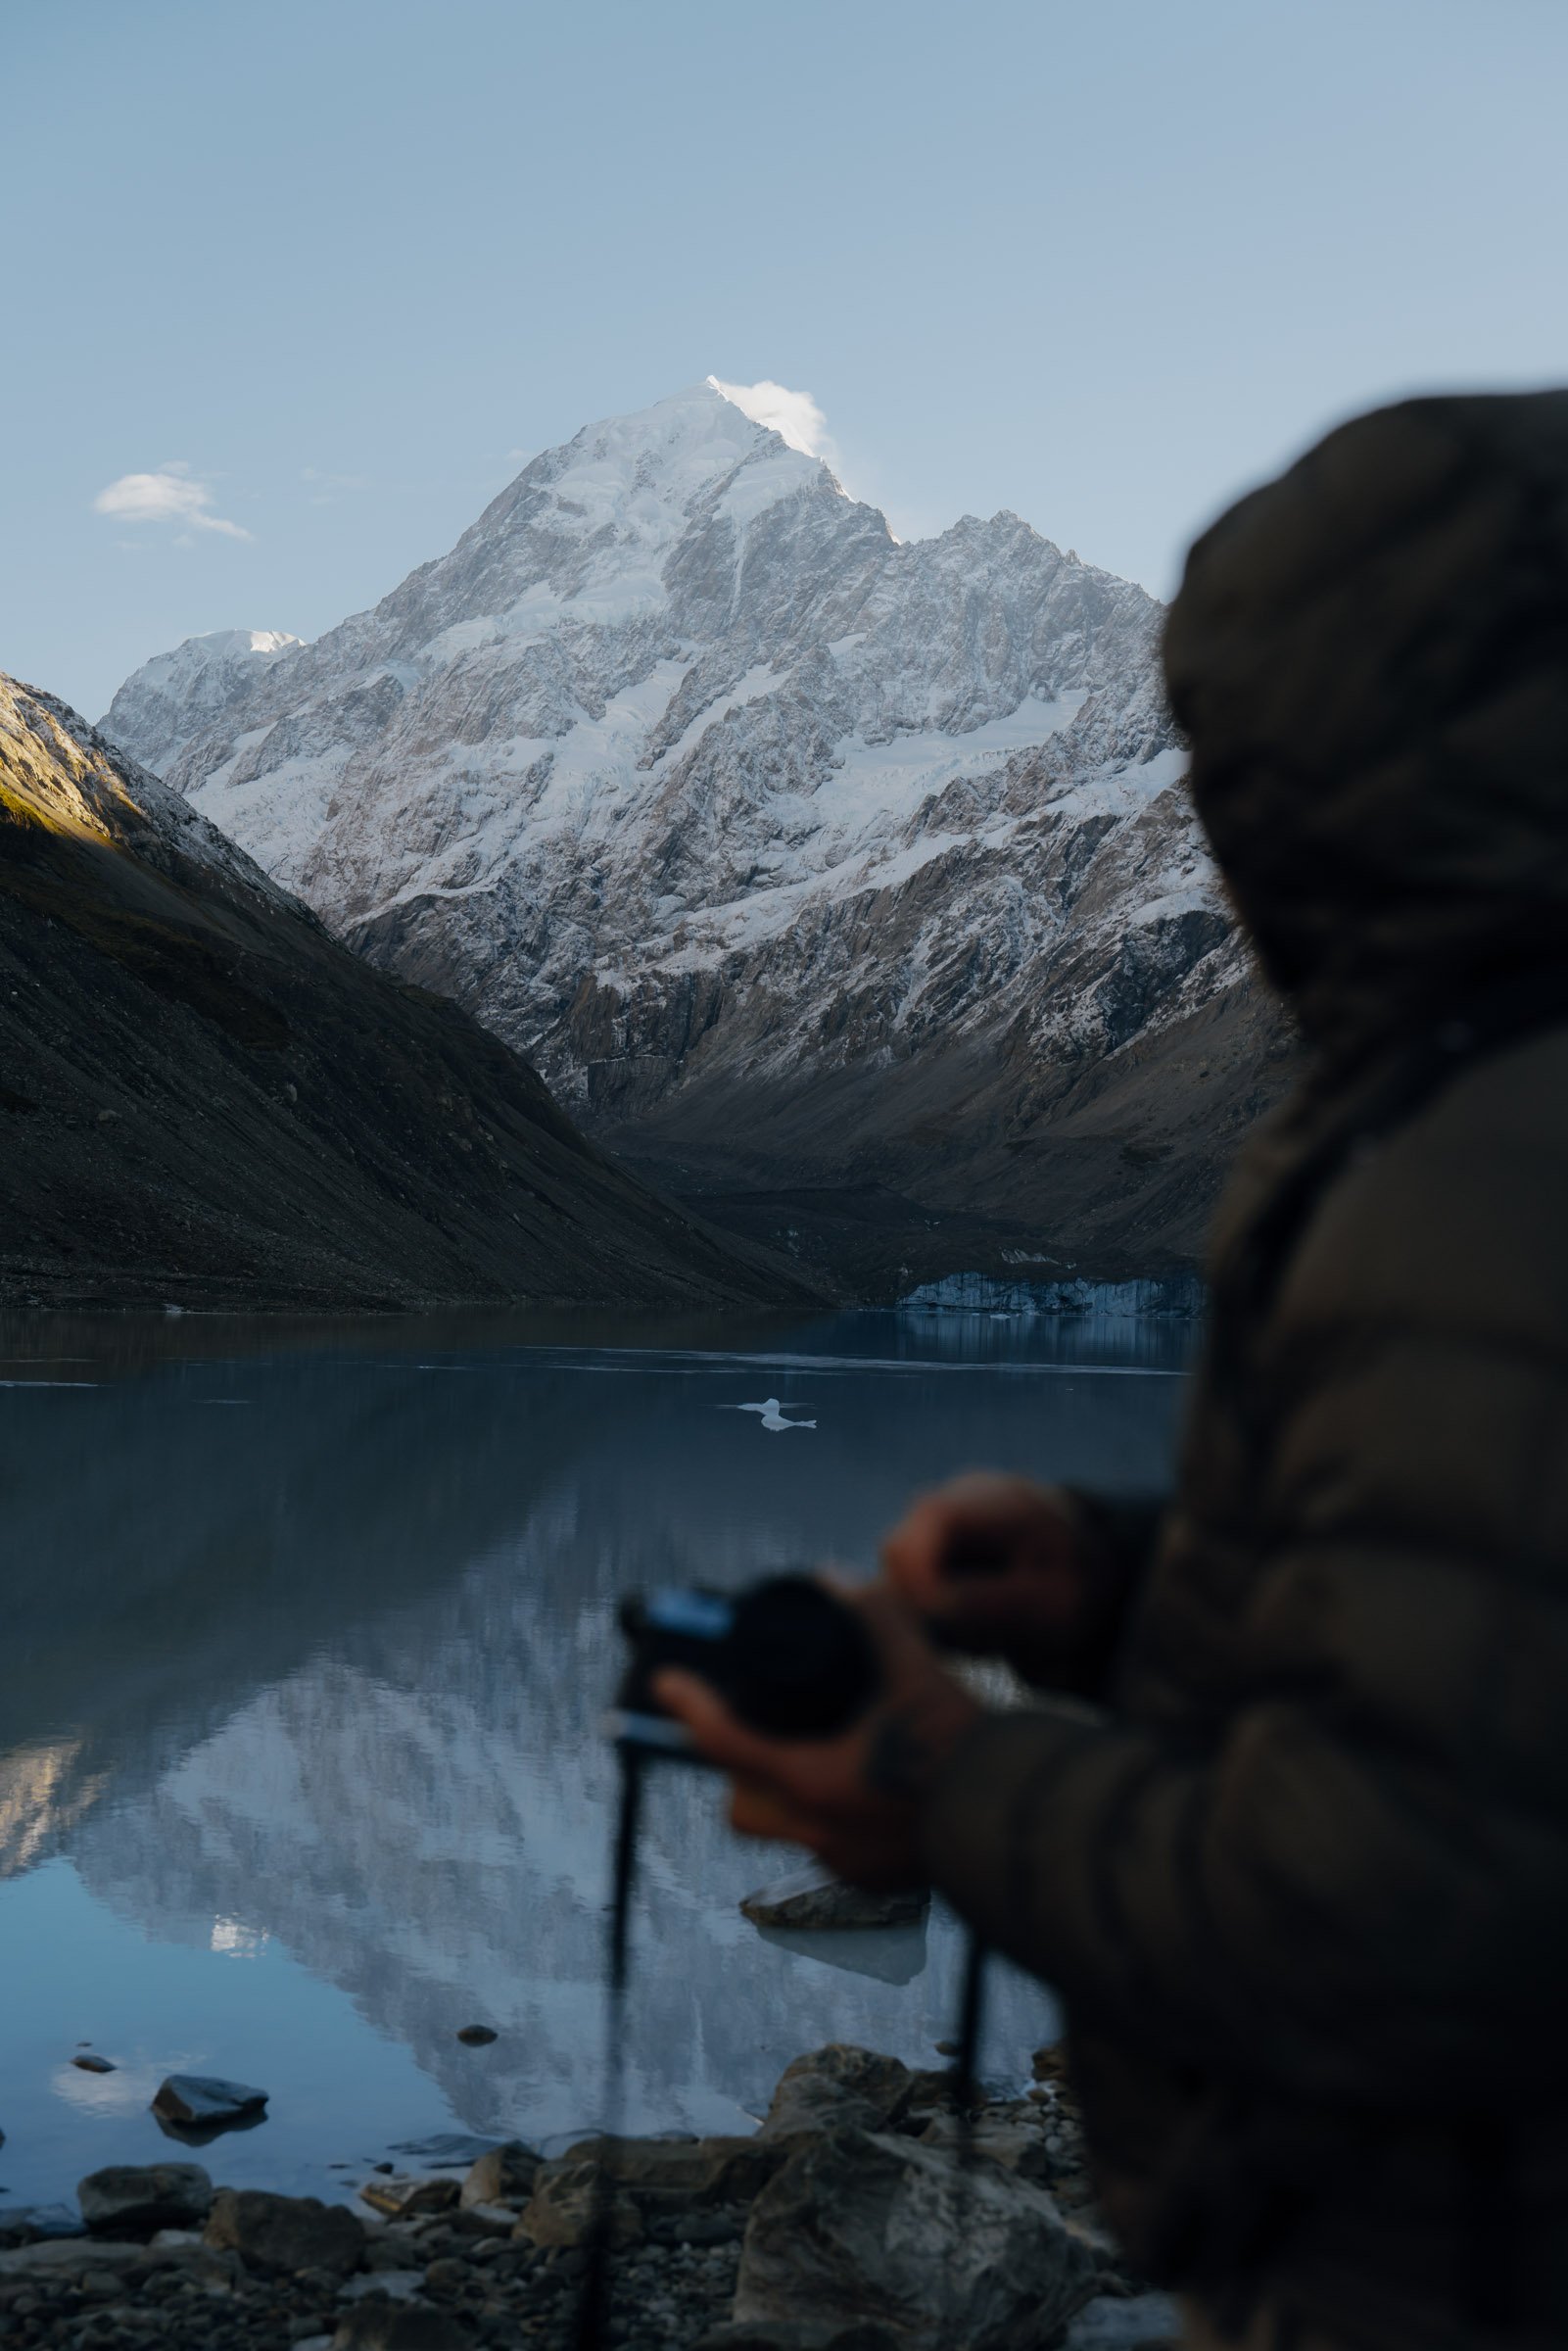
Time for the grand finale. I wasn’t prepared for the beauty, epicness, and grandeur that is Mt. Cook National Park. Photos just don’t do it justice. You’ve gotta stand there, feel the wind and hear the grass swaying with it, watch the fish jump and see the sun set those massive glaciers a bright red/orange glow. You’ve gotta walk the suspension bridges and boardwalks and see the Kea’s to know what I’m talking about. Lace up those boots. Chug some water. Bring tissues for the tears of joy about to happen, cuz this place is insanity.


If nothing else, you MUST do Hooker Valley. All of it. It’s 7 miles, but there’s nearly no elevation. You got this. Better yet, go for sunrise. Trust me. It’s early, and that early wake-up call is totally painful, I know, it never gets easier, but man is it worth it. This trail is popular and for good reason, and having the valley and views all to yourself? Sheeesh. It was worth every painful waking moment to be there, standing under Mt. Cook’s epic peak, surrounded by mountains, as the first light of day hit the glaciers overhead. I may have let out a squeal. Or two. Not sorry.
Grab your headlamp and enjoy VIP parking at the trailhead thanks to your early 6:30 a.m. start ;) Sunrise was at 7:40 a.m. that day in March, and we wanted to arrive at the boardwalk during blue hour to get a few headlamp shots. After a little Google Earthing, we found that particular spot is about 2.2 miles in, so we gave us 20 minutes a mile. It worked out beautifully.


The trail is mostly flat with a few minor gains and losses throughout. Nothing crazy. You’ll pass a few viewpoints along the way (useless in the dark but made a mental note to stop on the way back). There are two impressive suspension bridges pretty early on where you’ll then follow the river up, past a toilet, and onto the boardwalk, where we hung out until sunrise.


The boardwalk eventually turns to dirt/gravel once again–cross the last suspension bridge and take a super short detour to the reflective tarn for an impressive Mt. Cook reflection before continuing onto Hooker Lake. We found a few icebergs floating nearby, broken off from the glacier at the far end of the lake, Mt. Cook sitting majestically up above.


Then we heard it. The squalking… KEA’S! These large protected parrots are native to New Zealand’s mountains and forests and are truly a sight! We were lucky to find a few just chillin on a rock, practically posing for us. Straight magic.


Spend time meandering, take it all in, breath in the fresh mountain air, and touch the glacial water before heading back out. As soon as it hit 9 a.m., the trail got busy, and fast. It was so crazy to me how just a couple of hours earlier, we were one of maybe 5 people on the entire trail. It was so peaceful!

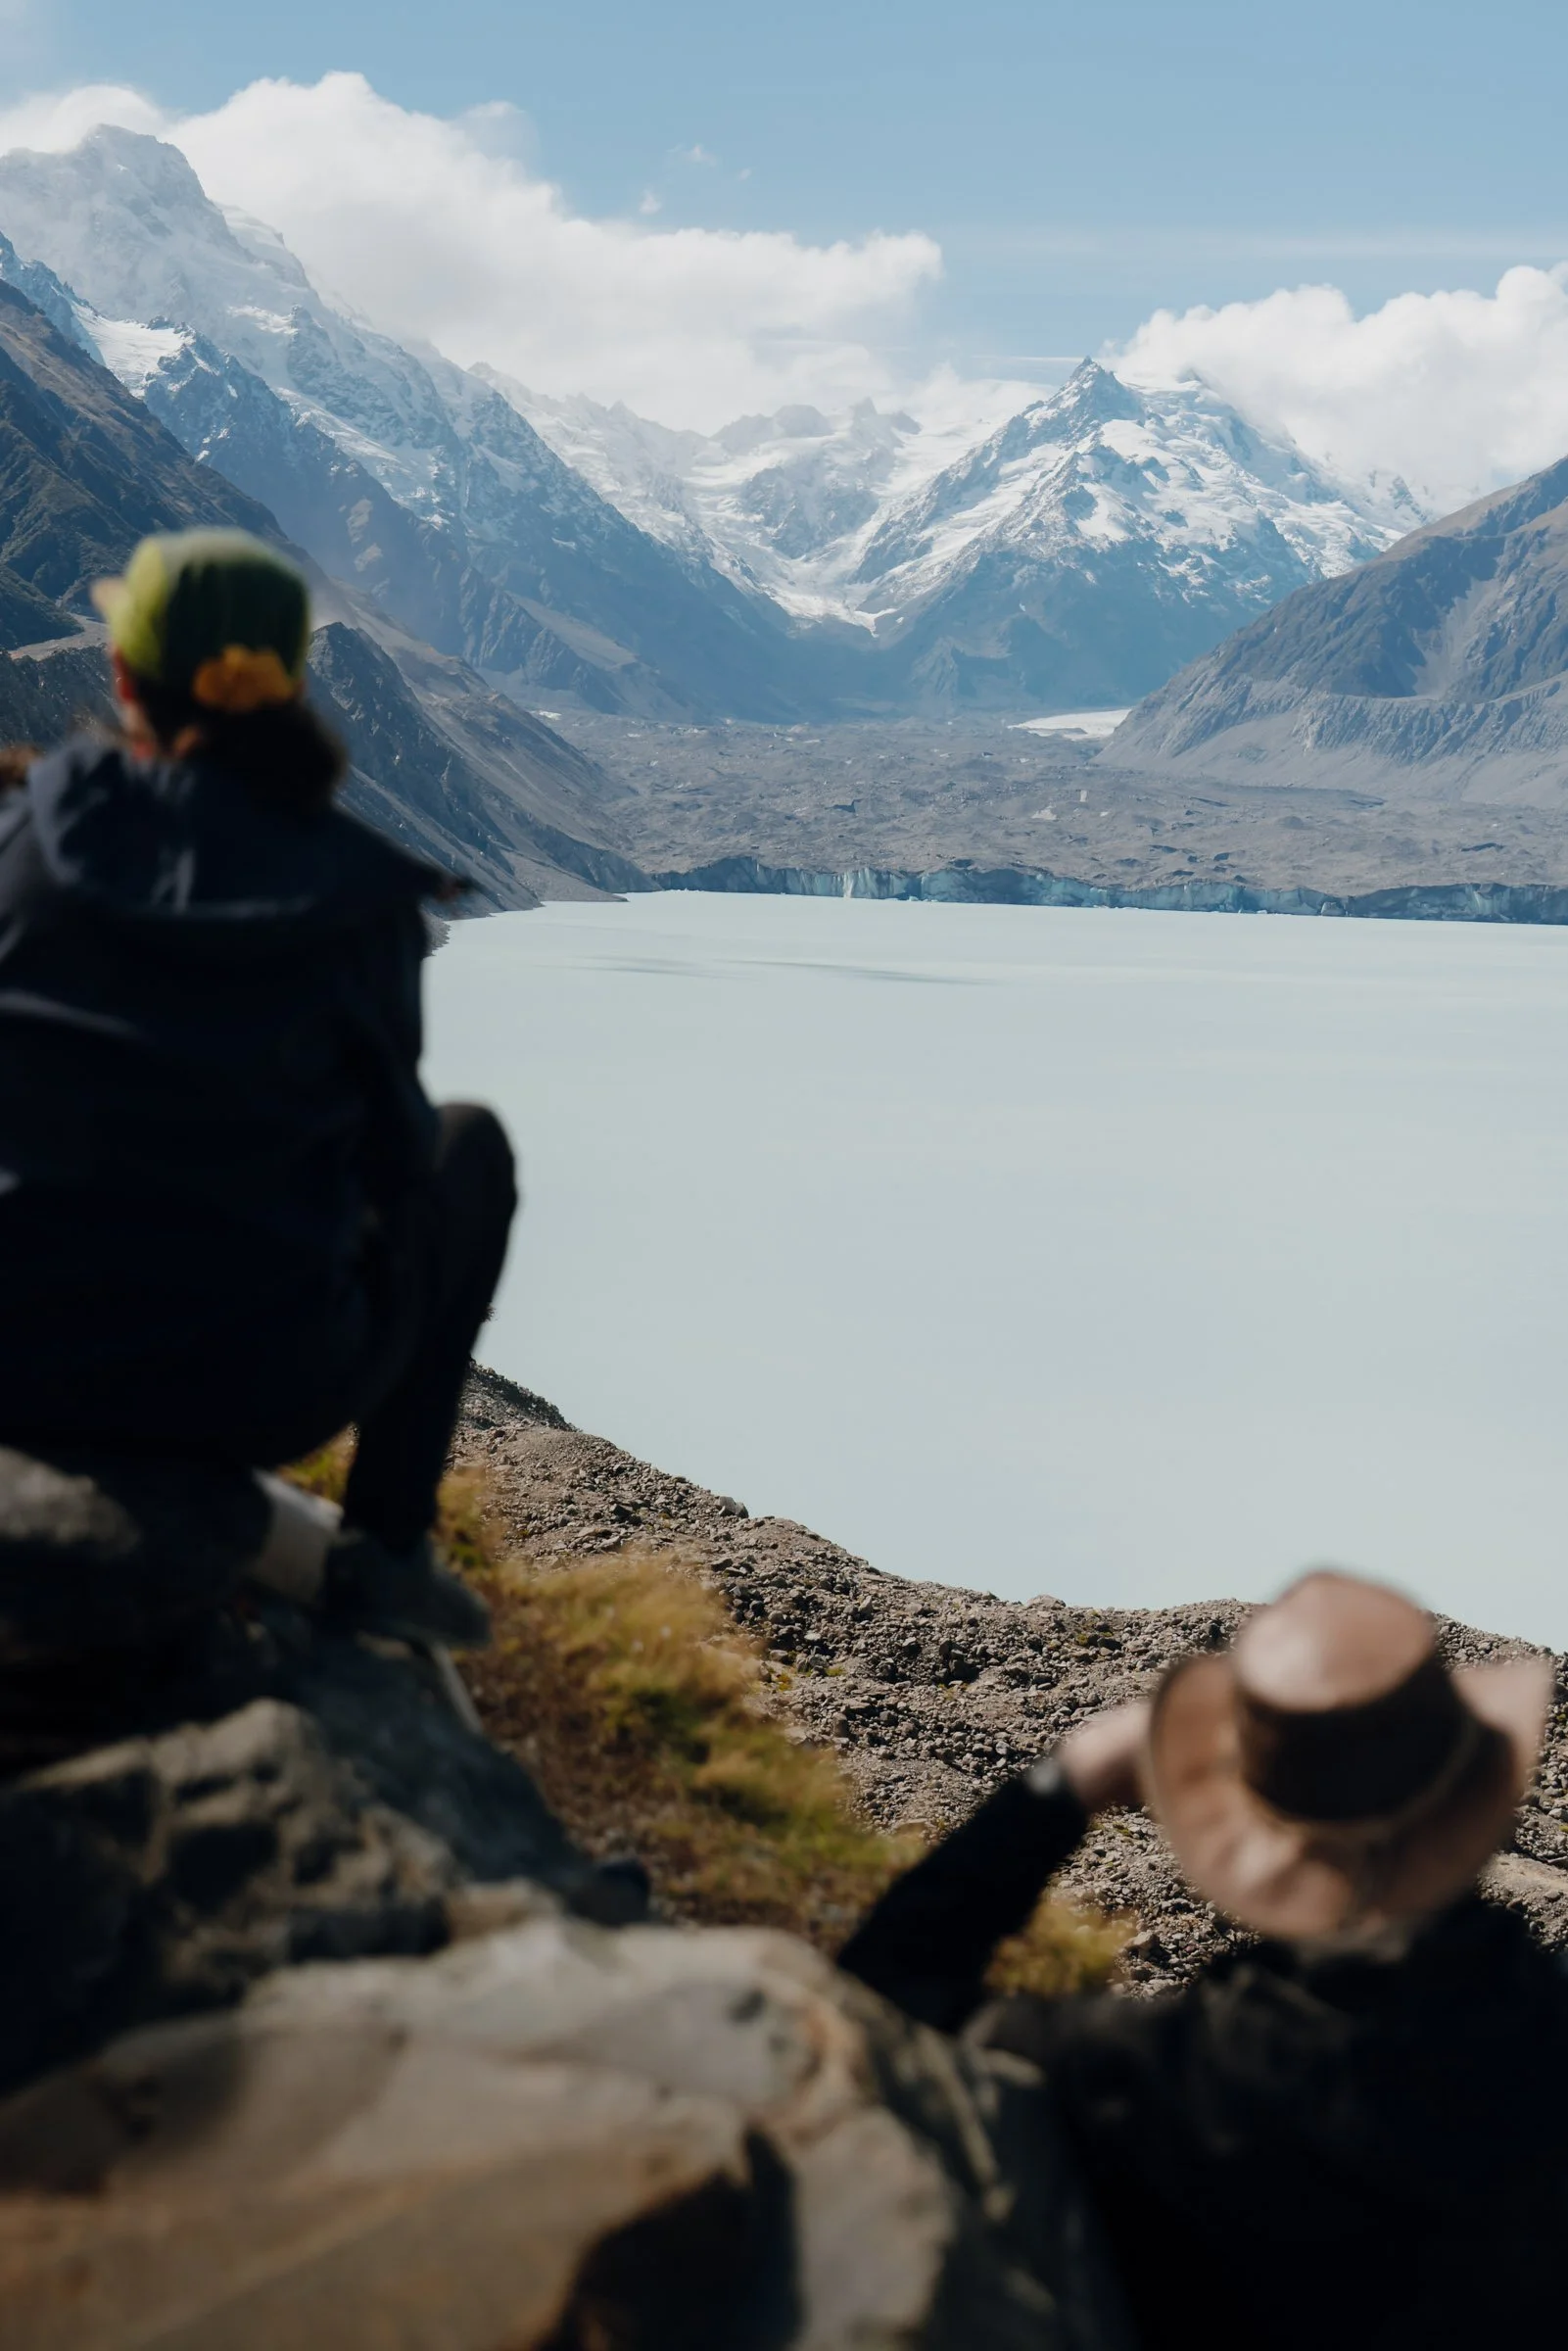
Tasman Glacier
The Tasman Glacier Viewpoint is an easy stop on your way out. As you pass Mount Cook Village heading South, take a left on Tasman Valley Rd and drive the 4.5 miles to the Tasman Glacier Viewpoint parking lot. It’s a short 0.4 miles to the overlook, but it’s nearly all stairs, whichhhh I wasn’t expecting, ha! Just go slow. The view is worth it!
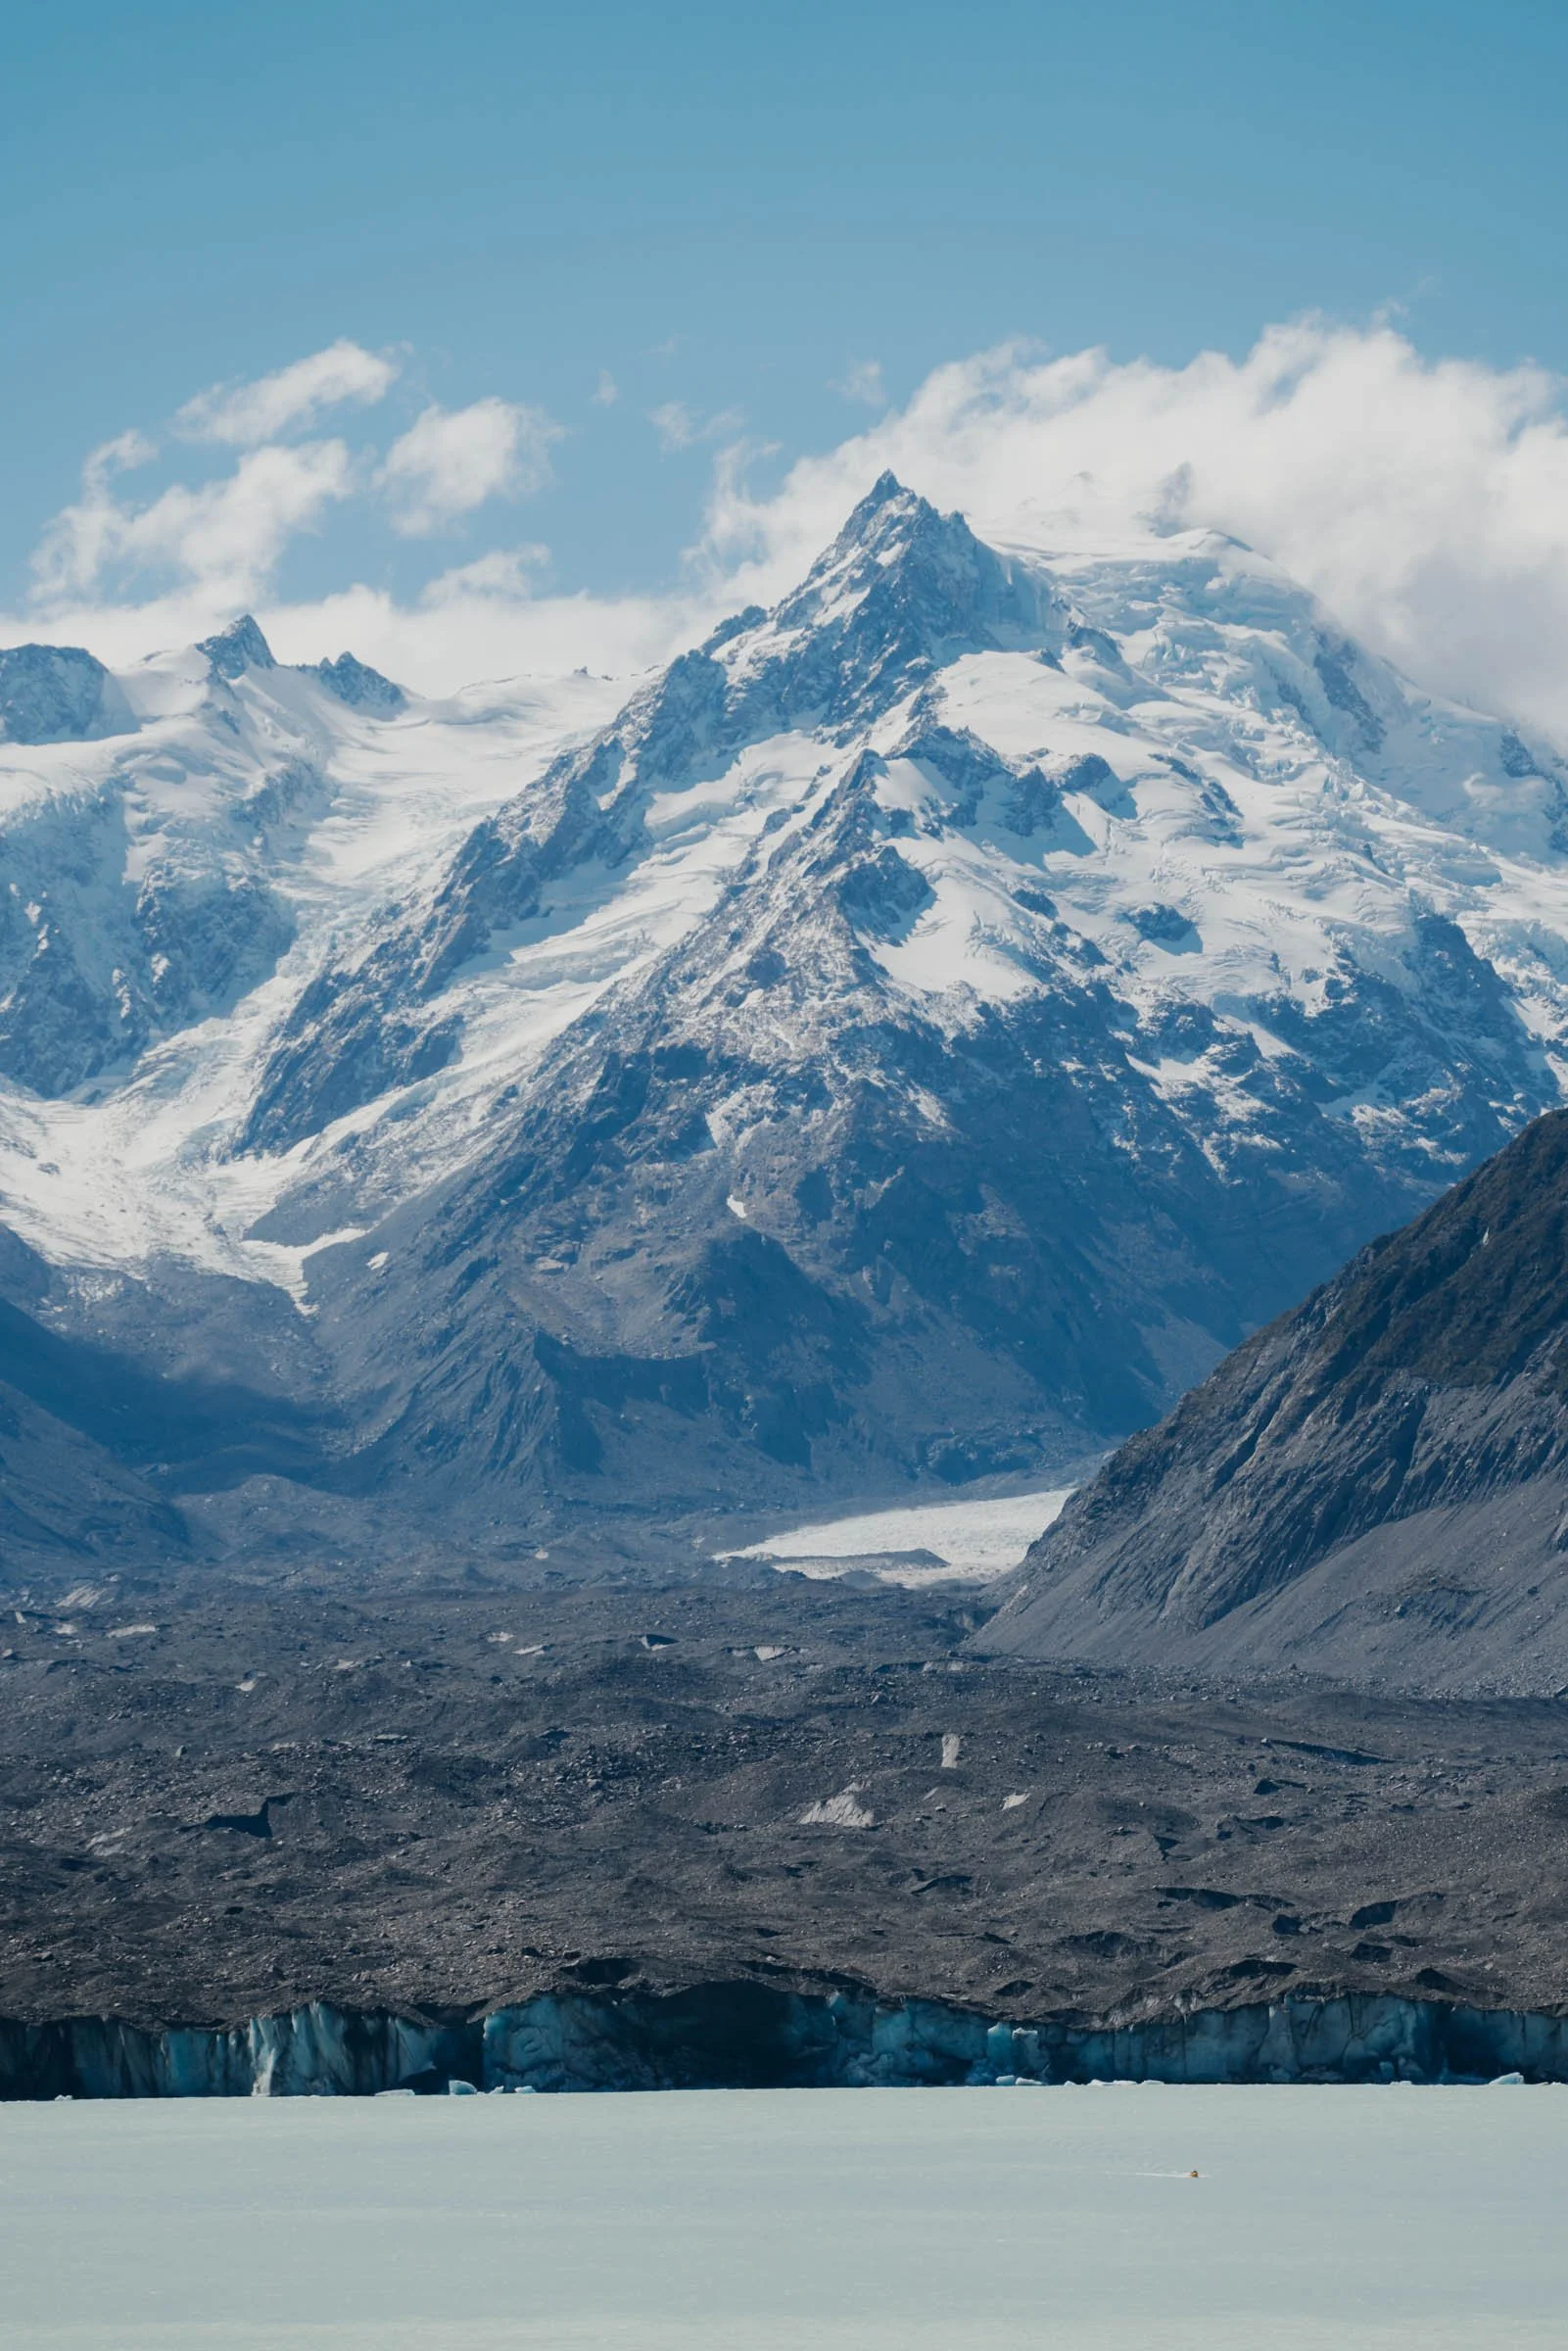

If you feel like getting up close and personal with this ancient ice, consider booking a boat, helicopter, or plane tour! There are a TON to choose from, so I’ll leave a link to a bunch of options here.
If I were to choose one, it’d be between these:
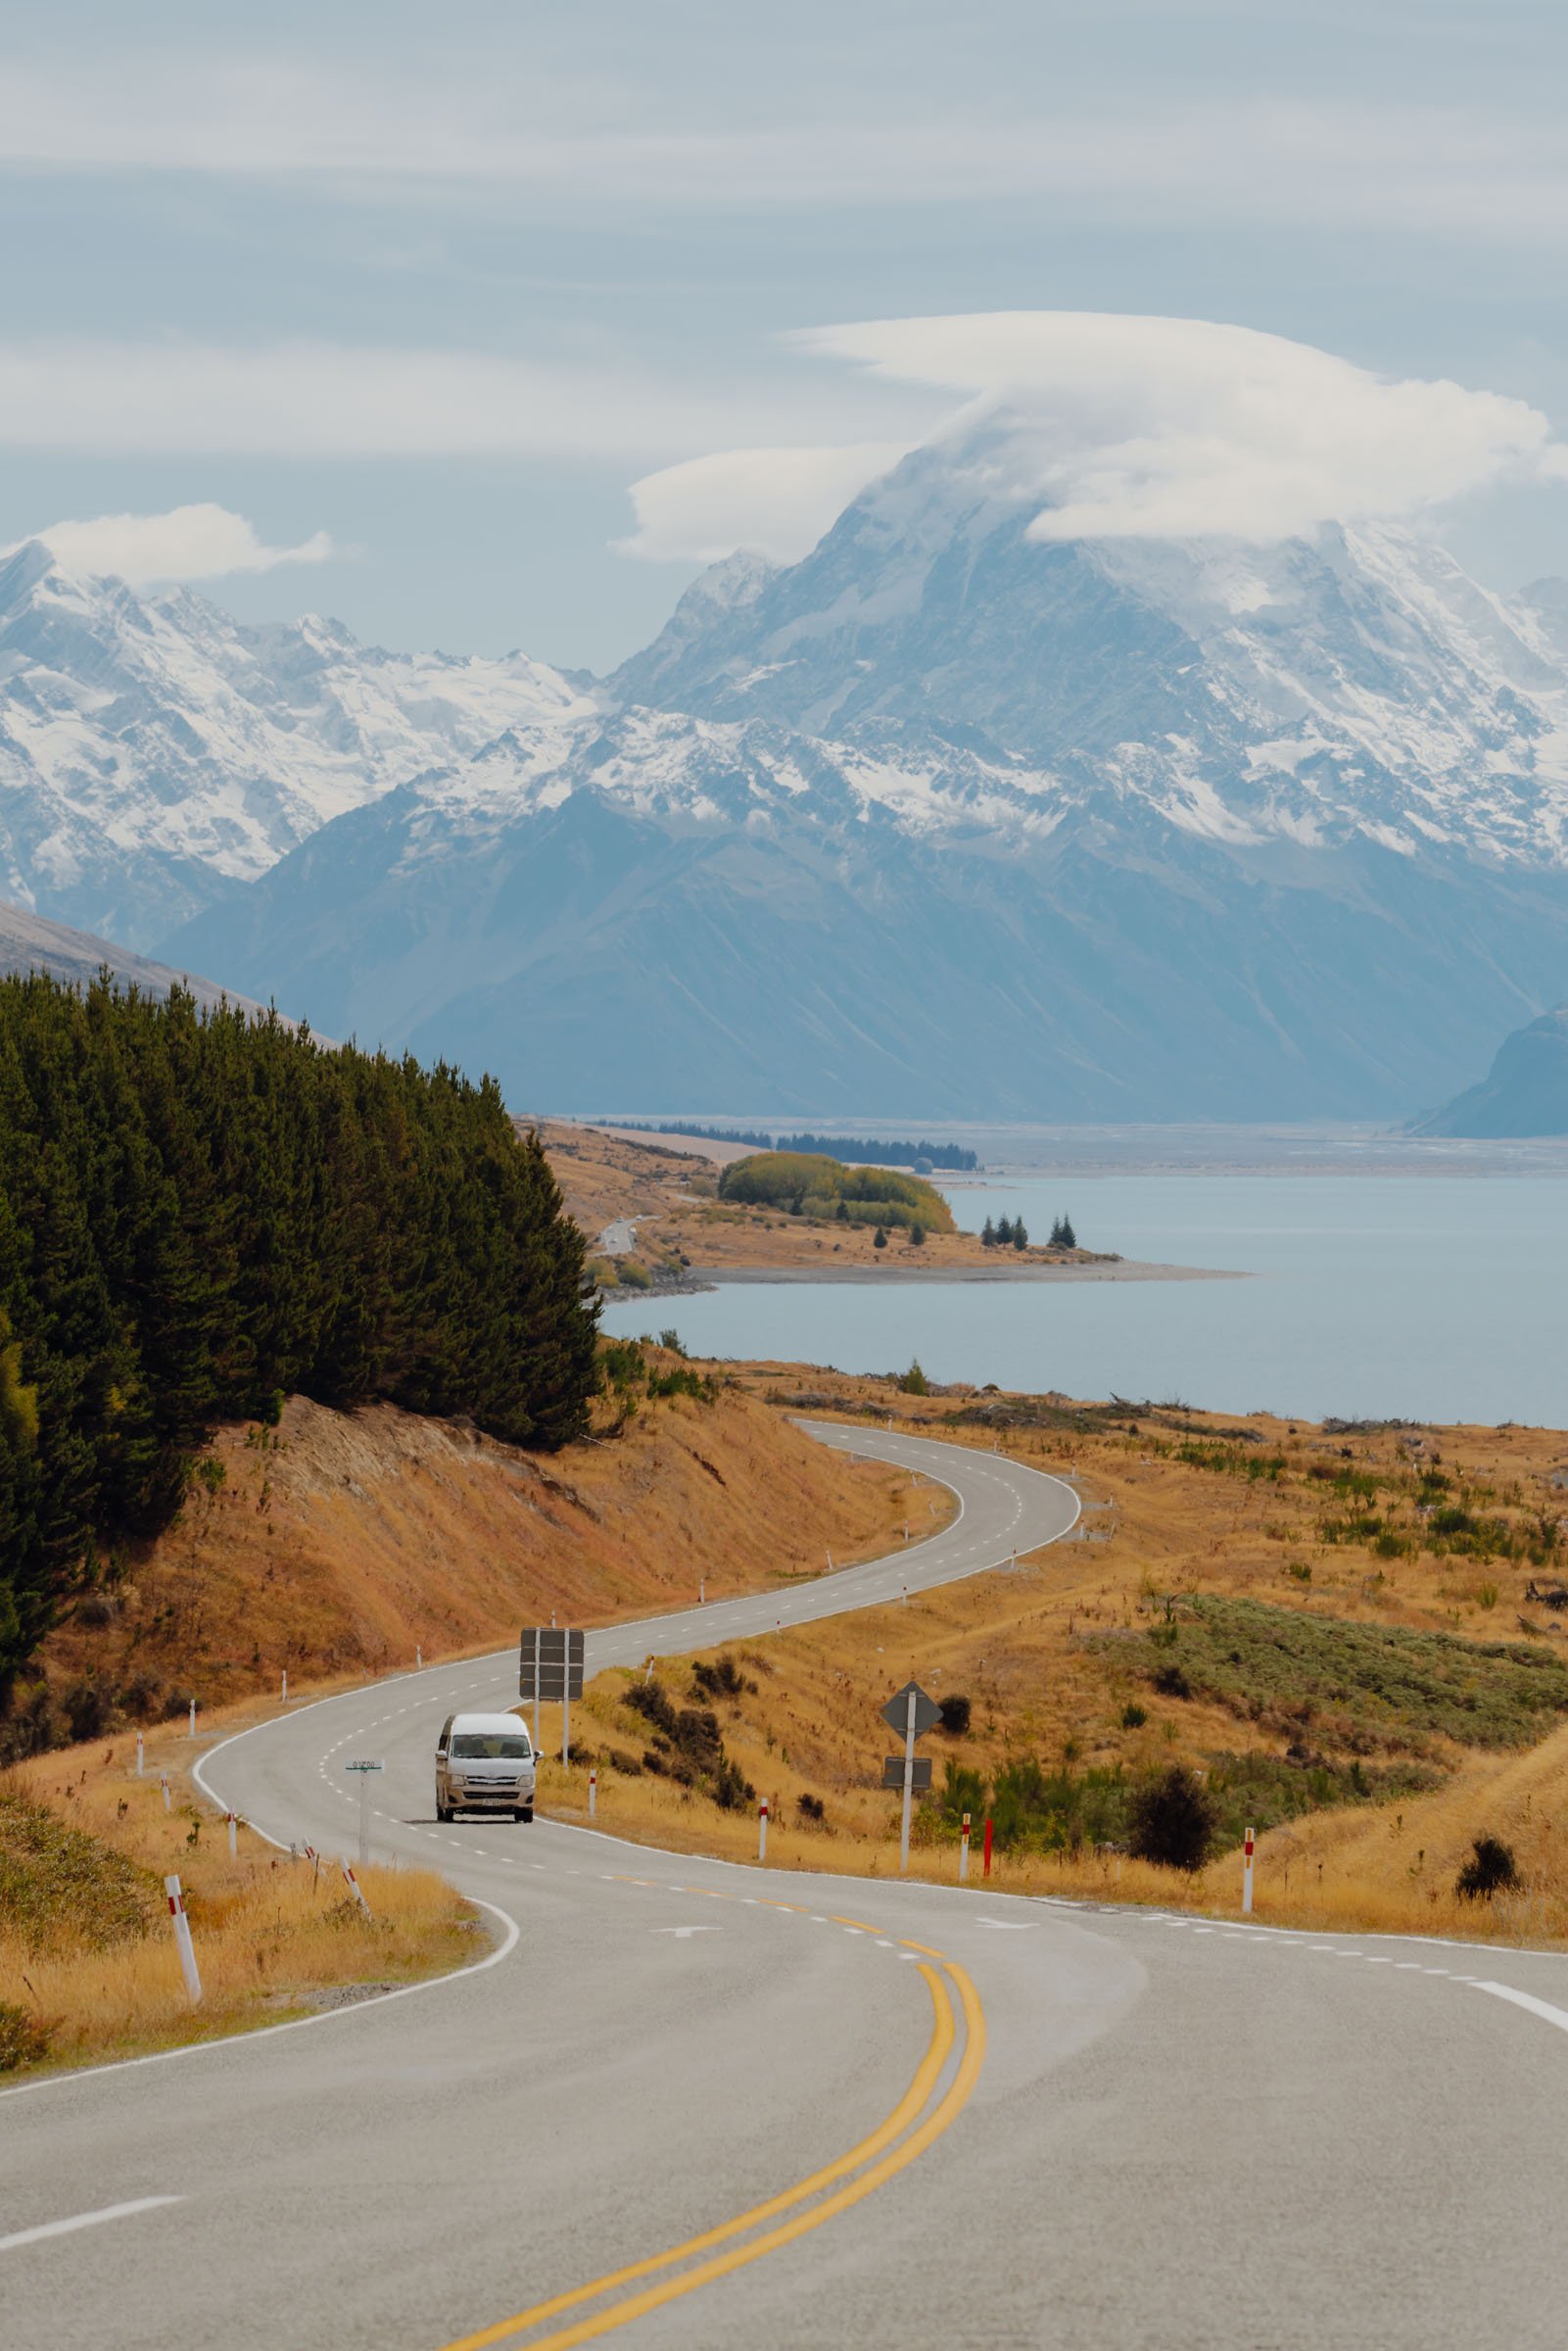
On your way back out, don’t forget to stop at Peter’s Lookout for that legendary view of Mount Cook, Lake Pukaki, and a winding road! It’s a stunner!
Where to Stay in the Mount Cook Village:
Budget: YHA Aoraki Mt Cook
Mid-range: Aoraki Court Aoraki/Mt Cook Village
Luxury: Hermitage Hotel
We decided to stay outside of the Mount Cook Village to save a little money.
Where we stayed: Lake Ohau Log Cabin
Where to Stay in Lake tekapo:
Budget: Tailor Made Tekapo Accommodation
Mid-range: The Chalet Boutique Motel
Luxury: Grand Suites Lake Tekapo
Day 6: Drive to the Airport.
This day always sneaks up on ya! Don’t forget to enjoy every little fleeting second of your trip, breathe in the fresh air, smell the flowers, swim in the lakes, and take all the photos. You’ll want to remember this trip forever.

Leave No Trace
Always remember to leave no trace–pack out what you pack in, leave what you find, prepare for every adventure, and respect the outdoors and each other every step of the way. Learn more about how to leave no trace here.
And if you do decide to venture out, drop a comment below or shoot me an email to tell me how it went!
Happy adventuring!